Spark NLP 101: LightPipeline
A Pipeline is specified as a sequence of stages, and each stage is either a Transformer or an Estimator. These stages are run in order, and the input DataFrame is transformed as it passes through each stage. Now let’s see how this can be done in Spark NLP using Annotators and Transformers.
By Veysel Kocaman, Data Scientist & ML Researcher
This is the second article in a series in which we are going to write a separate article for each annotator in the Spark NLP library. You can find all the articles at this link.
This article is mainly built on top of Introduction to Spark NLP: Foundations and Basic Components (Part-I). Please read that at first, if you want to learn more about Spark NLP and its underlying concepts.
In machine learning, it is common to run a sequence of algorithms to process and learn from data. This sequence is usually called a Pipeline.
A Pipeline is specified as a sequence of stages, and each stage is either a Transformer or an Estimator. These stages are run in order, and the input DataFrame is transformed as it passes through each stage. That is, the data are passed through the fitted pipeline in order. Each stage’s transform() method updates the dataset and passes it to the next stage. With the help of Pipelines, we can ensure that training and test data go through identical feature processing steps.

Now let’s see how this can be done in Spark NLP using Annotators and Transformers. Assume that we have the following steps that need to be applied one by one on a data frame.
- Split text into sentences
- Tokenize
- Normalize
- Get word embeddings
And here is how we code this pipeline up in Spark NLP.
from pyspark.ml import Pipelinedocument_assembler = DocumentAssembler()\
 .setInputCol(“text”)\
 .setOutputCol(“document”)

sentenceDetector = SentenceDetector()\
 .setInputCols([“document”])\
 .setOutputCol(“sentences”)

tokenizer = Tokenizer() \
 .setInputCols([“sentences”]) \
 .setOutputCol(“token”)

normalizer = Normalizer()\
 .setInputCols([“token”])\
 .setOutputCol(“normal”)

word_embeddings=WordEmbeddingsModel.pretrained()\
 .setInputCols([“document”,”normal”])\
 .setOutputCol(“embeddings”)

nlpPipeline = Pipeline(stages=[
 document_assembler,
 sentenceDetector,
 tokenizer,
 normalizer,
 word_embeddings,
 ])

pipelineModel = nlpPipeline.fit(df)
I am going to load a dataset and then feed it into this pipeline to let you see how it works.
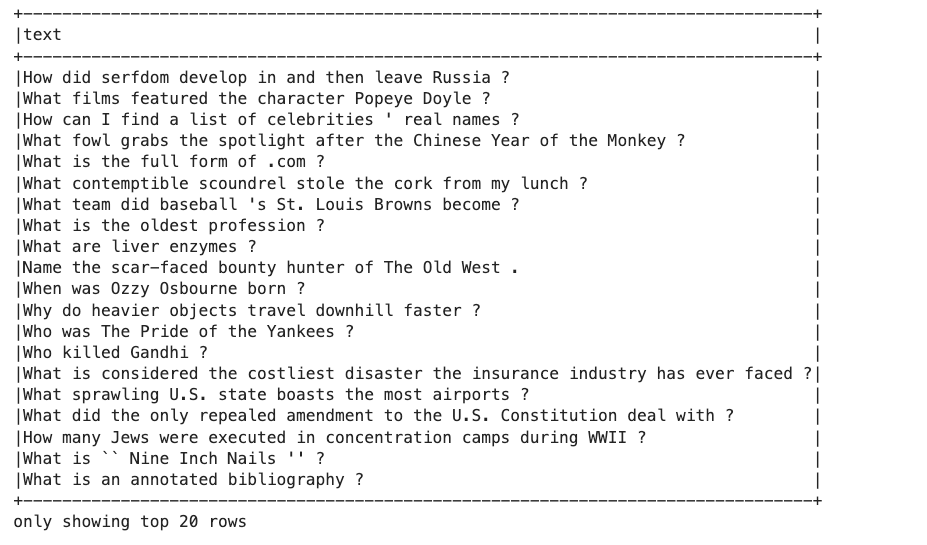
After running the pipeline above, we get a trained pipeline model. Let's transform the entire DataFrame.
result = pipelineModel.transform(df)
result.show()
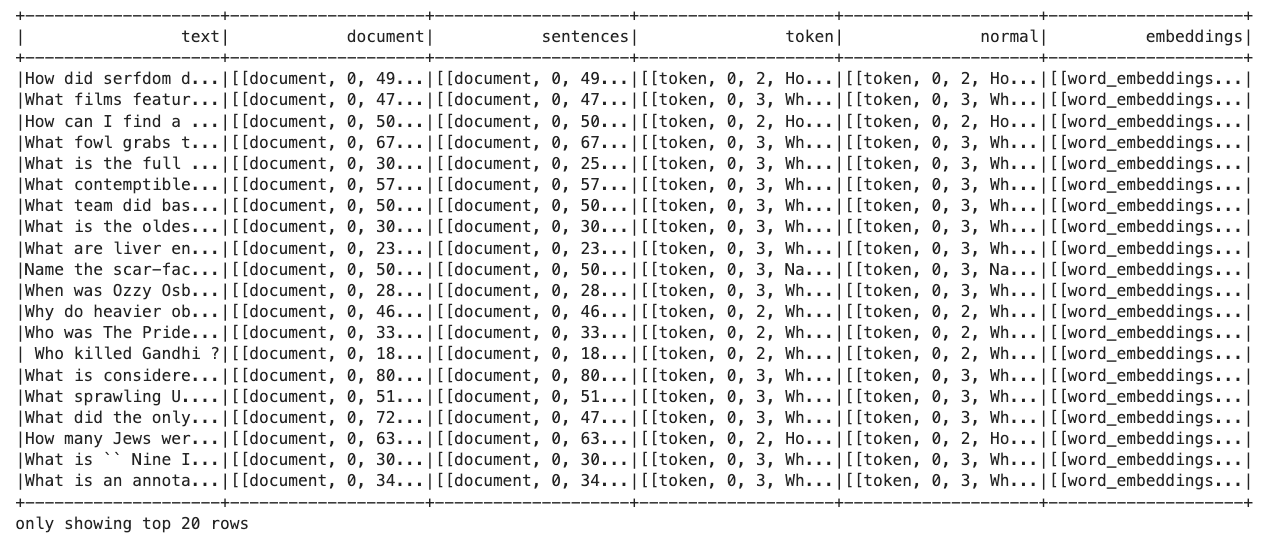
It took 501 ms to transform the first 20 rows. If we transform the entire data frame, it would take 11 seconds.
%%time

result = pipelineModel.transform(df).collect()

>>>
CPU times: user 2.01 s, sys: 425 ms, total: 2.43 s
Wall time: 11 s
It looks good. What if we want to save this pipeline to disk and then deploy it to get runtime transformations on a given line of text (one row).
from pyspark.sql import Row

text = "How did serfdom develop in and then leave Russia ?"

line_df = spark.createDataFrame(list(map(lambda x: Row(text=x), [text])), ["text"])

%time result = pipelineModel.transform(line_df).collect()

>>>
CPU times: user 31.1 ms, sys: 7.73 ms, total: 38.9 ms
Wall time: 515 ms
Transforming a single line of a short text took 515 ms! Nearly the same as it took for transforming the first 20 rows. So, it's not good. Actually, this is what happens when trying to use distributed processing on small data. Distributed processing and cluster computing are mainly useful for processing a large amount of data (aka big data). Using Spark for small data would be like getting in a fight with an ax:-)
Actually, due to its inner mechanism and optimized architecture, Spark could still be useful for the average size of data that could be handled on a single machine. But when it comes to processing just a few lines of text, it's not recommended unless you use Spark NLP.
Let us make an analogy to help you understand this. Spark is like a locomotive racing a bicycle. The bike will win if the load is light, it is quicker to accelerate and more agile, but with a heavy load the locomotive might take a while to get up to speed, but it’s going to be faster in the end.
So, what are we going to do if we want to have a faster inference time? Here comes LightPipeline.
LightPipeline
LightPipelines are Spark NLP specific Pipelines, equivalent to Spark ML Pipeline, but meant to deal with smaller amounts of data. They’re useful working with small datasets, debugging results, or when running either training or prediction from an API that serves one-off requests.
Spark NLP LightPipelines are Spark ML pipelines converted into a single machine but the multi-threaded task, becoming more than 10x times faster for smaller amounts of data (small is relative, but 50k sentences are roughly a good maximum). To use them, we simply plug in a trained (fitted) pipeline and then annotate a plain text. We don't even need to convert the input text to DataFrame in order to feed it into a pipeline that's accepting DataFrame as an input in the first place. This feature would be quite useful when it comes to getting a prediction for a few lines of text from a trained ML model.
from sparknlp.base import LightPipeline

LightPipeline(someTrainedPipeline).annotate(someStringOrArray)
Here are the available methods in LightPipeline. As you can see, we can also use a list of strings as input text.

LightPipelines are easy to create and also save you from dealing with Spark Datasets. They are also very fast and, while working only on the driver node, they execute parallel computation. Let’s see how it applies to our case described above:
from sparknlp.base import LightPipeline

lightModel = LightPipeline(pipelineModel, parse_embeddings=True)

%time lightModel.annotate("How did serfdom develop in and then leave Russia ?")

>>>
CPU times: user 12.4 ms, sys: 3.81 ms, total: 16.3 ms
Wall time: 28.3 ms{'sentences': ['How did serfdom develop in and then leave Russia ?'],
 'document': ['How did serfdom develop in and then leave Russia ?'],
 'normal': ['How',
  'did',
  'serfdom',
  'develop',
  'in',
  'and',
  'then',
  'leave',
  'Russia'],
 'token': ['How',
  'did',
  'serfdom',
  'develop',
  'in',
  'and',
  'then',
  'leave',
  'Russia',
  '?'],
 'embeddings': ['-0.23769 0.59392 0.58697 -0.041788 -0.86803 -0.0051122 -0.4493 -0.027985, ...]}
Now it takes 28 ms! Nearly 20x faster than using Spark ML Pipeline.
As you see, annotate return only the result attributes. Since the embedding array is stored under embeddings attribute of WordEmbeddingsModel annotator, we set parse_embeddings=True to parse the embedding array. Otherwise, we could only get the tokens attribute from embeddings in the output. For more information about the attributes mentioned, see here.
If we want to retrieve fully information of annotations, we can also use fullAnnotate() to return a dictionary list of entire annotations content.
result = lightModel.fullAnnotate("How did serfdom develop in and
                                 then leave Russia ?")

>>>
[{'sentences': [<sparknlp.base.Annotation at 0x139d685c0>],
  'document': [<sparknlp.base.Annotation at 0x149b5a320>],
  'normal': [<sparknlp.base.Annotation at 0x139d9e940>,
   <sparknlp.base.Annotation at 0x139d64860>,
   <sparknlp.base.Annotation at 0x139d689b0>,
   <sparknlp.base.Annotation at 0x139dd16d8>,
   <sparknlp.base.Annotation at 0x139dd1c88>,
   <sparknlp.base.Annotation at 0x139d681d0>,
   <sparknlp.base.Annotation at 0x139d89128>,
   <sparknlp.base.Annotation at 0x139da44a8>,
   <sparknlp.base.Annotation at 0x139da4f98>],
  'token': [<sparknlp.base.Annotation at 0x149b55400>,
   <sparknlp.base.Annotation at 0x139dd1668>,
   <sparknlp.base.Annotation at 0x139dad358>,
   <sparknlp.base.Annotation at 0x139d8dba8>,
   <sparknlp.base.Annotation at 0x139d89710>,
   <sparknlp.base.Annotation at 0x139da4208>,
   <sparknlp.base.Annotation at 0x139db2f98>,
   <sparknlp.base.Annotation at 0x139da4240>,
   <sparknlp.base.Annotation at 0x149b55470>,
   <sparknlp.base.Annotation at 0x139dad198>],
  'embeddings': [<sparknlp.base.Annotation at 0x139dad208>,
   <sparknlp.base.Annotation at 0x139d89898>,
   <sparknlp.base.Annotation at 0x139db2860>,
   <sparknlp.base.Annotation at 0x139dbbf28>,
   <sparknlp.base.Annotation at 0x139dbb3c8>,
   <sparknlp.base.Annotation at 0x139db2208>,
   <sparknlp.base.Annotation at 0x139da4668>,
   <sparknlp.base.Annotation at 0x139dd1ba8>,
   <sparknlp.base.Annotation at 0x139d9e400>]}]
fullAnnotate() returns the content and metadata in Annotation type. According to documentation, the Annotation type has the following attributes:
annotatorType: String,
begin: Int,
end: Int,
result: String, (this is what annotate returns)
metadata: Map[String, String],
embeddings: Array[Float]
So, if we want to get the beginning and end of any sentence, we can just write:
result[0]['sentences'][0].begin
>> 0

result[0]['sentences'][0].end
>> 49

result[0]['sentences'][0].result
>> 'How did serfdom develop in and then leave Russia ?'
You can even get metadata for each token with respect to embeddings.
result[0]['embeddings'][2].metadata

>> {'isOOV': 'false',
 'pieceId': '-1',
 'isWordStart': 'true',
 'token': 'serfdom',
 'sentence': '0'}
Unfortunately, we cannot get anything from non-Spark NLP annotators via LightPipeline. That is when we use the Spark ML feature like word2vec inside a pipeline along with SparkNLP annotators, and then use LightPipeline, annotate only returns the result from SparkNLP annotations as there is no result field coming out of Spark ML models. So we can say that LightPipeline will not return anything from non-Spark NLP annotators. At least for now. We plan to write a Spark NLP wrapper for all the ML models in Spark ML soon. Then we will be able to use LightPipeline for a machine learning use case in which we train a model in Spark NLP and then deploy to get faster runtime predictions.
Conclusion
Spark NLP LightPipelines are Spark ML pipelines converted into a single machine but the multi-threaded task, becoming more than 10x times faster for smaller amounts of data. In this article, we talked about how you can convert your Spark pipelines into Spark NLP LightPipelines to get a faster response for small data. This is one of the coolest features of Spark NLP. You get to enjoy the power of Spark while processing and training, and then get faster inferences through LightPipelines as if you do that on a single machine.
We hope that you already read the previous articles on our official Medium page, and started to play with Spark NLP. Here are the links for the other articles. Don’t forget to follow our page and stay tuned!
Introduction to Spark NLP: Foundations and Basic Components (Part-I)
Introduction to: Spark NLP: Installation and Getting Started (Part-II)
Spark NLP 101 : Document Assembler
** These articles are also being published on John Snow Labs' official blog page.
Bio: Veysel Kocaman is a Senior Data Scientist and ML Engineer having a decade long industry experience. He is currently working on his PhD in CS at Leiden University (NL) and holds an MS degree in Operations Research from Penn State University.
Original. Reposted with permission.
Related:
- The World’s Most Widely Used NLP Library In The Enterprise
- How to Create a Vocabulary for NLP Tasks in Python
- Text Encoding: A Review