Background Removal in the Image using the Mediapipe Library
This article was published as a part of the Data Science Blogathon.
Overview
In this article, we will be making an application that will remove or replace the background of the image with another image. For that, we will be using two libraries. First, is the media pipe library for segmenting the person from the background. Second, cv2 for performing image processing techniques.

Application of Background Removal Application via Mediapipe Library
- Background eraser: Sometimes while filling up some forms we require to give the passport photograph with white or no background, there this application could be very handy.
- An app like Zoom: It can be called a mini clone of Zoom application as in zoom also we have experienced the functionality where we can change the background.
- Work from home setup: This application can be very handy in case of meeting the work from home setup, as sometimes in video conferencing, we might don’t want our colleague to have a look at the background.
Let’s build our zoom clone.
Import the Libraries
Now, we will be loading all the required libraries to build this application.
import cv2
import numpy as np
import mediapipe as mp
import matplotlib.pyplot as plt
Firstly we need to initialize the selfie segmentation model
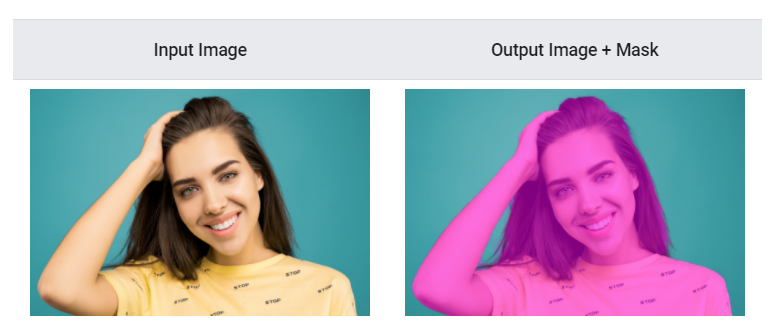
Image Source: ProAndroidDev
So, our very first step will be to initialize our model which will be like a pre-step for the selfie segmentation model.
In this model, we will have two types of model:
General Model: If we pass 0 as the parameter for the selfie segmentation model then the general model will be selected.Landscape Model: If we will pass 1 as the parameter for the above model then the landscape model will be selected.
Note: If we will not specify any of the models then 0 will be selected by default i.e. General model.
But wait a minute! What is the difference between both models? Let’s discuss that:
When it comes to the general model, it specifically works on 256X256x1, i.e., 256-Height, 256-Width, 1 channel as the input, and 256x256x3 as the output. When we talk about the Landscape model, it specifically works on the 144X256X1 as the input and results in 144x256x3 output tensors other than that, both the general and landscape model is the same.
change_background_mp = mp.solutions.selfie_segmentation

change_bg_segment = change_background_mp.SelfieSegmentation()
Code breakdown:
- As discussed here, we will initialize the segmentation model using mp. solutions.selfie_segmentation, if we break it down, then we can see that from the Mediapipe library, we are calling solutions class, and from that class, we are calling selfie_segmentation model.
- After model initialization, we will be setting our segmentation function, i.e.,
SelfieSegmentation().
Read an Image
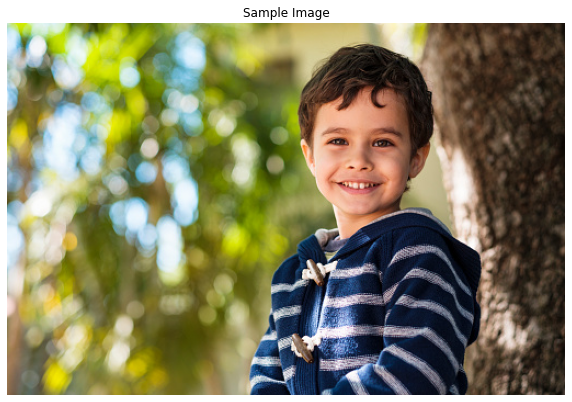
So previously, we have initialized our segmentation model and created a selfie segmentation function as well. Now, let’s read our sample image and see what it looks like:
cv2.read: To read the sample image from the local system.plt.imshow: This is the matplotlib function that will help us to see/plot the image.
sample_img = cv2.imread('media/sample.jpg')

plt.figure(figsize = [10, 10])

plt.title("Sample Image");plt.axis('off');plt.imshow(sample_img[:,:,::-1]);plt.show()
Output:
Code breakdown:
- So firstly, we are reading the image from the read() function
- Then before plotting/displaying the image, we will set the size of the display using the figure function.
- Finally, before displaying the image, it will be a good practice to convert the image format from RGB to BGR as cv2 will read the image in that format only when it comes to colored image, and then with the help of the show function, we will display the image.
Remove/Replace Background using Mediapipe Library
Now we are all set to use the selfie segmentation model on our sample image first to remove or replace the background, but before that, as we know, previously we have converted the sample image to BGR format as the cv2 library read it correct in that way only, but this is not the case for media pipe library so we will re-convert the image from BGR->RGB format.
RGB_sample_img = cv2.cvtColor(sample_img, cv2.COLOR_BGR2RGB)

result = change_bg_segment.process(RGB_sample_img)

plt.figure(figsize=[22,22])

plt.subplot(121);plt.imshow(sample_img[:,:,::-1]);plt.title("Original Image");plt.axis('off');
plt.subplot(122);plt.imshow(result.segmentation_mask, cmap='gray');plt.title("Probability Map");plt.axis('off');
Output:
Code breakdown:
- As discussed, we will first convert the BGR format image to an RGB format image.
- Now with the help of
processfunction, we will process our selfie segmentation model on the sample image.
- Then as we did in the Read image section, here also we will set the figure size with the help of
figurefunction.
- Finally, we will be displaying the original image as well as segmented image side by side (by using
subplotfunction of matplotlib) andimshowfunction.
Inference: So, if we will closely look at the output (segmented subplot, i.e., our main processed output) then there, we can see that some areas are neither purely black nor purely white they are a bit gray which indicates that those places our model was not able to predict that it was the background or the person so for that reason we will be using the threshold techniques to have the more accurate segmented area in the image.
So in our next step, we will be using thresholding of the mask so that we would only get two types of pixel values, i.e., Binary black and white mask, which has a pixel value of 1 for the person and 0 for the background.
binary_mask = result.segmentation_mask > 0.9

plt.figure(figsize=[22,22])
plt.subplot(121);plt.imshow(sample_img[:,:,::-1]);plt.title("Original Image");plt.axis('off');
plt.subplot(122);plt.imshow(binary_mask, cmap='gray');plt.title("Binary Mask");plt.axis('off');
Output:
Code breakdown:
Binary masking with thresholding: Here, we are using the concept of binary masking, which will have a pixel value of 1 for the person and a pixel value of 0 for the background. Also, we will be setting up the threshold value of 0.9, i.e., the confidence of 90% that pixel values when will be greater it will be 1 otherwise 0.
- Now, again we will plot both the original and preprocessed image (one with the binary mask) using subplots and Matplotlib’s show function.
So by far, we have segmented our image accurately by performing some image preprocessing techniques. Now it’s time to visually see how the image’s background will be removed, so for that, we will be using the numpy.where() function. This function will use the binary mask values and returns white are for every 1-pixel value and then replace every area with 0 pixels, i.e., a black region with 255, which means the background will have white color only.
But, before having the required output, we have to first convert the one-channel image into the three-channel image using numpy.dstack function.
binary_mask_3 = np.dstack((binary_mask,binary_mask,binary_mask))

output_image = np.where(binary_mask_3, sample_img, 255)

plt.figure(figsize=[22,22])

plt.subplot(121);plt.imshow(sample_img[:,:,::-1]);plt.title("Original Image");plt.axis('off');
plt.subplot(122);plt.imshow(output_image[:,:,::-1]);plt.title("Output Image");plt.axis('off');
Output:
Code breakdown:
- As discussed, we will be using Numpy’s d-stack function to convert our image from one channel to three-channel.
- Now, we will be using the Numpy’s function that will convert every black region to a white region. That is, it removes the black segmented area with the white so that it appears to be like the white background.
- Finally, we will set the image size using the figure function. And then display both the original and output image using the show function.
Note: By far, for having the white background, we have used 255 as the value, but we can also have another background image as the output, for that, we just need to change the parameter in np.where function.
bg_img = cv2.imread('media/background.jpg')
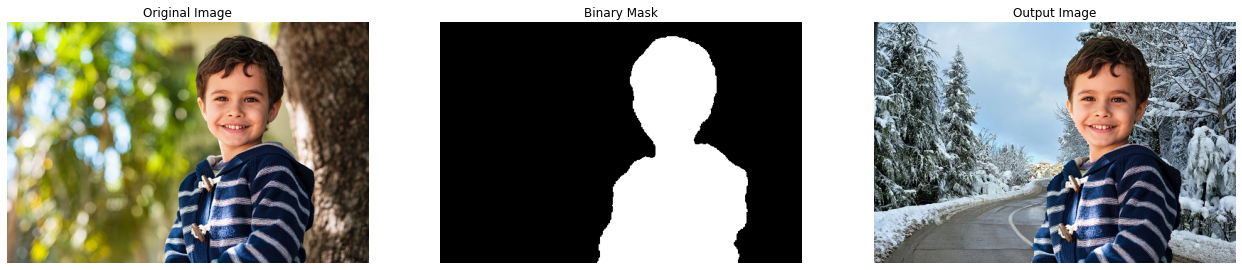
output_image = np.where(binary_mask_3, sample_img, bg_img)
plt.figure(figsize=[22,22])
plt.subplot(131);plt.imshow(sample_img[:,:,::-1]);plt.title("Original Image");plt.axis('off');
plt.subplot(132);plt.imshow(binary_mask, cmap='gray');plt.title("Binary Mask");plt.axis('off');
plt.subplot(133);plt.imshow(output_image[:,:,::-1]);plt.title("Output Image");plt.axis('off');
Output:
Code breakdown:
- So here comes the last part where we will
replacethe background of the image. For that, we will first read that background image usingimreadthe function.
- Now we will create one final output image. We’ll use the np. where function to replace the black region (binary asking) with the other background image.
- Finally, we will display the
original image, sample image,and thefinal segmentation result.
Conclusion
So, finally, we have developed our application which can remove the background of any particular image that has the person in it, though, we can also create functionality, where it can be done in real-time just like the zoom application. Still, the logic will be the same only, instead of image processing, there, we will be handling the video processing.
Key takeaways from the article
- The very first takeaway from this article is that we have learned how image segmentation works and its real-world implementation.
- There are ample techniques available for image segmentation. But this is one of the simplest to use as you can see it’s in the modular form.
- We have also covered some image preprocessing techniques like thresholding, erosion, stack. These basic techniques are also involved in building a complete computer vision pipeline for an application.
Endnotes
Here’s the repo link to this article. Hope you liked my article on Background removal in the image using the Mediapipe library. If you have any opinions or questions, then comment below.
Read on AV Blog about various predictions using Machine Learning.
About Me
Greeting to everyone, I’m currently working in TCS and previously, I worked as a Data Science Analyst in Zorba Consulting India. Along with full-time work, I’ve got an immense interest in the same field, i.e. Data Science, along with its other subsets of Artificial Intelligence such as Computer Vision, Machine Learning, and Deep learning; feel free to collaborate with me on any project on the domains mentioned above (LinkedIn).
The media shown in this article is not owned by Analytics Vidhya and are used at the Author’s discretion.


Dear Sir/Madam! Would you be so kind to help me to find company-person to develop system of recognition of simple grafs. It's like logo consist from straitened and curved lines. I am 70 years old , I collected such marks signs more than hundred thousands around the word and times. organize as universal date base ir can be used for artifisial intellect & for study of human cognitives