A Virtual Private Network, or VPN, allows you to securely connect your computer to another computer network through the internet. A VPN Server is the computer or network device that runs the VPN, and normally your computer will connect to a VPN Server to “get on the VPN”. In this post I will show you how to setup your own VPN Server using Amazon Web Services, and how to connect to it from both Windows and Linux.
Businesses of all sizes use VPNs to offer employees a way to securely work from home, from coffee shops, from airports, or really any location where you might have untrusted access to the public internet. The connection is secure because all of your computer’s network traffic is sent through an encrypted tunnel from your device to the VPN Server. VPN Servers “for hire” are advertised as a way for those without access to a work-sponsored VPN to enjoy the same benefits of secure networking. Unfortunately, some VPN providers (frequently “free” VPNs) abuse this trust relationship by injecting ads (or even malware) into your traffic, and you really can’t be sure you have any real security at all.
If you really need to use a VPN to protect your network traffic, and you are concerned about whether your VPN provider is trustworthy, you can build your own using the trusted Amazon Web Services (AWS) platform. Let’s do this together in the following basic steps:
- Prep a Windows PC by installing the puTTY application. We’ll use puTTY to login to our VPN Server and set it up.
- Create an Ubuntu server instance on the Amazon Web Services (AWS) platform. This will become our VPN Server.
- Install and configure the VPN Server software on our AWS server.
- Install, configure, and test the VPN client software on our Windows PC.
- Install, configure and test the VPN client software on a Linux PC.
Install puTTY on our Windows PC
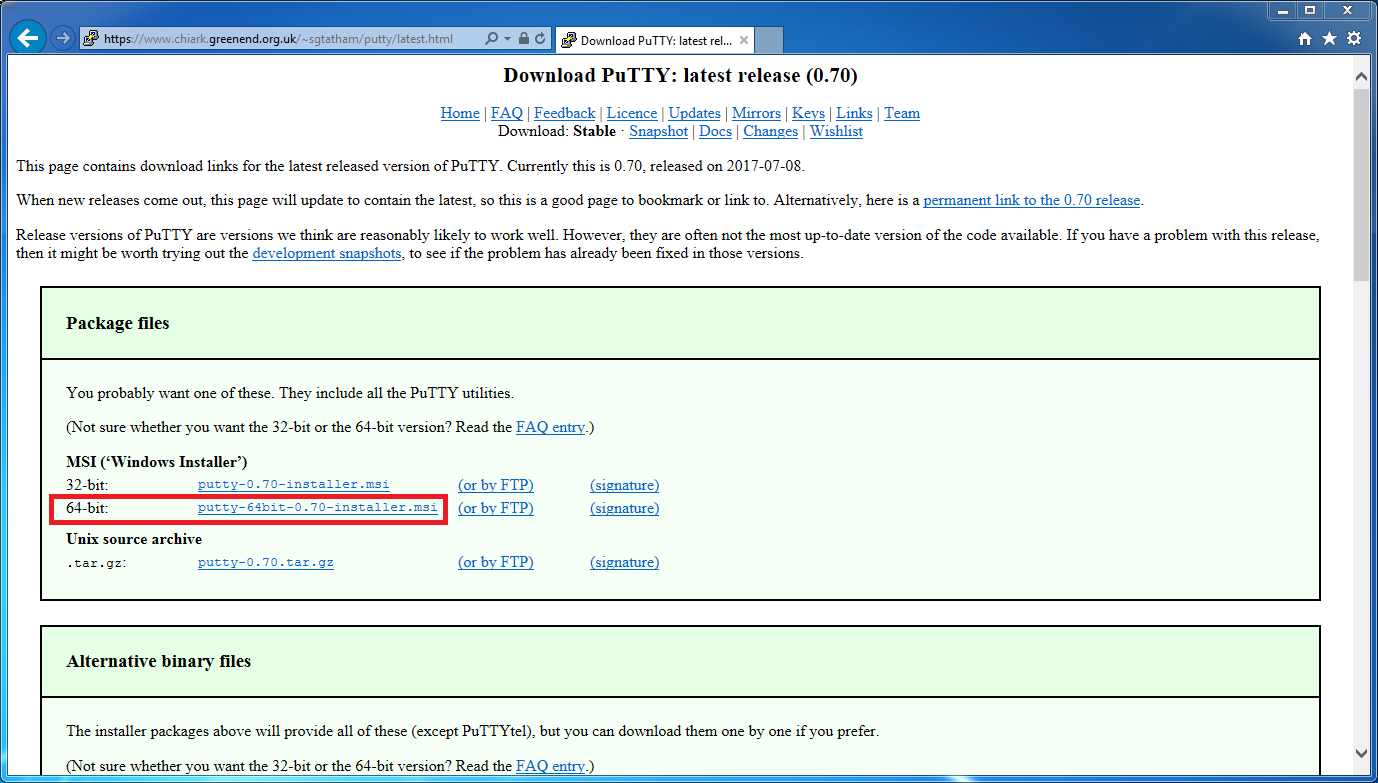
Start by visiting the puTTY download page. As my Windows PC is running 64-bit Windows, I’ll choose the 64-bit installer as seen in the following screenshot (the 0.70 version number is the latest version at the time of publication):
After downloading and saving the putty-64bit-0.70-installer.msi file, double-click on it to launch the installation.

Since we downloaded the installer from the internet, we will get the security warning seen above. Click the Run button to proceed with the launch of the setup wizard.
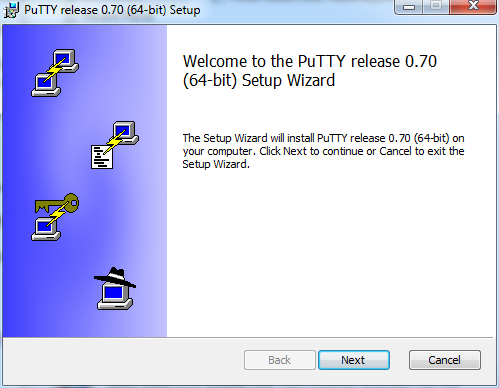
After the setup wizard window opens, click the Next button.

The setup wizard is asking us where to put the puTTY application files. Keep the default folder name and click the Next button.
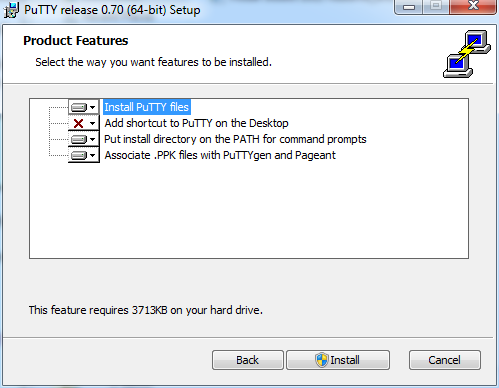
The product features window allows us to select which features of puTTY we want to install. Keep the default settings and click the Install button.
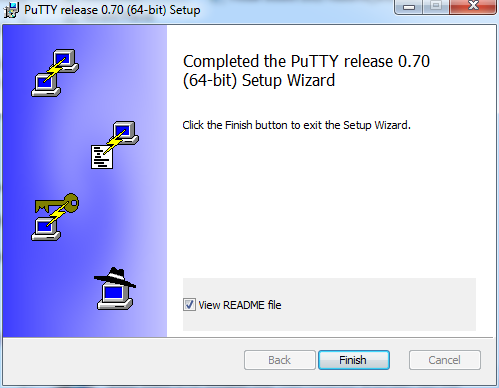
When the installer completes the installation process, click the Finish button. puTTY is now installed and we can turn our attention to the task of creating an Ubuntu server on the AWS platform. This will become our VPN Server.
Create the VPN Server on AWS
Amazon Web Services is a cloud computing platform that provides the infrastructure building blocks for almost any computing need. Businesses typically use AWS to build enterprise scale web applications, but individuals can use it too. In fact, we’ll use it to setup a single Ubuntu (Linux) machine that will become our VPN Server.
AWS customers are billed on a pay-as-you-go basis, where the cost is driven by the resources you use. However, AWS also offers a free tier (free for one year) as a way of introducing the platform to new users. We’ll setup our machine in the free tier. It will work just fine for our needs, and during the year the services are free, you can monitor the AWS billing dashboard to get a sense for how your usage patterns drive cost.
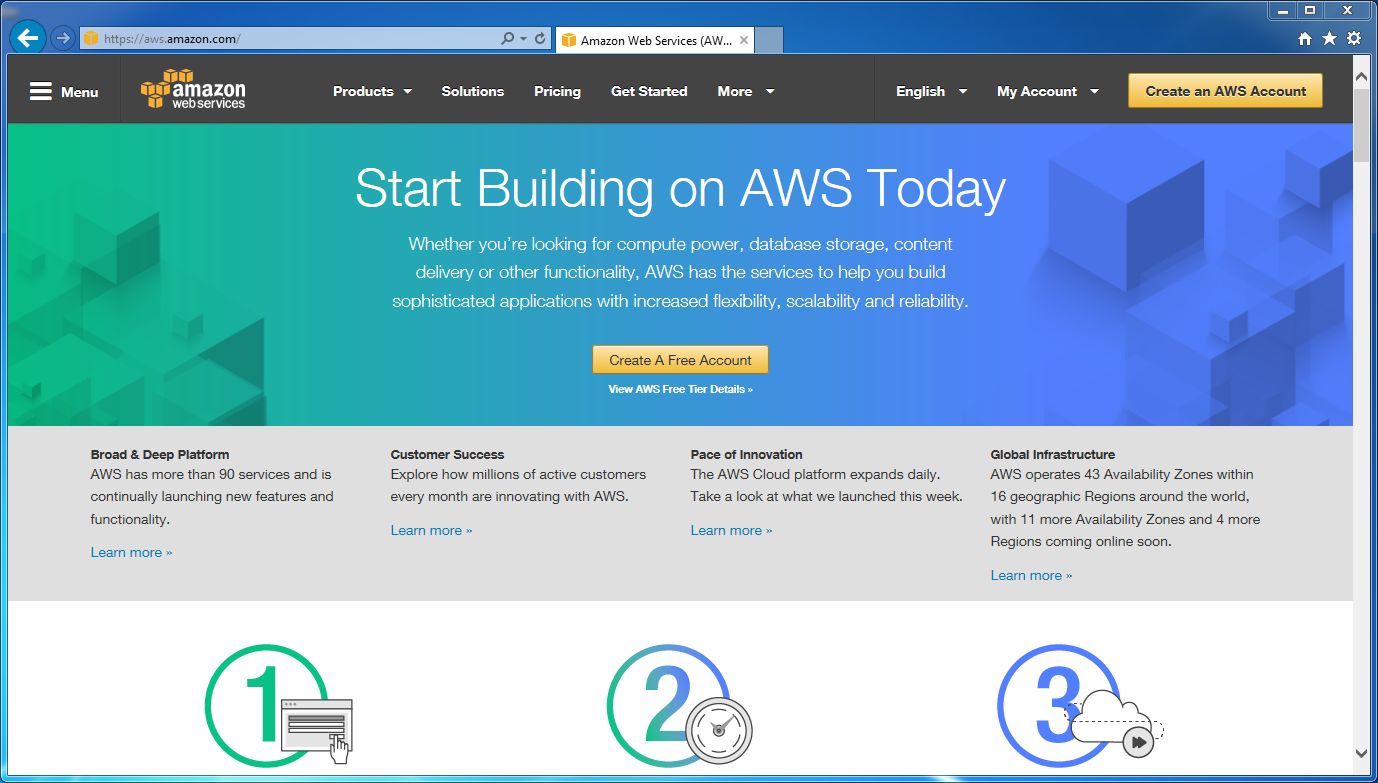
It’s easy to start using AWS – you simply have to go to https://aws.amazon.com and create an account. I’ve already done that, so let’s get started. Begin on the AWS home page:
Under “My Account”, choose “AWS Management Console”.
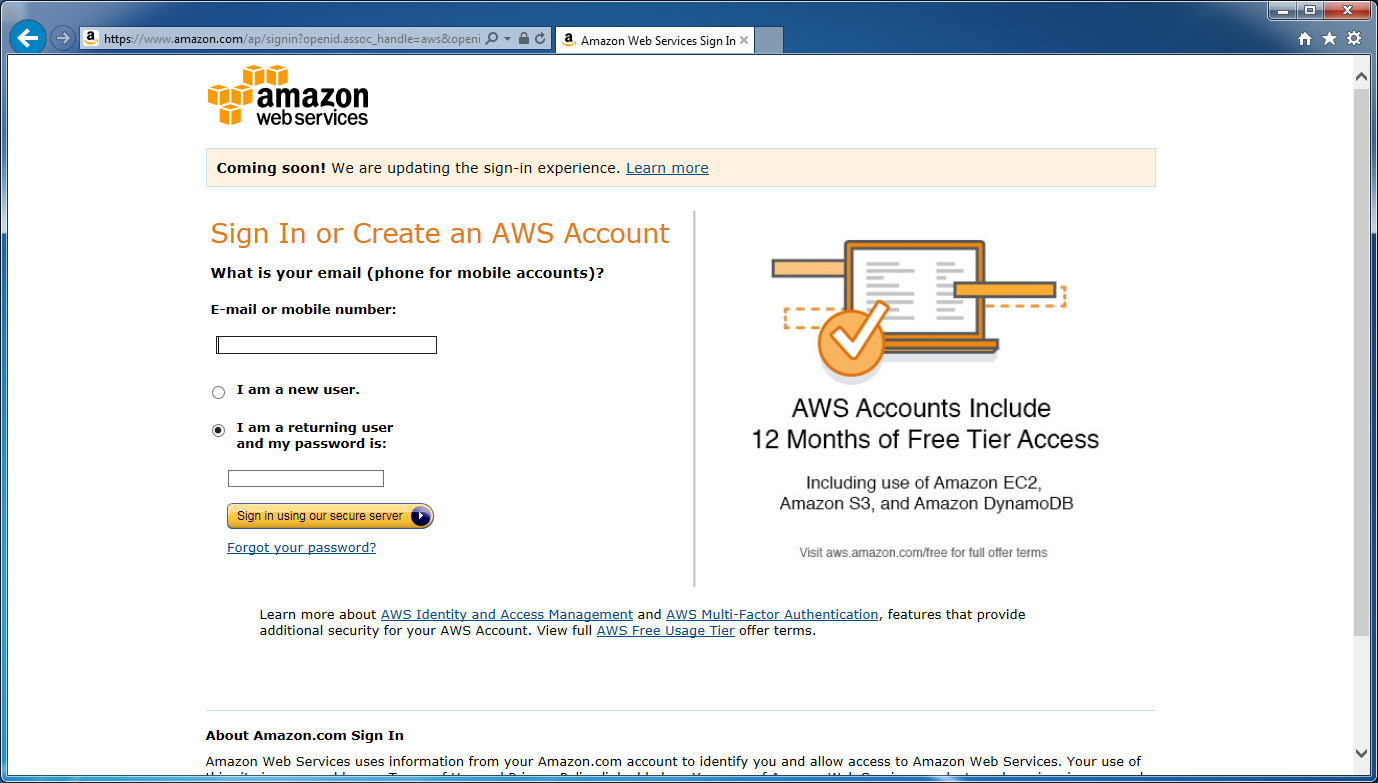
At this point the website asks us to login. I’ll go ahead and do that now. Security best practice – be sure to enable two-factor-authentication when you create your own account.
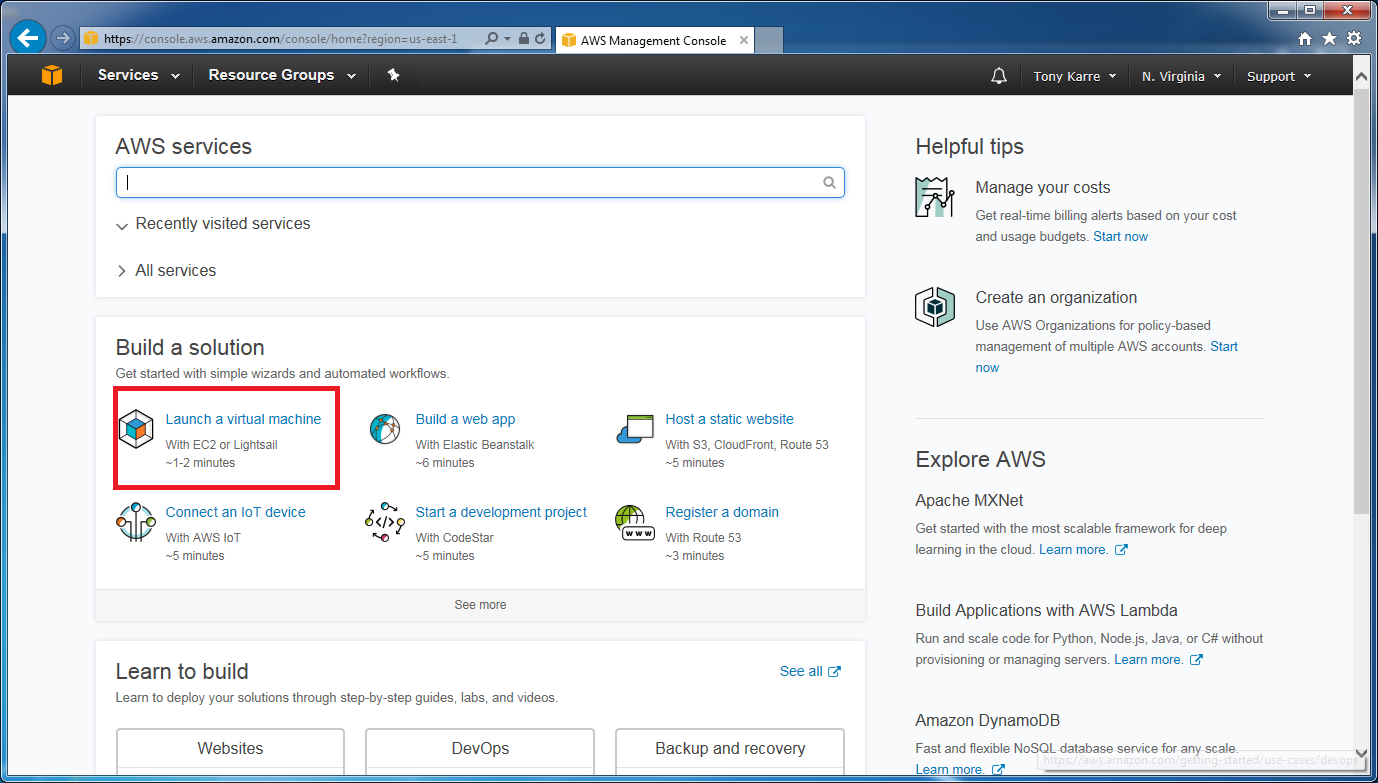
After logging in, choose “Launch a virtual machine” as seen above.
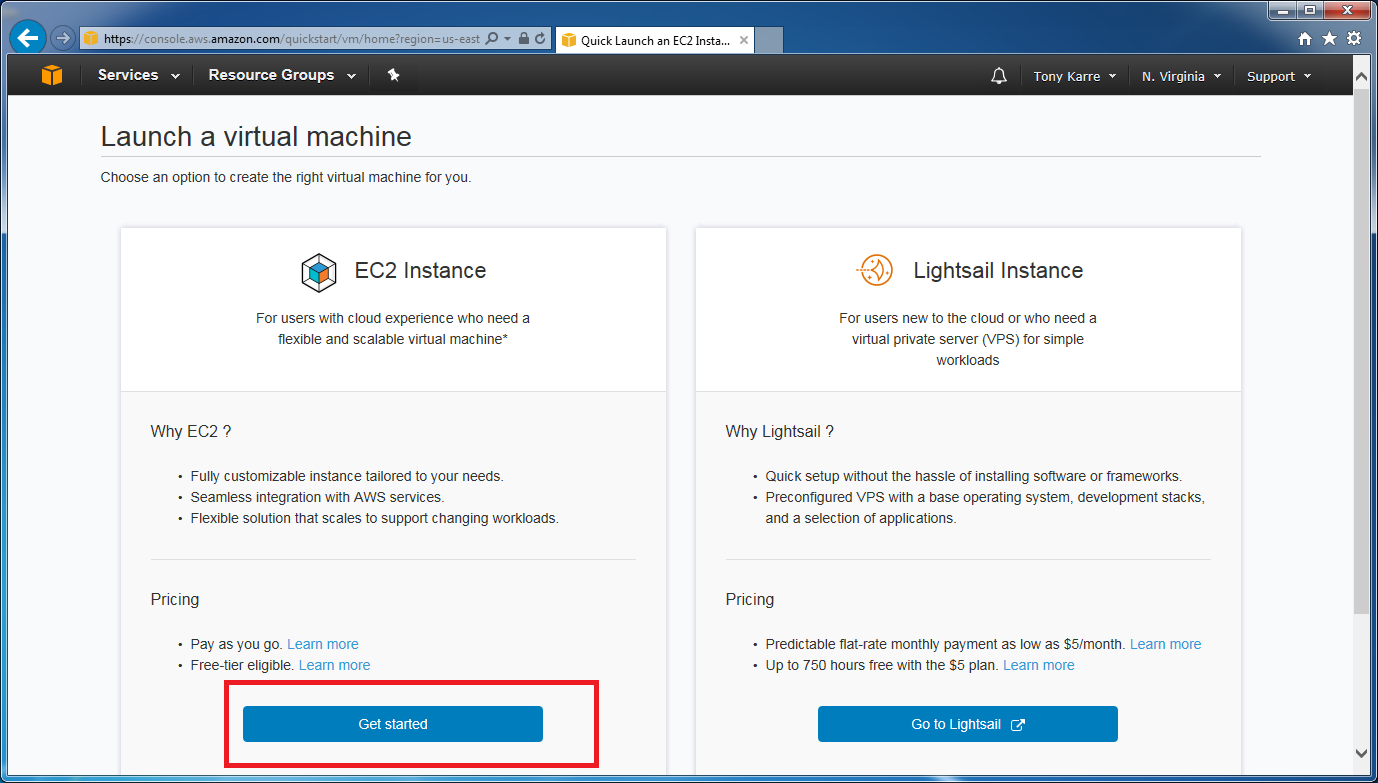
Now click the “Get Started” button. This will launch the EC2 quick launch wizard.
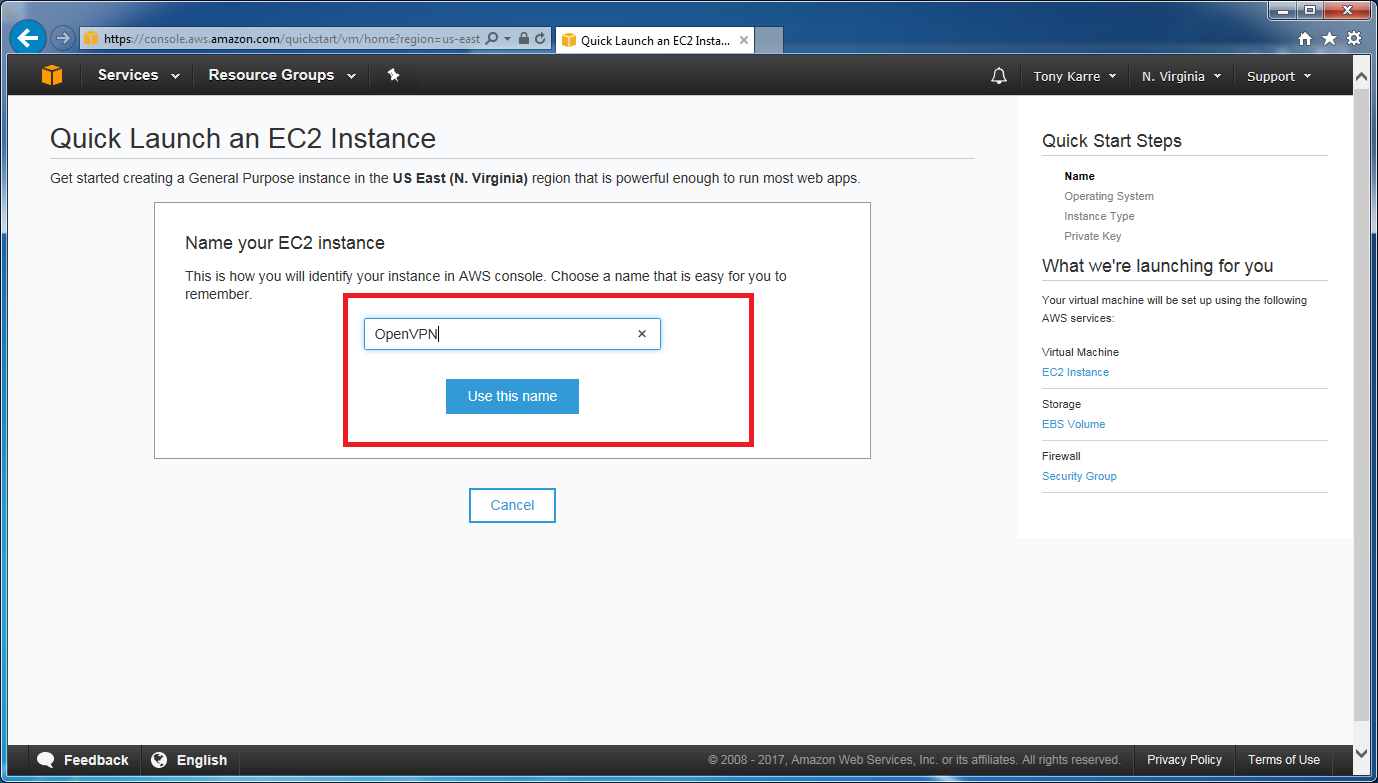
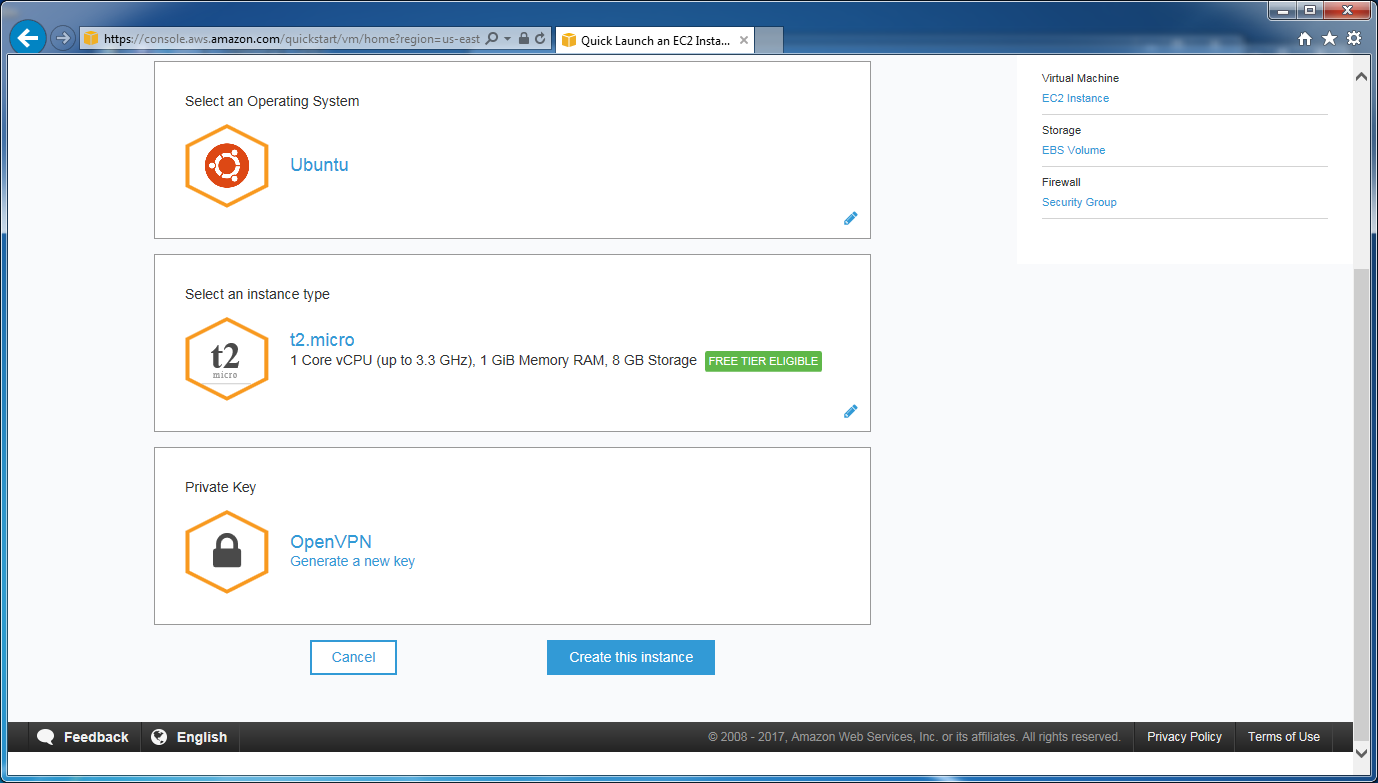
Provide a name for the new instance. The name can be anything you want and I’ve typed “OpenVPN”, as that is the VPN software we’ll be using to setup our VPN Server. After typing in the name, click the “Use this name” button.
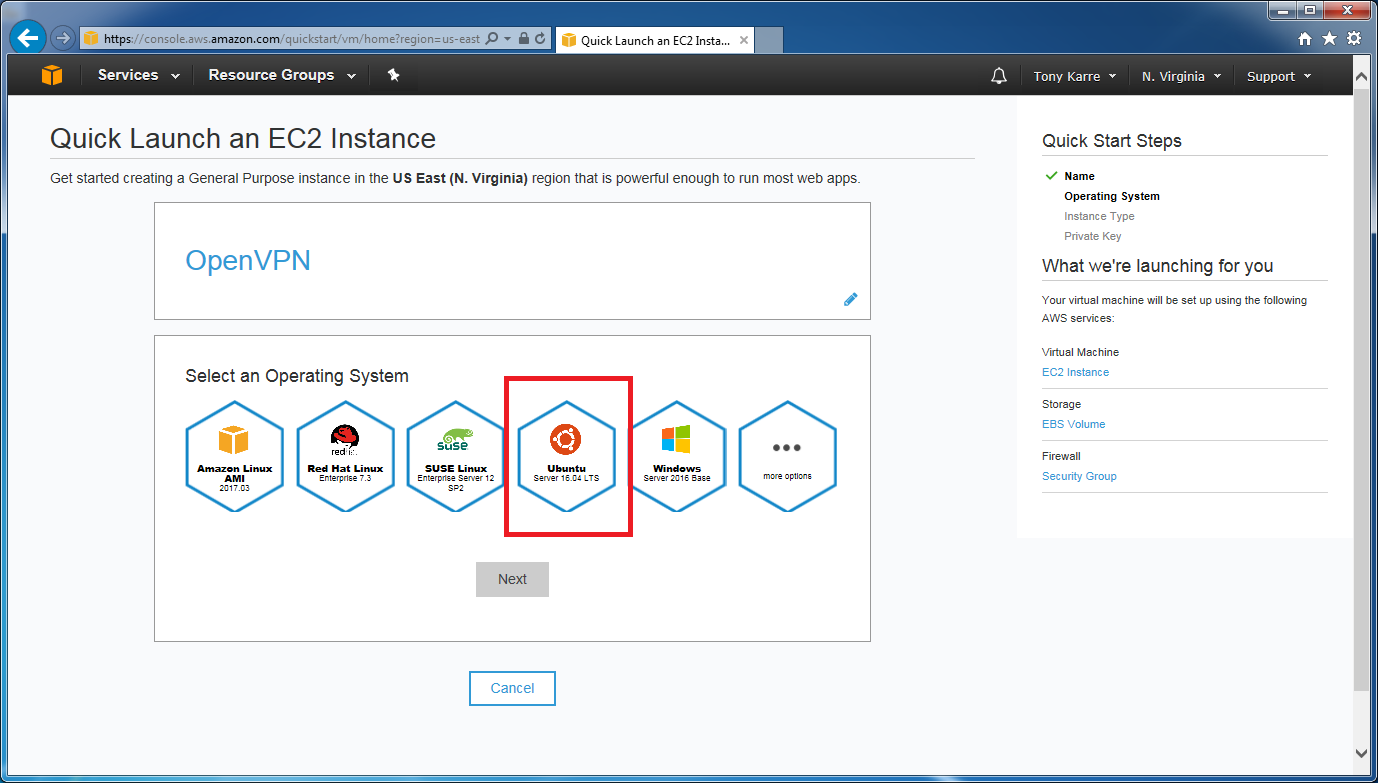
We want to use the Ubuntu operating system (Ubuntu is a popular Linux distribution). Click on the “Ubuntu Server 16.04 LTS” item, then click the “Next” button.
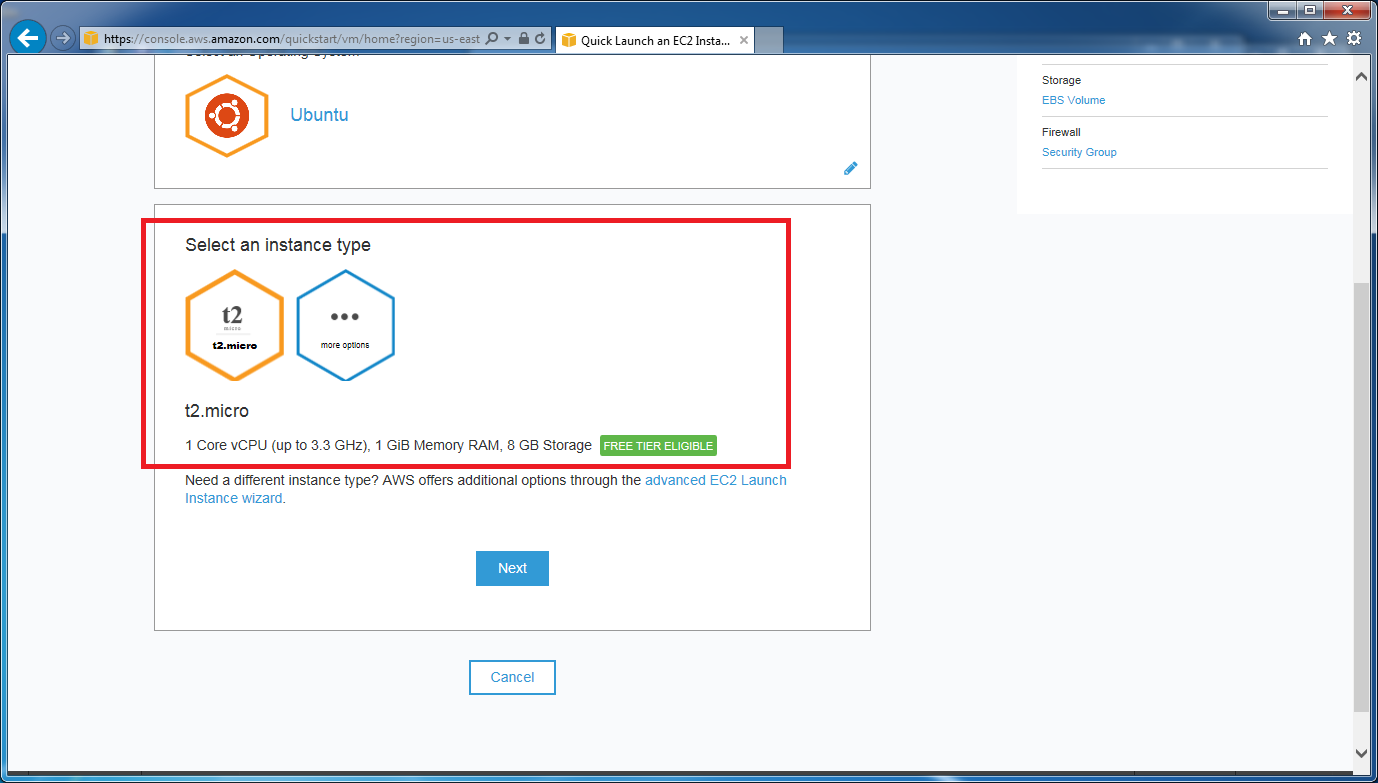
Now we need to select the instance type. This is essentially the size of the server we are building. We want to stay with the default, which is the free tier “t2.micro”. Click the “Next” button to continue.
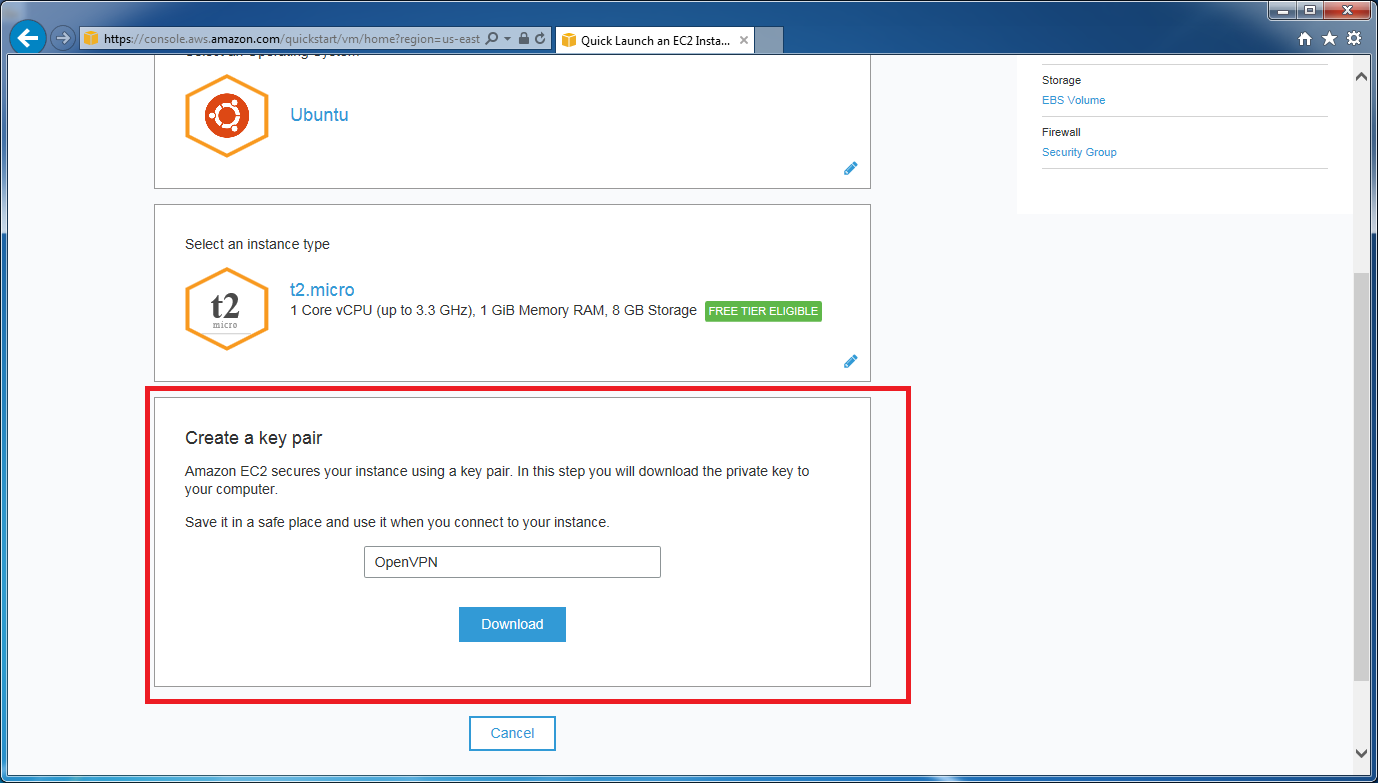
In this step, AWS is telling us that we are about to download a key pair. With AWS servers, you don’t use a traditional username and password to log into the machine. Instead, you use key-based authentication to gain access. This is much more secure, because you need physical possession of the key file and there is no password that can be guessed by someone else. Like the site says, you need to keep this key file safe. Click “Download” to start the download process.
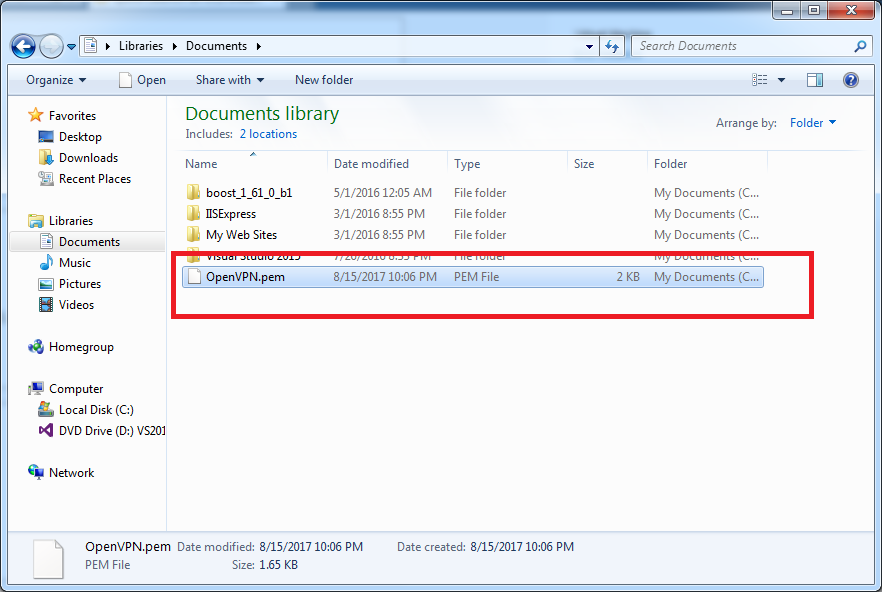
After a couple of clicks, the file has been downloaded. The filename is the name of your instance (in this example we used OpenVPN) with “.pem” as the filetype. I’ve saved the file to my Documents folder so I can find it later. Now let’s continue by clicking on the “Create this instance” button seen below.
After clicking on “Create this instance”, our new Ubuntu machine is created with a security group (think “firewall”) that only allows access from our current public IP address. In other words, if you are at home sitting on your sofa when you create your instance, AWS will use your home internet connection IP address for this purpose. This is exactly what we want, and we can open it up later if we want to.
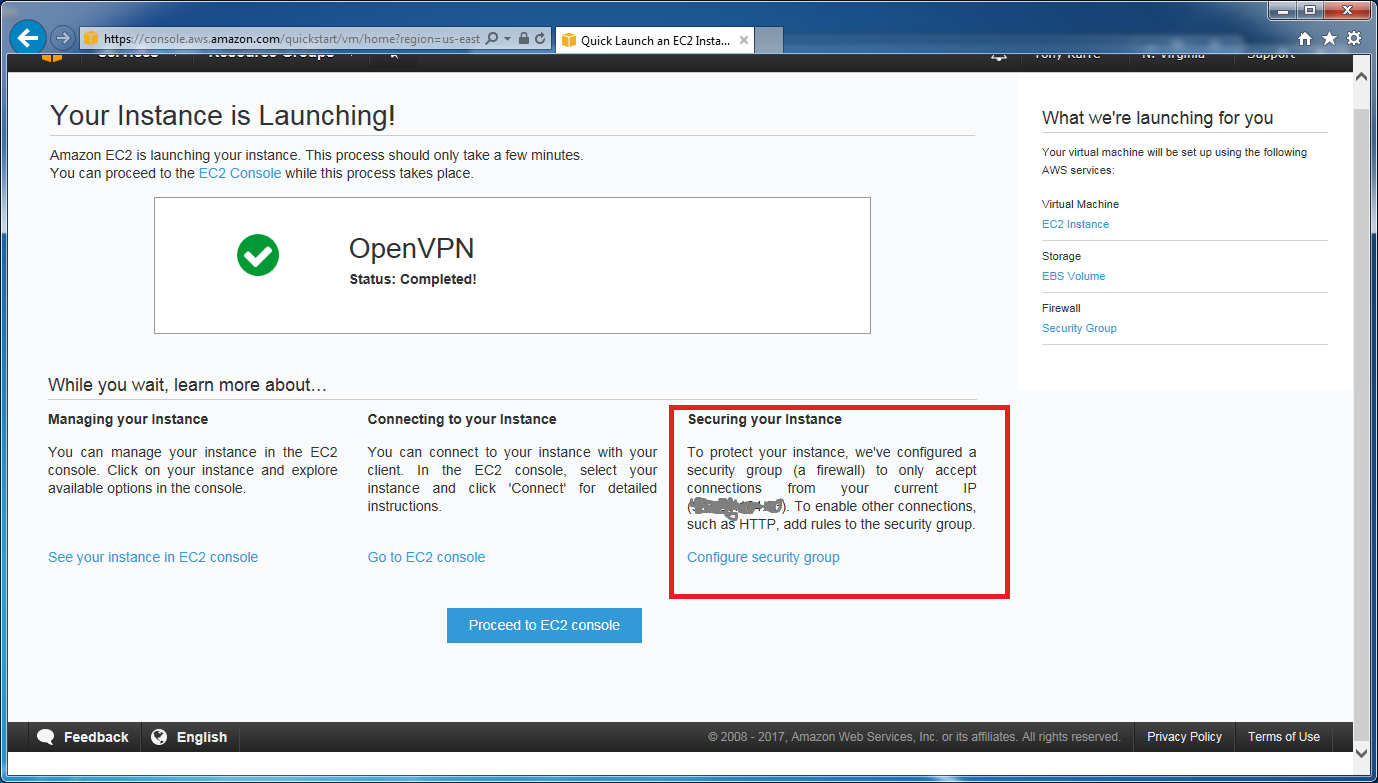
As seen above, there is an option to configure the security group. Let’s do that – we need to open up a port that our OpenVPN software will need. Click the “Configure security group” link.
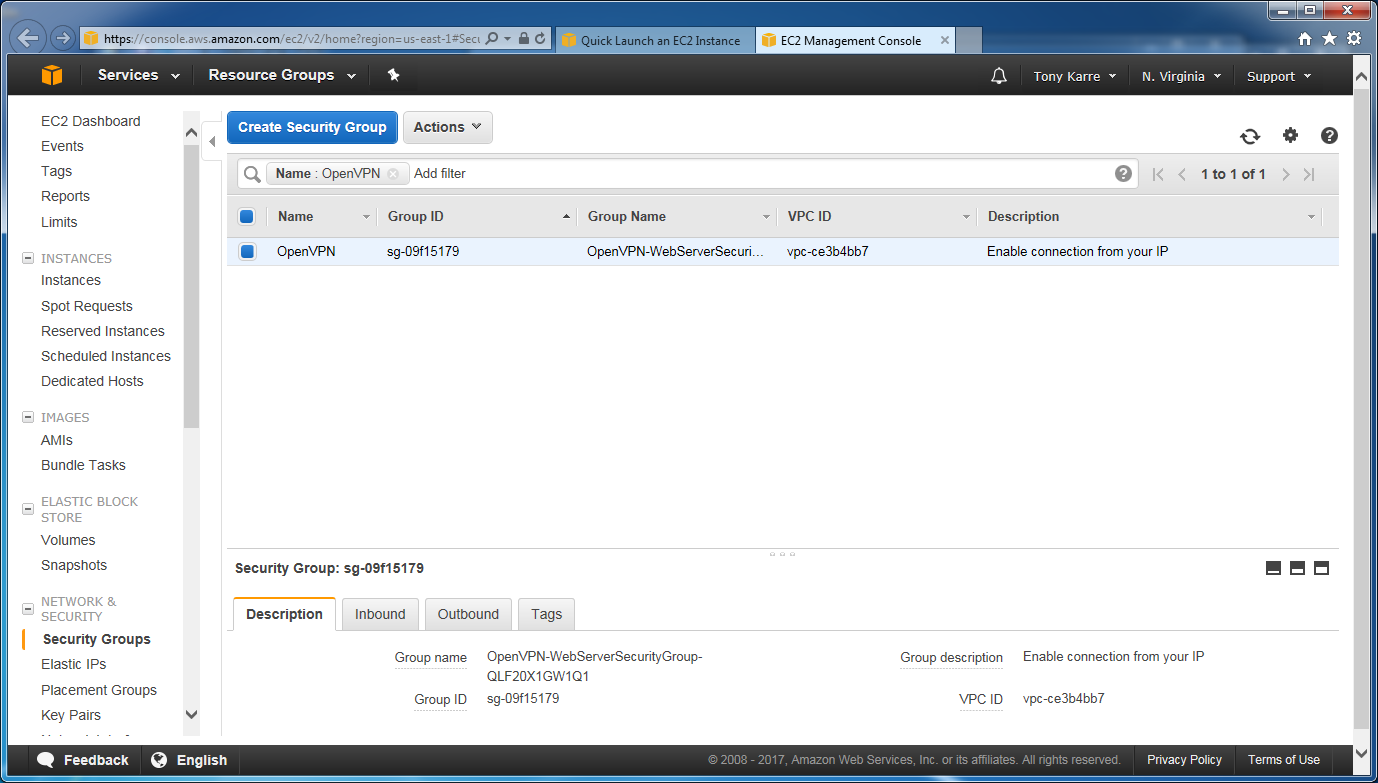
As seen above, clicking the “Configure security group” link opens a new browser tab and takes us directly to the EC2 Management Console’s Security Group page. This page lists all of the security groups associated with our account, and we only have one so far (and it is already selected on the page). Click the “Actions” button at the top.
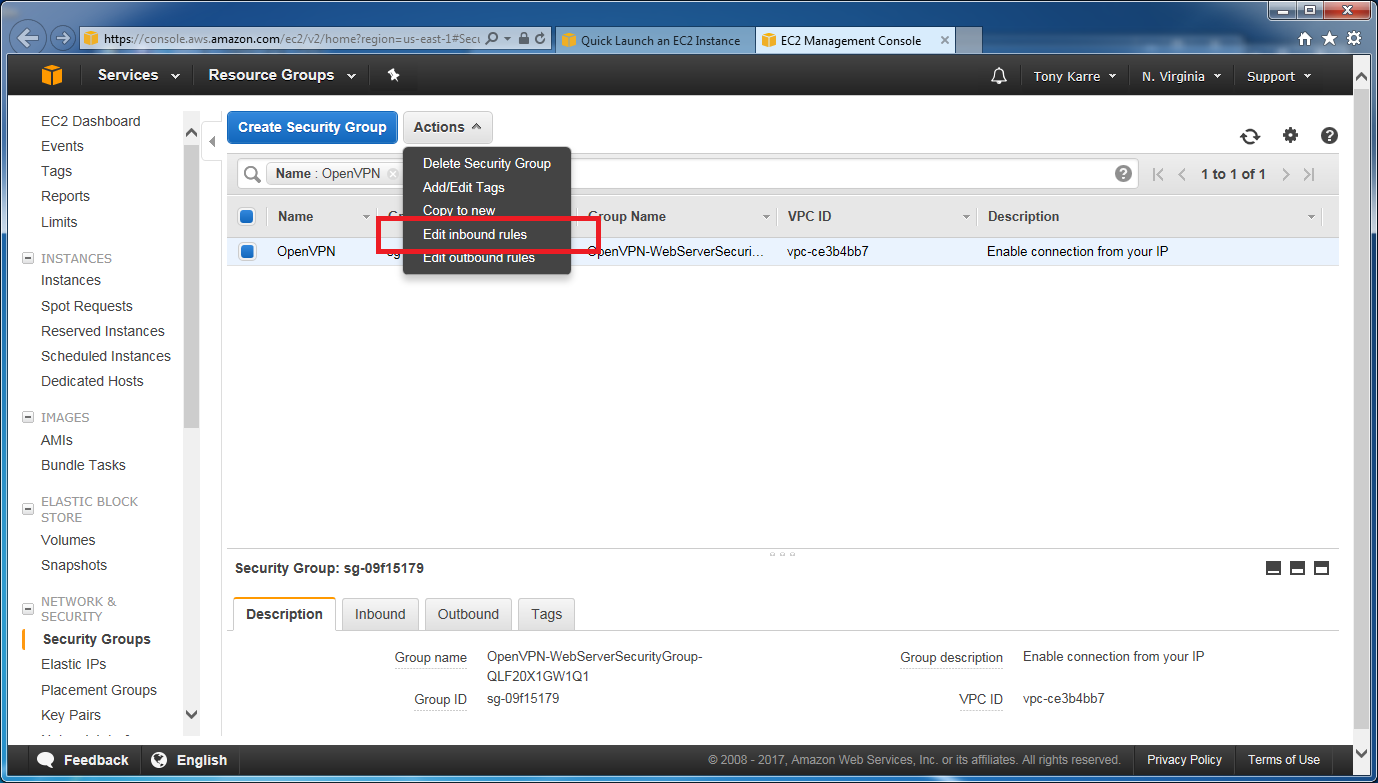
Clicking the “Actions” button reveals a menu of actions that you can take on the security group. Choose “Edit Inbound Rules” so we can open the port that we need.
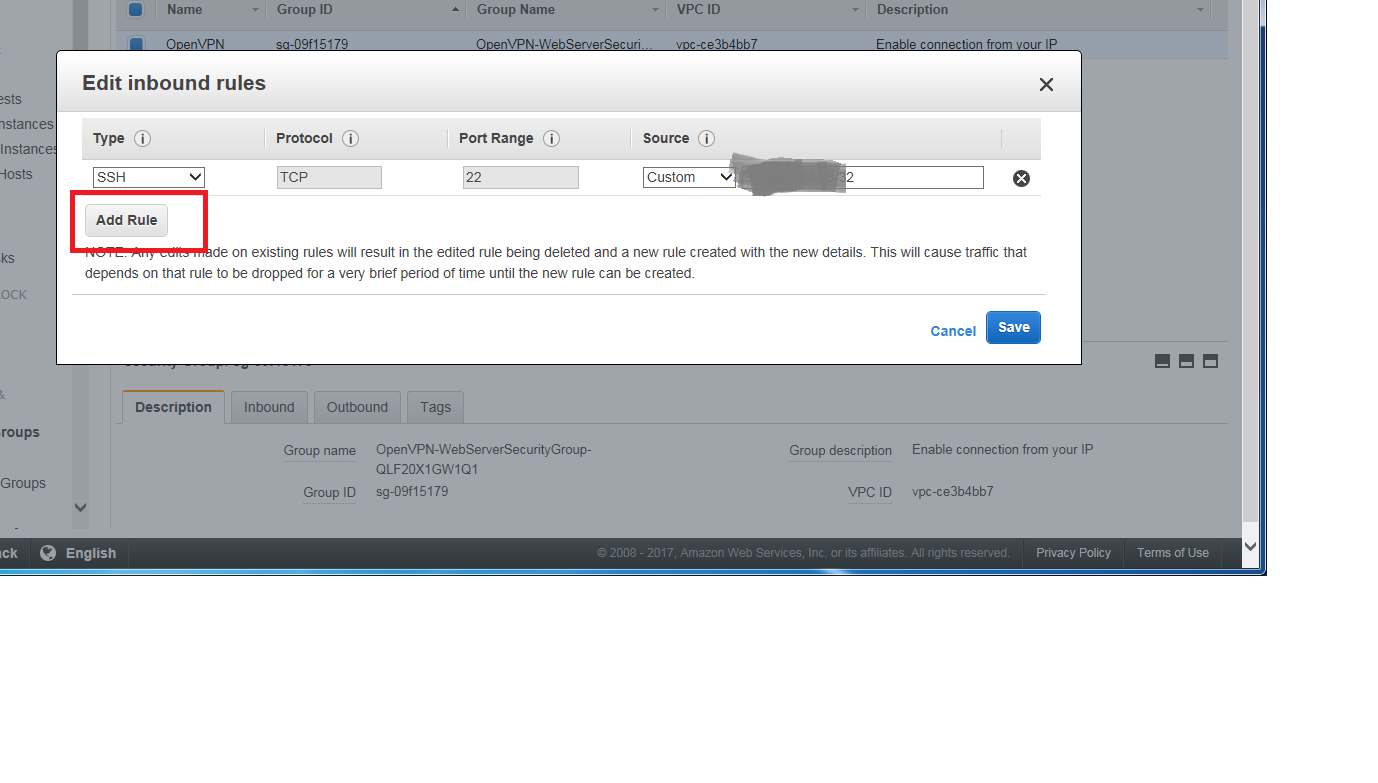
You can see that we already have one inbound rule – it allows “SSH” access, and only from our home IP address. Let’s add a second inbound rule by clicking on the “Add Rule” button.
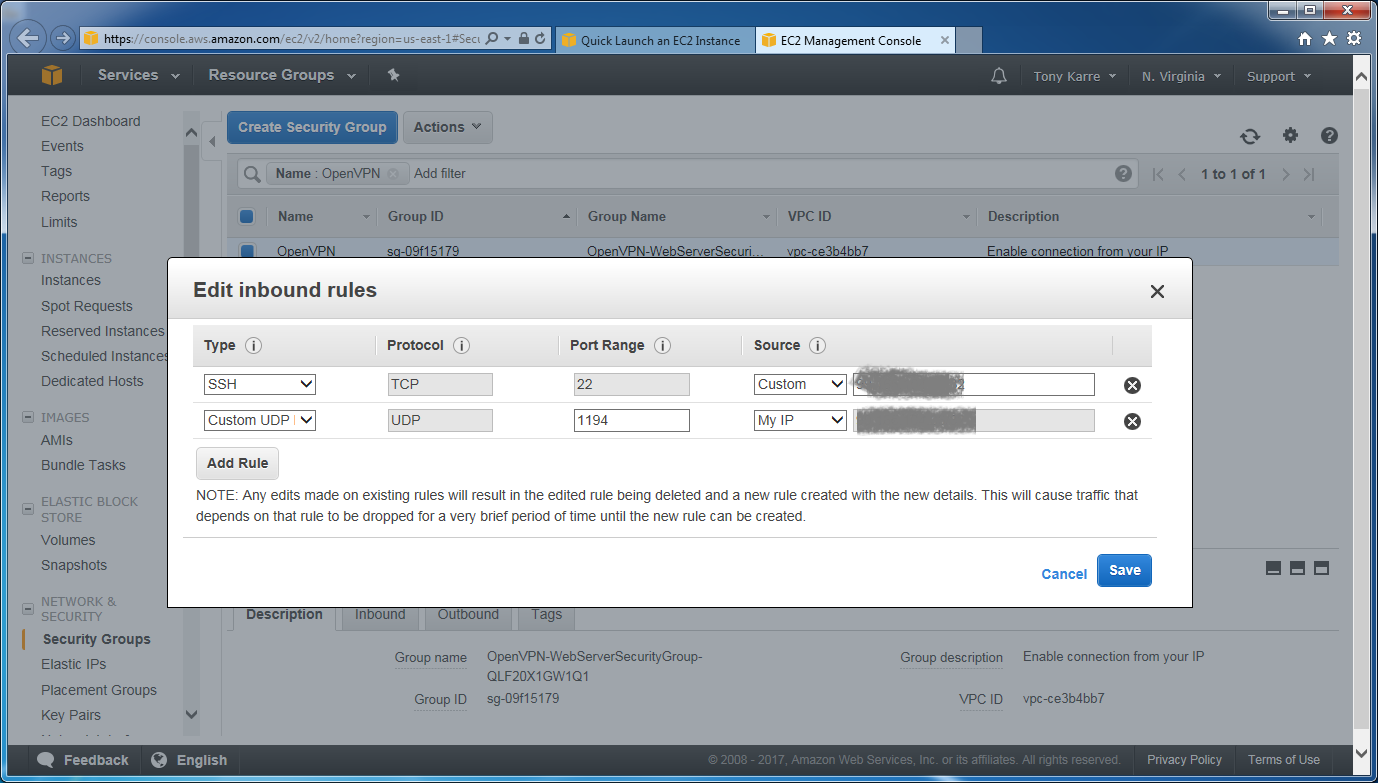
For our new rule, we’ll choose these parameters:
- Custom UDP Rule
- Port = 1194
- Source = My IP
When you select “My IP” as the source, you’ll notice that your own IP address is automatically loaded. Now click the “Save” button.
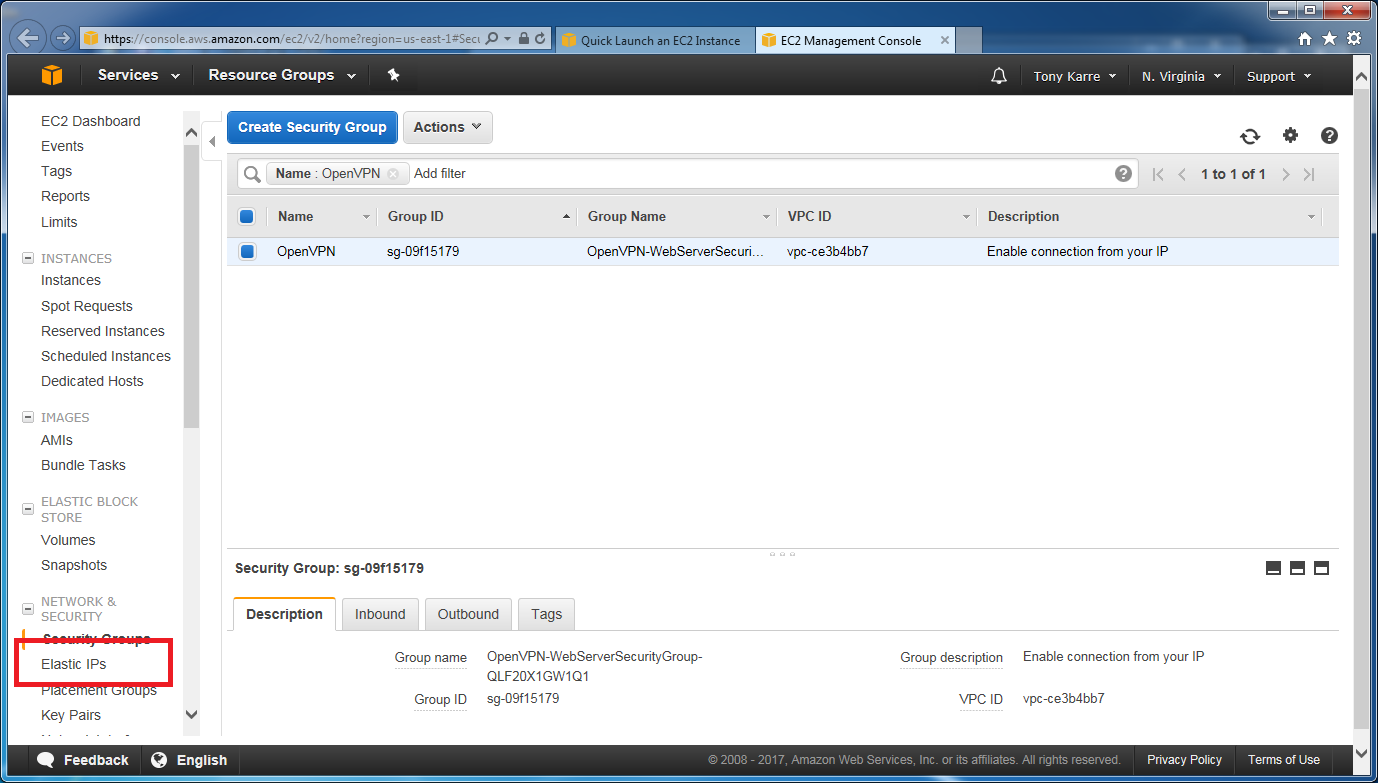
Now we need to create an “Elastic IP”, which is essentially a static public IP address through which our server can be reached. If we don’t create this static IP, then we’ll need to reach our server through a different IP address every time we start our instance. Click the “Elastic IPs” link seen in the lower left-hand side of the page.

Click the “Allocate new address” button.

Click the “Allocate” button.

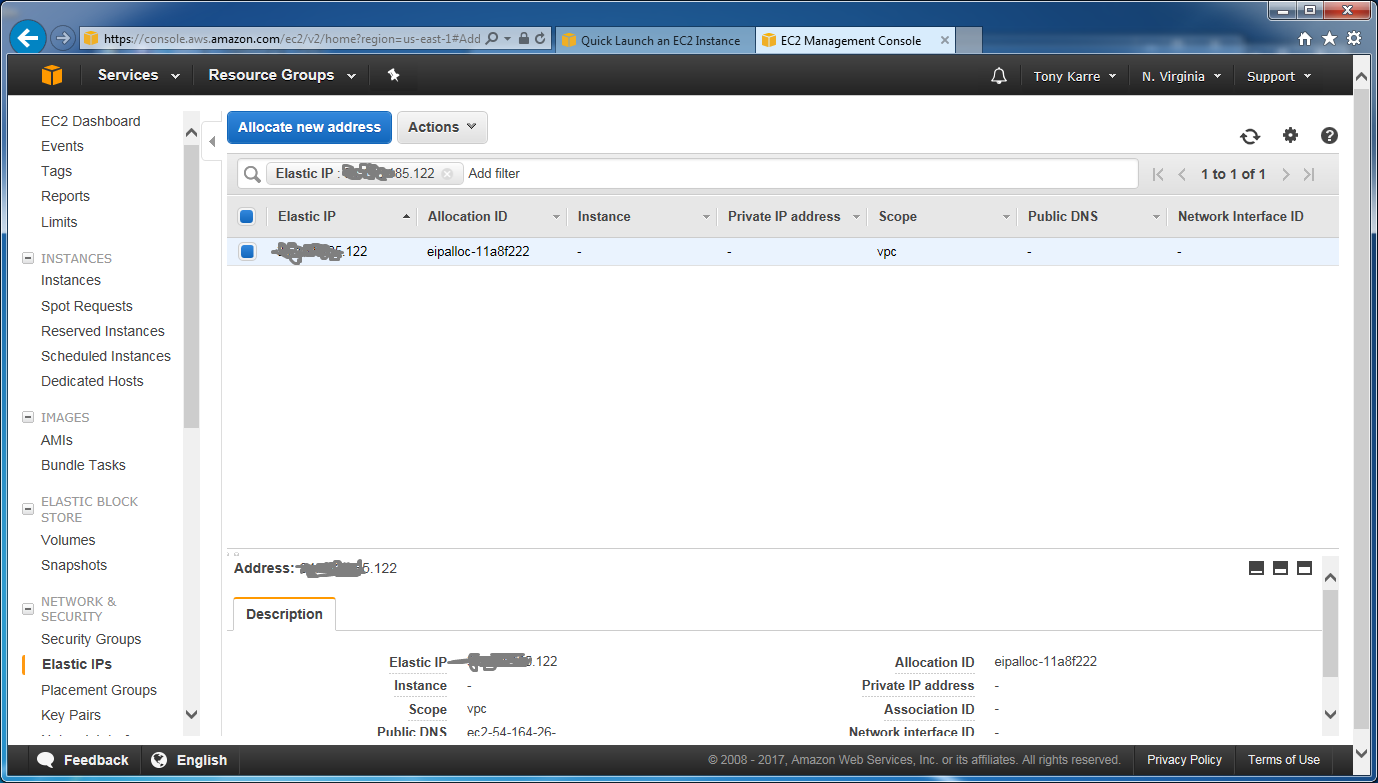
Now our Elastic IP address has been created and is displayed on the page (although I’ve obscured mine in the screenshot). Make a note of this address – we’ll need to refer to it later when we try to login to the server.
At this point, click on the IP address that is displayed. This will take us to the Elastic IPs dashboard. If you accidentally click on the “Close” button, don’t worry, just click on the “Elastic IPs” link on the lower left-hand side of the page.
In the same fashion as before, click on the “Actions” button, then choose “Associate address” in the popup menu.
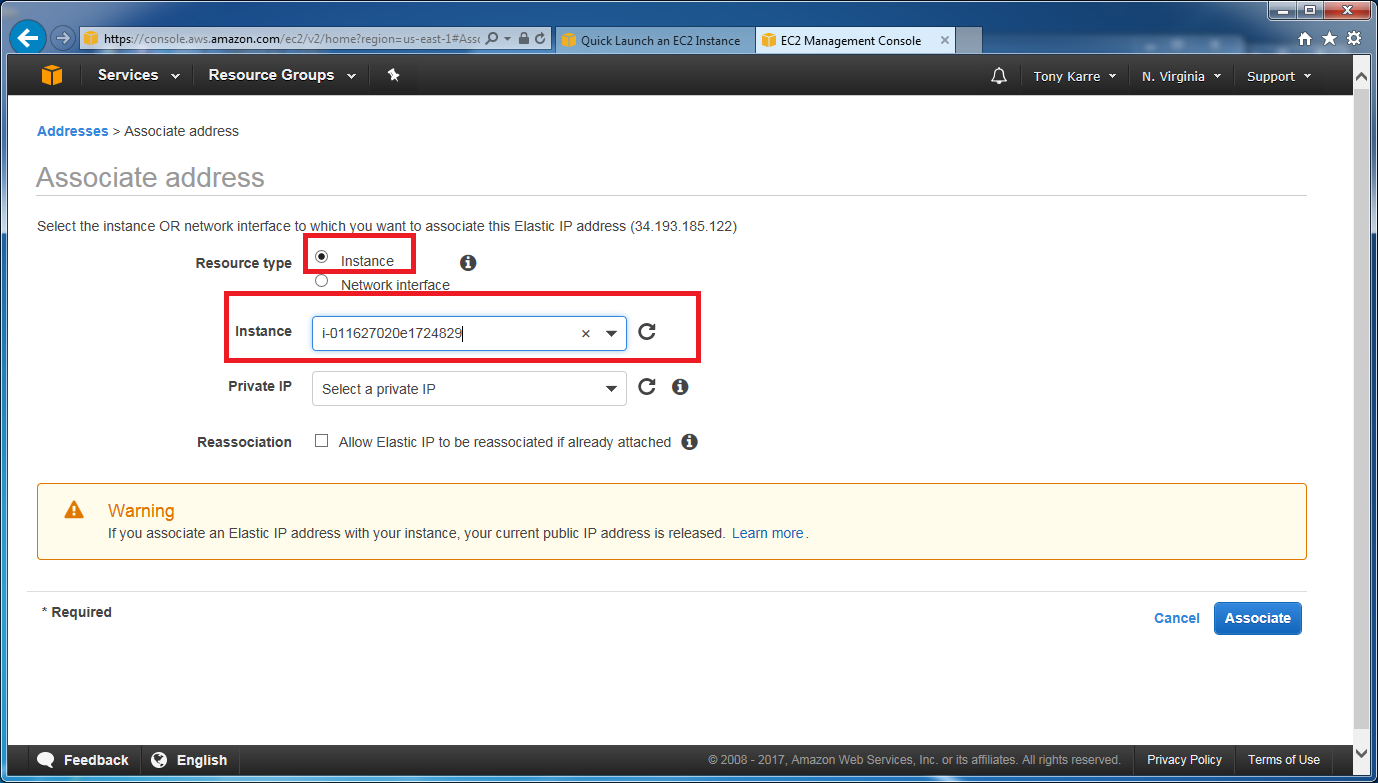
On this page, choose the “instance” option, then in the “instance” pulldown field choose the new running instance (in our example, “OpenVPN” can be seen before you click on it). Then click the “Associate” button.

Our new static IP address has been successfully associated with our server. Click Close to return to the dashboard.
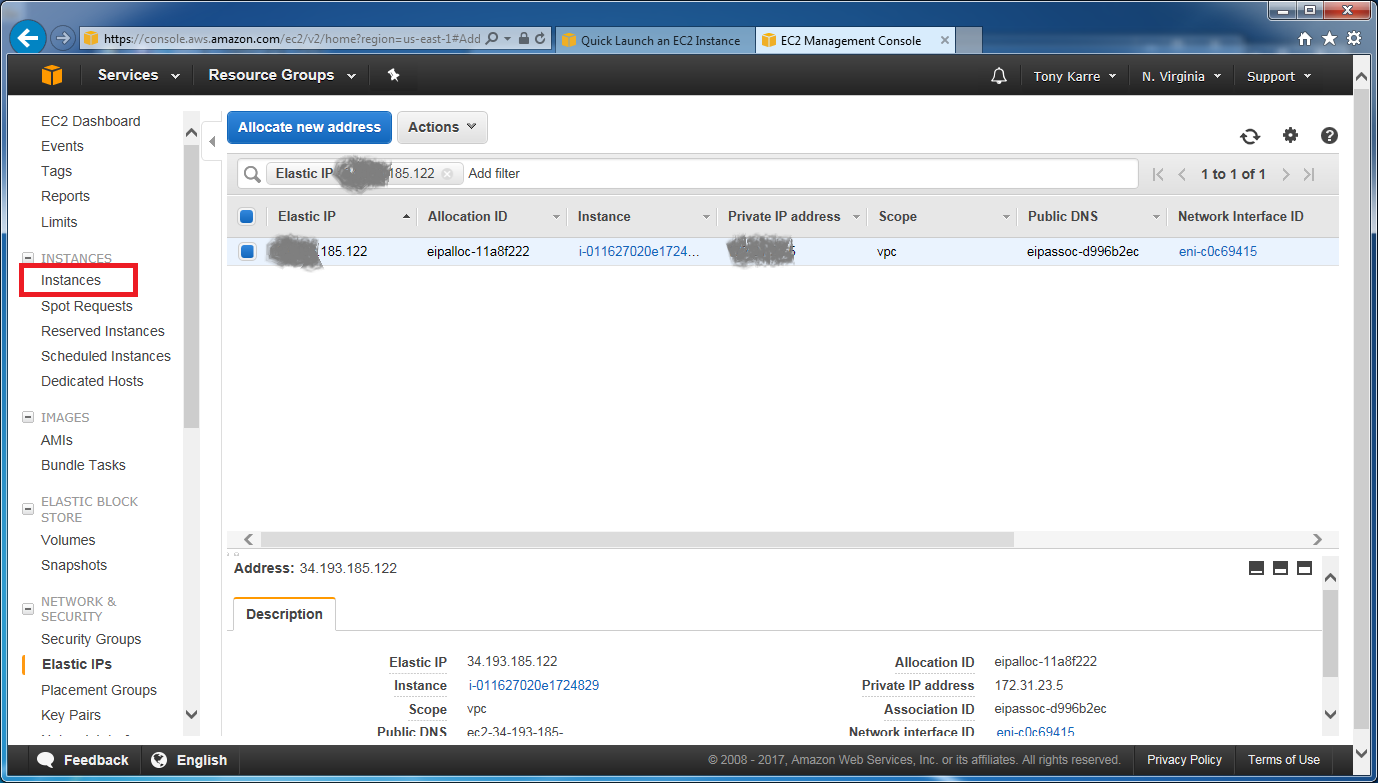
Now click on the “Instances” link in the left-hand nav. This will take us to the Instances dashboard where we can make one final adjustment. We need to enable “Termination Protection”. This will ensure that we don’t accidentally blow away our instance if we happen to choose “Terminate” instead of “Stop” when we are trying to shutdown our instance state later. To get there, click the Actions button as before, then choose “instance settings”, then “Change Termination Protection”.
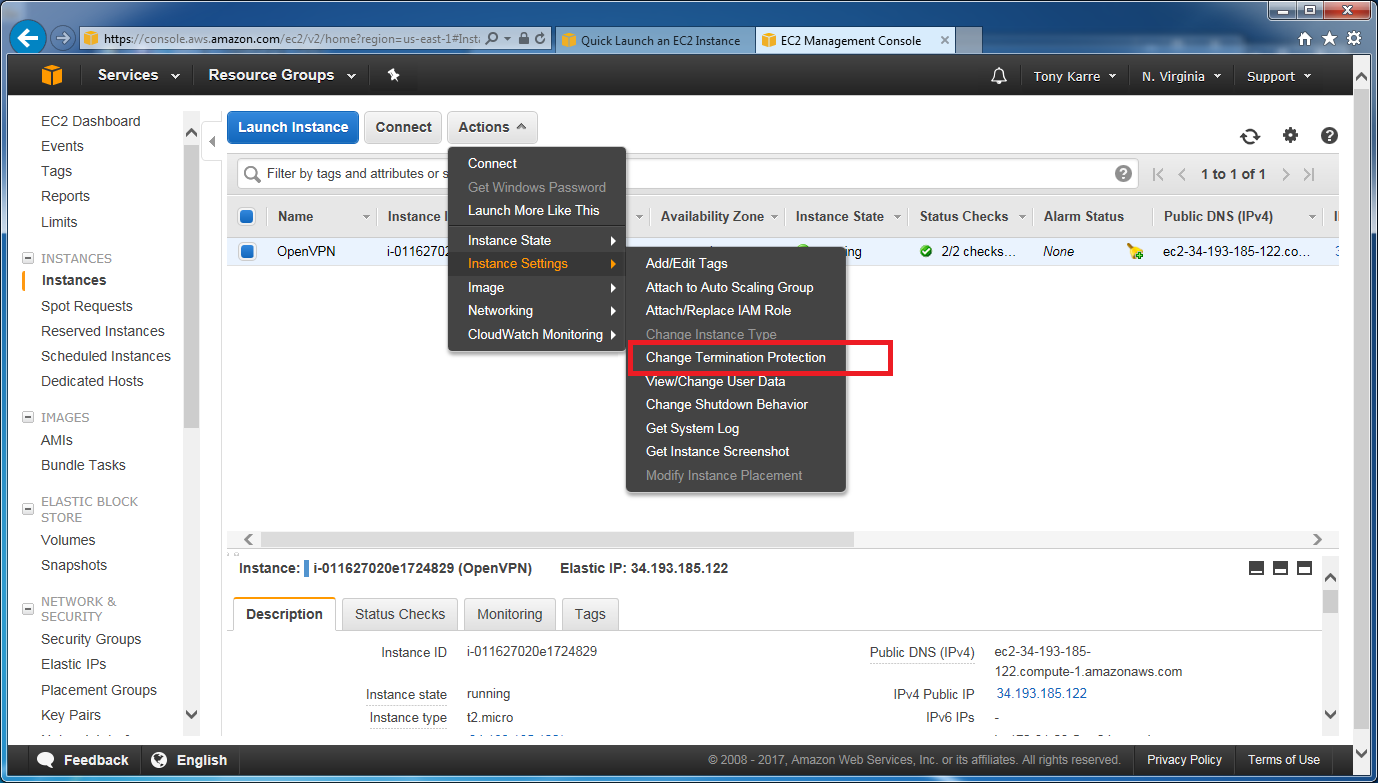
When the “Change Termination Protection” action is selected for the instance, the following window appears:
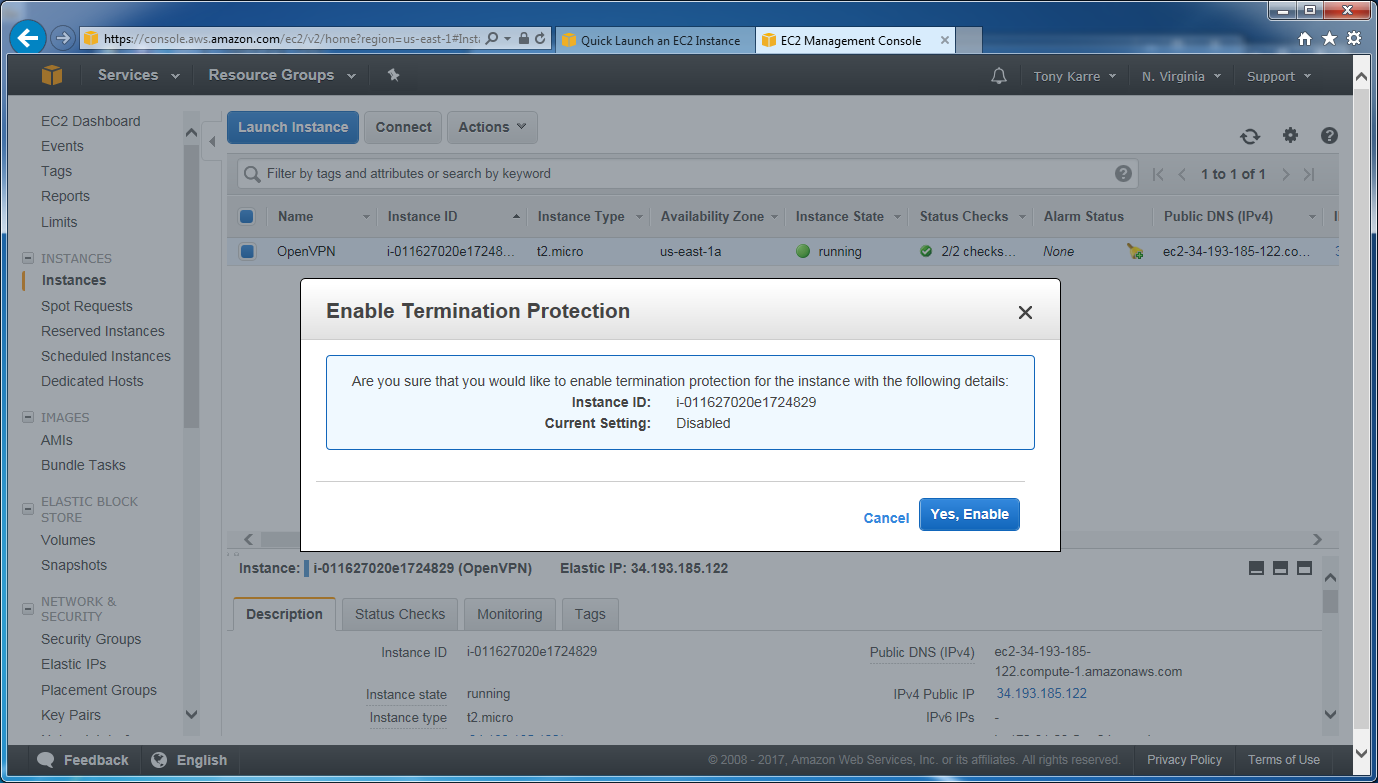
Choose “Yes, enable”. This will return us to the dashboard. At this point we have a running AWS instance! Let’s logout of the AWS Management Console and begin the VPN software configuration.
Configure the VPN Server Software
To configure the VPN Server software, we need to login to the server from our Windows PC via SSH. Remember the key file that we downloaded earlier (the file named OpenVPN.pem)? Our first step is to convert that key file from “pem” format to “ppk” format. We’ll then use the transformed key with puTTY to login to our server via SSH.
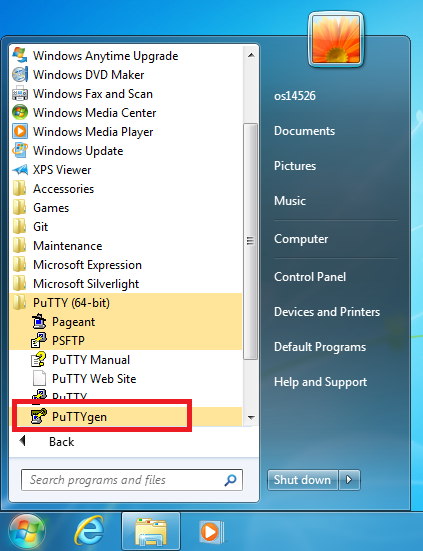
In Windows, run the “PuTTYgen” application.

Click the “Load” button, then find and select the OpenVPN.pem key file we downloaded earlier. You’ll need to change the filter in the “file open” dialog box to “all files” in order to see the pem file. Once you select the file, the puTTYgen application will automatically load it, ending with this message:
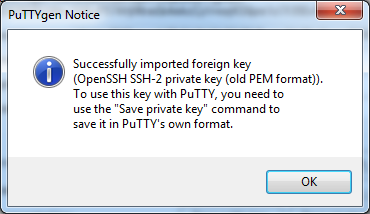
Click OK.
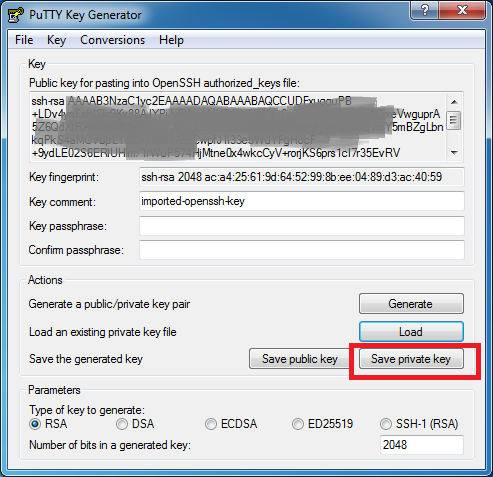
You’ll notice that the key data has been imported into the tool. Now click the “Save private key” button to save in the desired “ppk” format. Since I didn’t specify a passphrase, I’ll get a warning message. For this example, I’ll just acknowledge the warning and continue. A “file save” dialog box will then appear. Type “OpenVPN” for the filename to get a new key file with the name OpenVPN.ppk.
You can now quit the PuTTY key generator program by clicking the red X in the upper right of the window.
At this point we now have a ppk key file that we can use to login to our AWS server. Let’s do that now. Start by opening the PuTTY application.

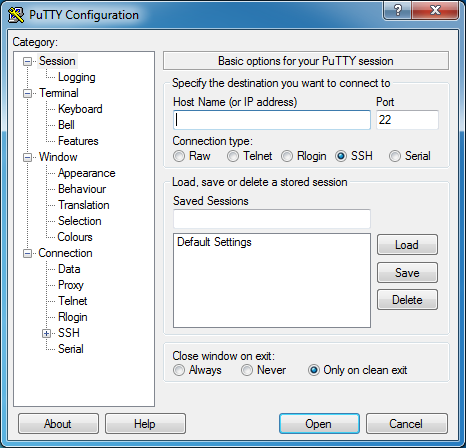
We need to provide two pieces of data. First, we need to provide the IP address of our server. The IP address we need is the “Elastic IP” address from earlier. This is the public IP address of our VPN Server. Type that IP address into the “Host Name (or IP address)” field. Then, in the left-hand category menu, expand the “SSH” category and click on “Auth”.

After you select the “Auth” category, browse for the OpenVPN.ppk private key file that we created a moment ago. Now return to the “Session” category at the very top of the list.
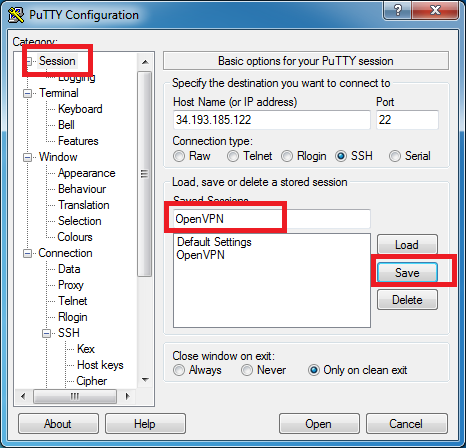
Save our session configuration data for later use by giving it a name (“OpenVPN”), then clicking the “Save” button. After clicking Save, “OpenVPN” will appear in the list of saved settings as seen above. Later, you can “Load” the OpenVPN stored session file to speed up the login process.
Now let’s login. Choose the new saved OpenVPN session, then click the “Open” button.

After clicking the Open button, PuTTY will open a SSH command line window with a “first time” warning about the server we are connecting to.
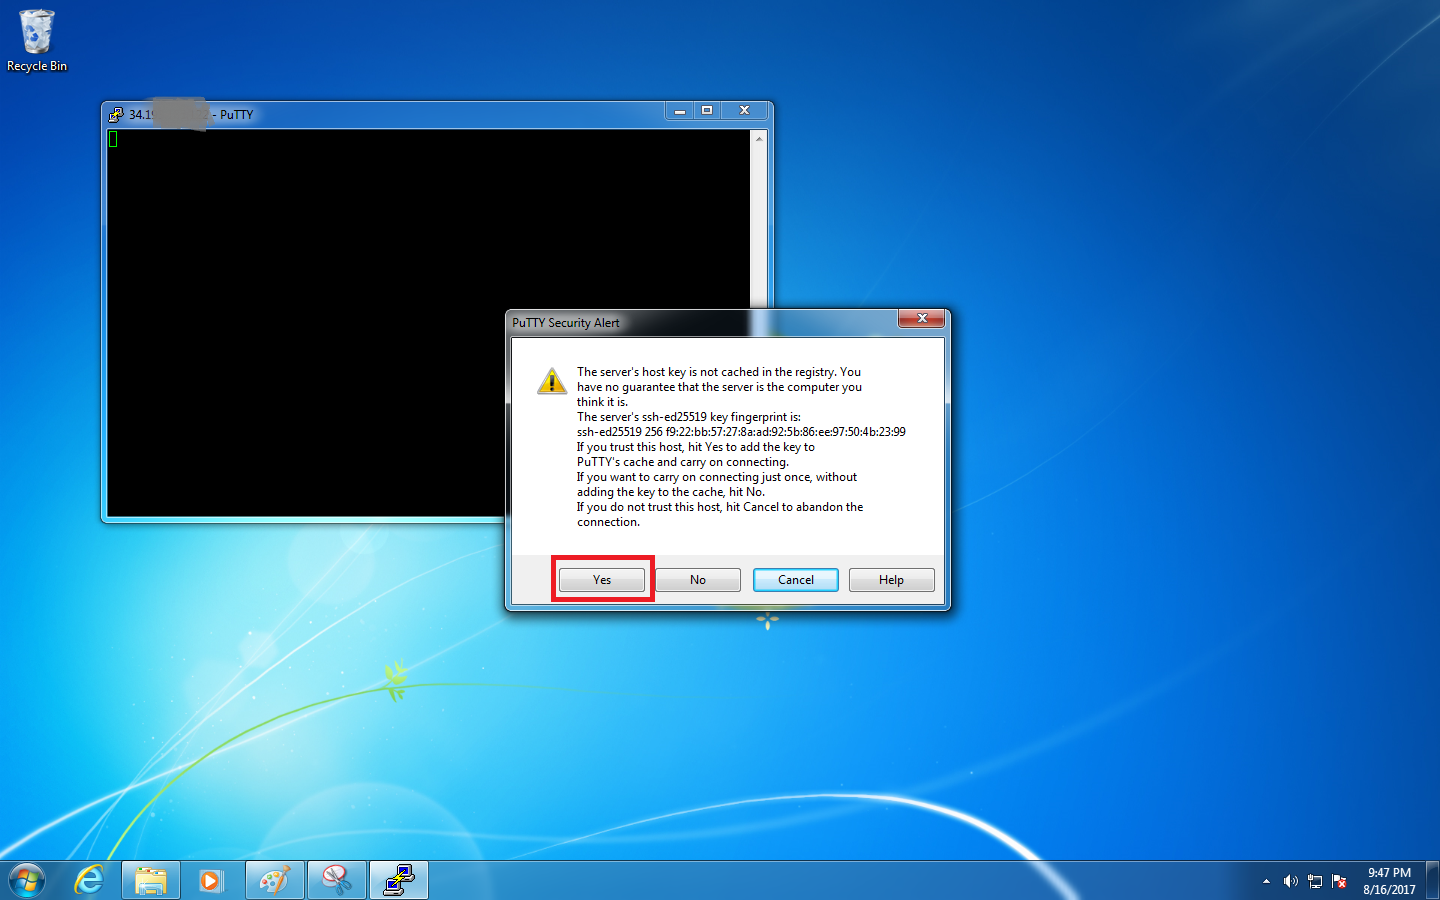
Click the “Yes” button to continue.
In the command line window, you will see a “login as” prompt. type ubuntu (the default AWS ubuntu instance username is “ubuntu”), then hit return. The system will authenticate you via the private key file.
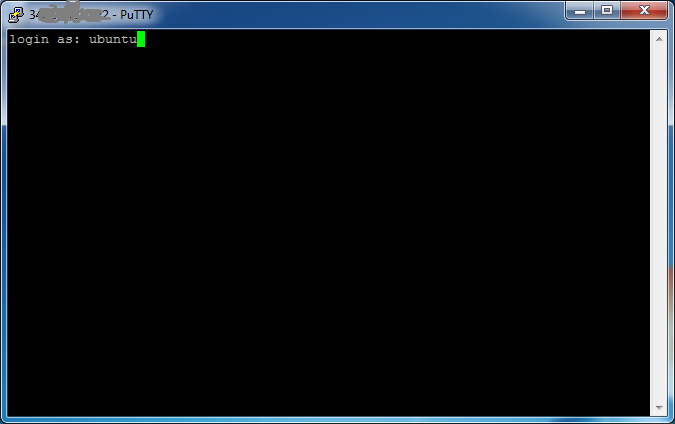
We have successfully logged in! Now let’s update our system to make sure it has the most available patches. Enter the following commands:
sudo apt-get update

sudo apt-get upgrade
The “upgrade” command will ask you to type “Y” as an “are you sure” response if there are patches to install.
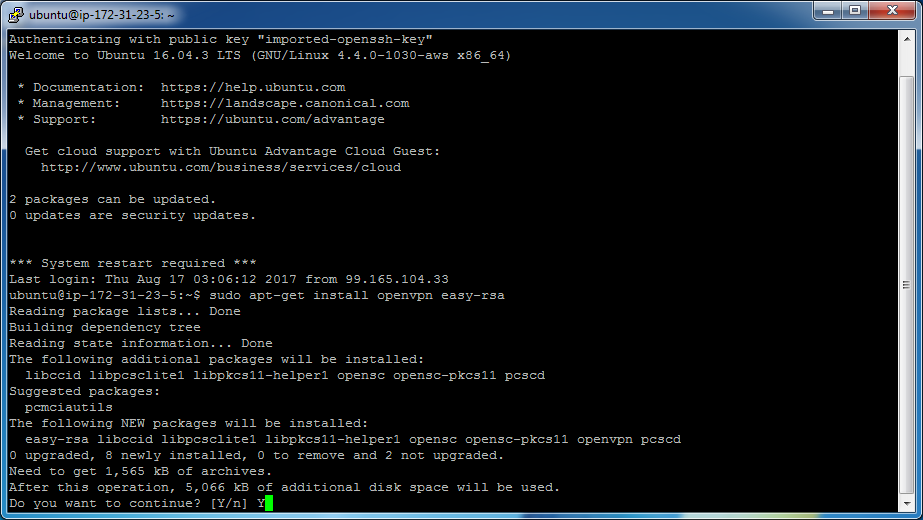
Now let’s install the VPN software. We’ll choose OpenVPN. At the same time, we’ll install easy-rsa, which is a collection of utilities that we need to generate the various encryption keys we’ll need.
Enter the following command:
sudo apt-get install openvpn easy-rsa
For the next series of commands, we’ll run as the “root” user (the Linux equivalent of the admin user). The following command will give us a root shell:
sudo su -
In the screenshot below, notice how the command line prompt changes to indicate root access. Now extract the base server.conf file
gunzip -c /usr/share/doc/openvpn/examples/sample-config-files/server.conf.gz > /etc/openvpn/server.conf

Run the make-cadir script to copy over some necessary files from /usr/share/doc/openvpn/examples/ and create a working directory. Then, change our current directory to the directory we just created.
make-cadir /etc/openvpn/easy-rsa

cd /etc/openvpn/easy-rsa/

Next, create a symbolic link from openssl-1.0.0.cnf to openssl.cnf.
ln -s openssl-1.0.0.cnf openssl.cnf

Now let’s create several keys that we will need to connect to our VPN. After we create the keys, we’ll edit the server configuration file so it references the new keys.
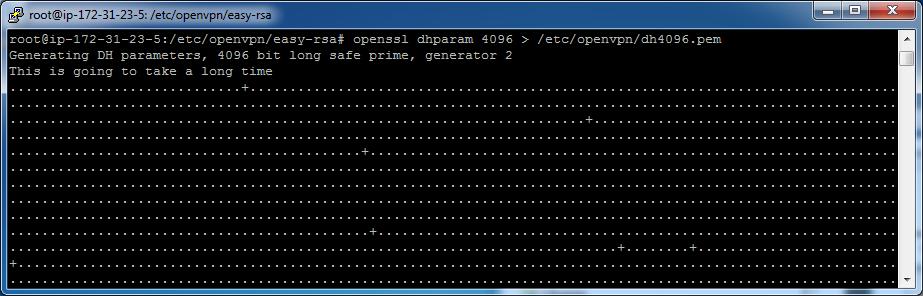
Create the Diffie-Hellman pem file (this may take a few minutes to run):
openssl dhparam 4096 > /etc/openvpn/dh4096.pem

Prep for the key generation steps:
mkdir keys

source ./vars

./clean-all

Generate the ta.key file:
openvpn --genkey --secret /etc/openvpn/easy-rsa/keys/ta.key

Generate the root key. In this step, the key generation utility will ask several questions, answers to which will be stored in the key itself. You can supply any answers that make sense for your situation:
./build-ca

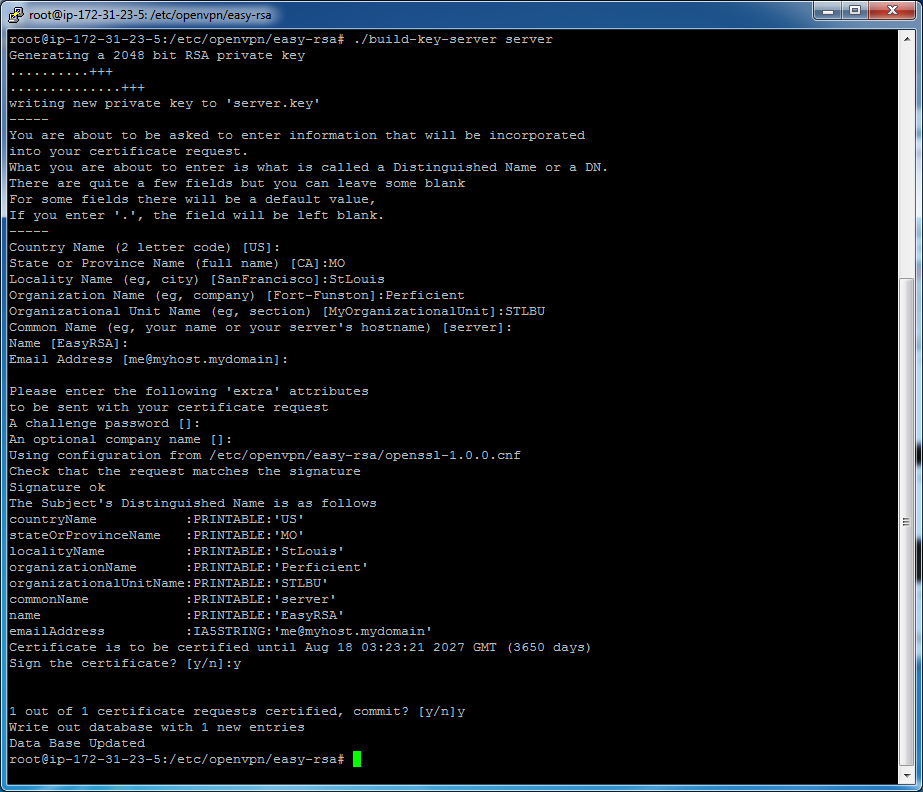
Build the server private key. You’ll need to answer similar questions.
./build-key-server server
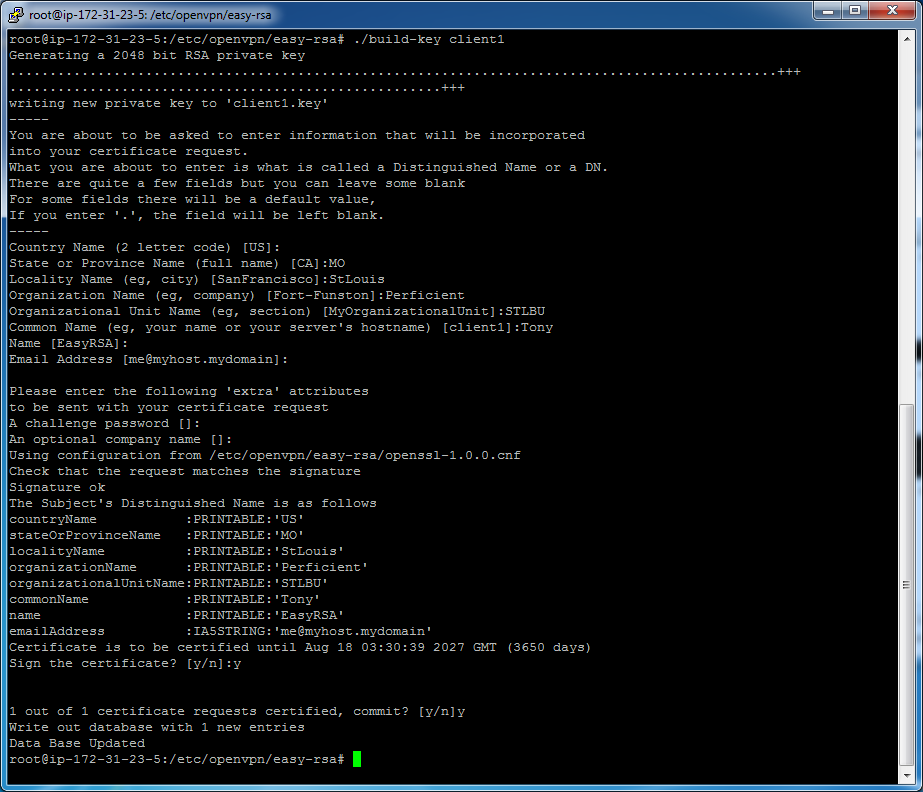
Now build a client key. Client keys can be generated separately for each distinct client that needs to connect to the VPN. We’ll create a single client key here, then later we’ll copy it down to our Windows PC.
./build-key client1

Avoid Contact Center Outages: Plan Your Upgrade to Amazon Connect
Learn the six most common pitfalls when upgrading your contact center, and how Amazon Connect can help you avoid them.
Now that we’ve generated several keys, we need to edit the server configuration file to point to the key files. We’ll use the Linux “nano” command-line text editor to perform these edits. After we have made the changes in the nano editor, we’ll type control-O to save the file, then control-X to exit the editor.
nano /etc/openvpn/server.conf
The following screenshot demonstrates how your command-line window appears when the editor is running:

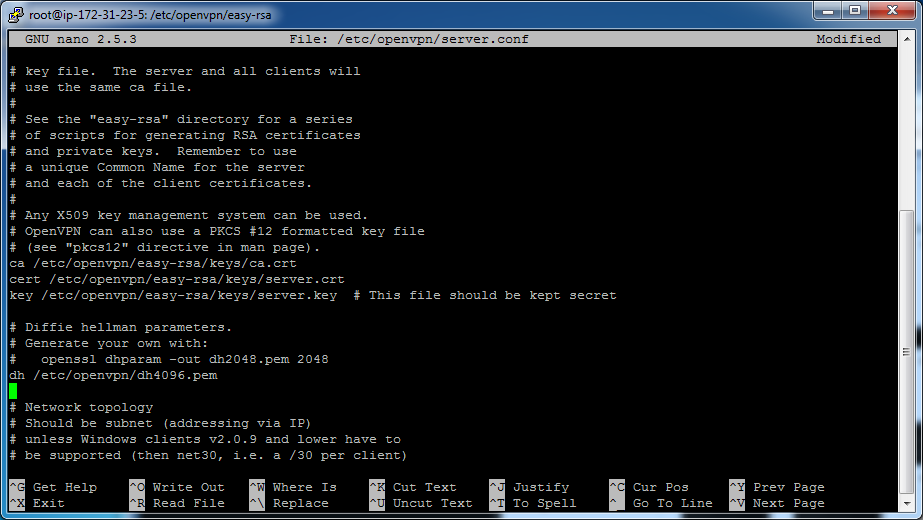
Now edit these lines in the file to make the file paths match the files we just created:
ca /etc/openvpn/easy-rsa/keys/ca.crt

cert /etc/openvpn/easy-rsa/keys/server.crt

key /etc/openvpn/easy-rsa/keys/server.key # This file should be kept secret

dh /etc/openvpn/dh4096.pem
In the following screenshot, you can see those lines after I edited them.
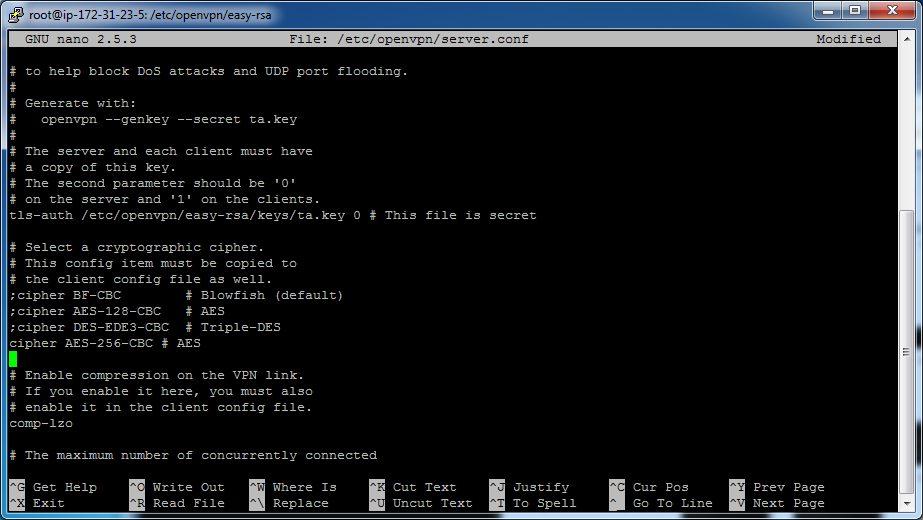
Now edit the tls-auth line to remove the leading semicolon, and to add the path to the file.
tls-auth /etc/openvpn/easy-rsa/keys/ta.key 0 # This file is secret
Then add the following line to the cipher section.
cipher AES-256-CBC # AES
Those two edits can be seen in the following screenshot.
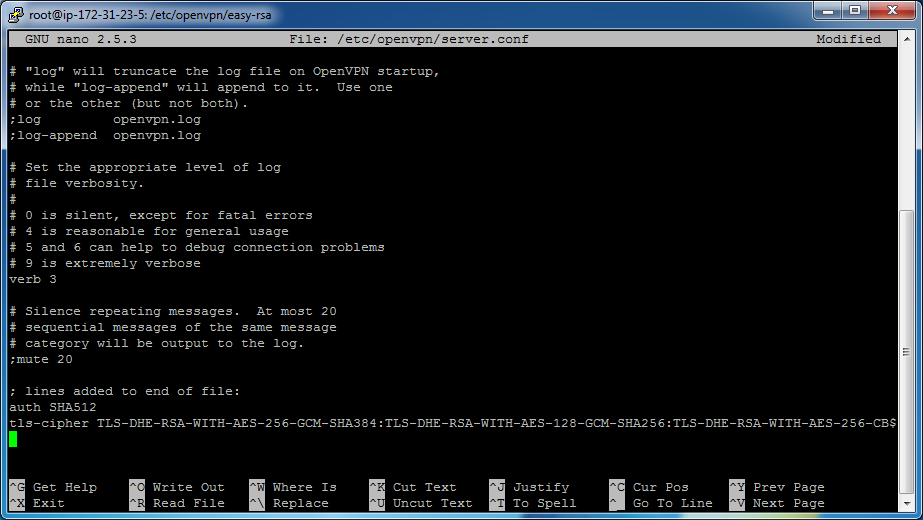
Now add these two lines to the end of the file:
auth SHA512

tls-cipher TLS-DHE-RSA-WITH-AES-256-GCM-SHA384:TLS-DHE-RSA-WITH-AES-128-GCM-SHA256:TLS-DHE-RSA-WITH-AES-256-CBC-SHA:TLS-DHE-RSA-WITH-CAMELLIA-256-CBC-SHA:TLS-DHE-RSA-WITH-AES-128-CBC-SHA:TLS-DHE-RSA-WITH-CAMELLIA-128-CBC-SHA
These two lines can be seen in the following screenshot:
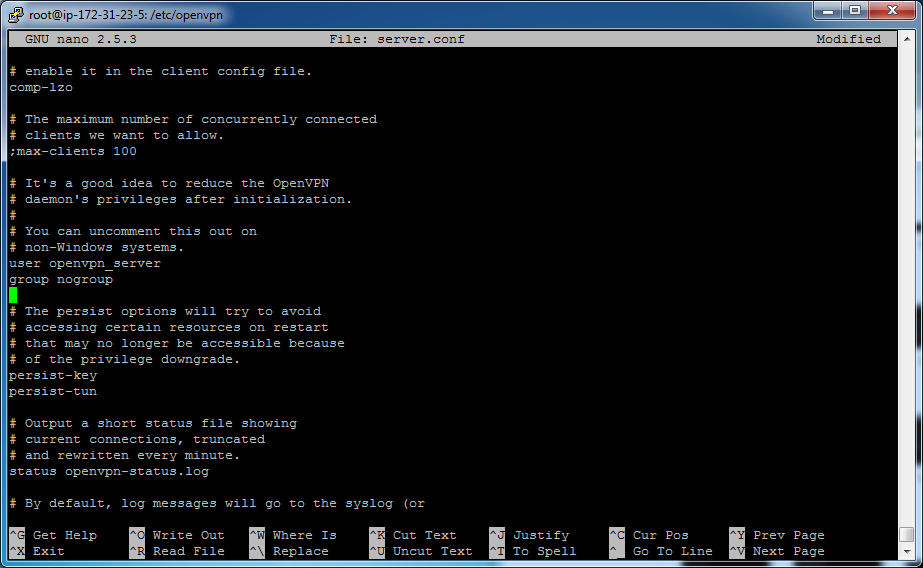
Now let’s edit the “user” lines in the file. These will tell the VPN server software to run in the context of an unprivileged user that we will create shortly. This is a security best practice. Find the user and group lines, remove the leading semicolon, and change the username to “openvpn_user”:
user openvpn_server

group nogroup
These edits are seen in the following screenshot:
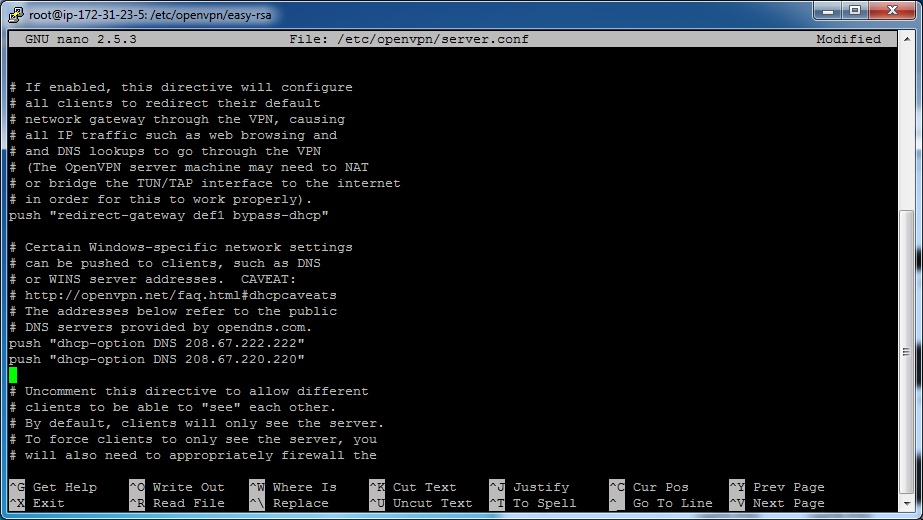
Enable some “push” directives that will enable the VPN tunneling feature. The first push directive will tell the client to route internet traffic out the tunnel. The remaining push directives define the DNS configuration we want the clients to use. The DNS servers in these directives point to OpenDNS servers.
push "redirect-gateway def1 bypass-dhcp"

push "dhcp-option DNS 208.67.222.222"

push "dhcp-option DNS 208.67.220.220"
The following screenshot illustrates how we removed the leading semicolon to enable the directives.
Now we’ve completed the edits to the server.conf file. Type control-O to save the file, then control-X to exit the nano editor.
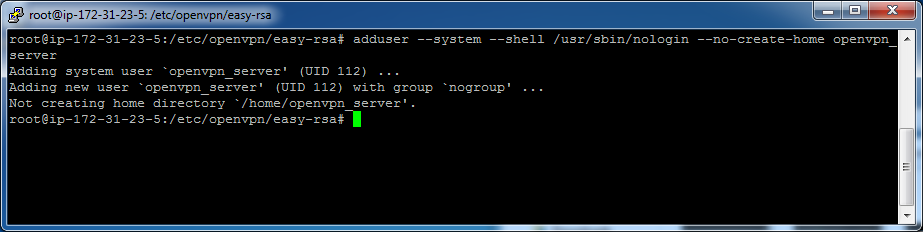
Let’s continue by creating the openvpn_server user account that we specified in the server.conf file. This user will run the openvpn server software process.
adduser --system --shell /usr/sbin/nologin --no-create-home openvpn_server
We need to tell the networking software (iptables) on our server to route traffic from VPN clients out to the internet (via eth0) and then we need to turn on ipv4 forwarding.
Start by installing the iptables-persistent utility. This utility will allow us to save changes to settings that we make to our Linux iptables.
apt-get install iptables-persistent
Answer “Y” to all questions.
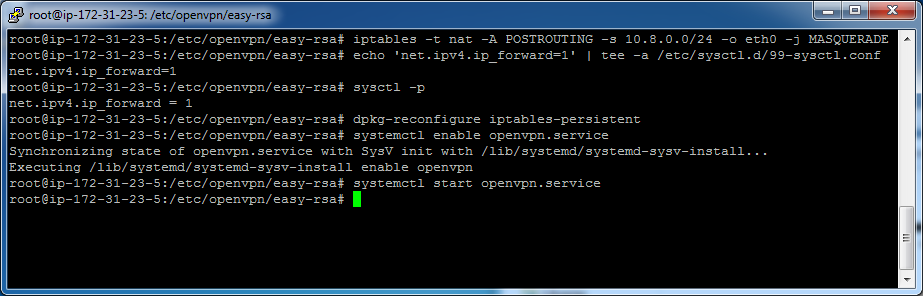
Now continue with the following commands.
iptables -t nat -A POSTROUTING -s 10.8.0.0/24 -o eth0 -j MASQUERADE

echo 'net.ipv4.ip_forward=1' | tee -a /etc/sysctl.d/99-sysctl.conf

sysctl -p
Save the iptables routing rules
dpkg-reconfigure iptables-persistent
Enable and start the VPN service.
systemctl enable openvpn.service

systemctl start openvpn.service
Let’s do a quick check to see if our new VPN service is running. If it is running, then it will be listening for connections on UDP port 1194. A good way to check that is with the netstat command.
netstat -an

In the screenshot above, we can see a UDP listener on port 1194. If you don’t see this, then it’s possible that something went wrong during startup. If this is the case, enable logging in the server.conf file. In the following screenshot, you can see where I’ve enabled the log-append directive. Now I can look in /etc/openvpn/openvpn.log to see what is happening.

If you enable the log-append directive after the VPN server is started, you’ll need to restart it to force it to re-read the server.conf file (sudo is needed if you are not root at the time).
sudo systemctl restart openvpn.service
Now let’s create an OpenVPN client-side file. This file will eventually contain all of the settings that our clients require to connect to our VPN. Create the file from a template, and change the file permissions to make this file readable by the ubuntu user.
cp /usr/share/doc/openvpn/examples/sample-config-files/client.conf /home/ubuntu/client.ovpn

chmod +r /home/ubuntu/client.ovpn

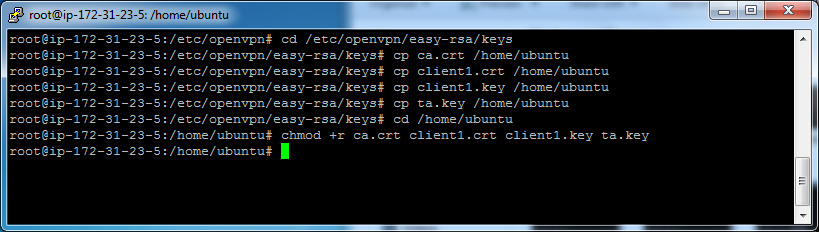
Now copy the necessary key files to /home/ubuntu so we can copy them down later. After we copy the files, we’ll change the file permissions to make them readable for downloading later.
cd /etc/openvpn/easy-rsa/keys

cp ca.crt /home/ubuntu

cp client1.crt /home/ubuntu

cp client1.key /home/ubuntu

cp ta.key /home/ubuntu

cd /home/ubuntu

chmod +r ca.crt client1.crt client1.key ta.key
Now that we have staged the files, we can now move back to our Windows PC and start setting up our OpenVPN client. Type “exit” to drop out of our root user, then type “exit” again to completely log off.
Install, configure, and test the VPN client software on our Windows PC
In your web browser, navigate to the OpenVPN Downloads page.
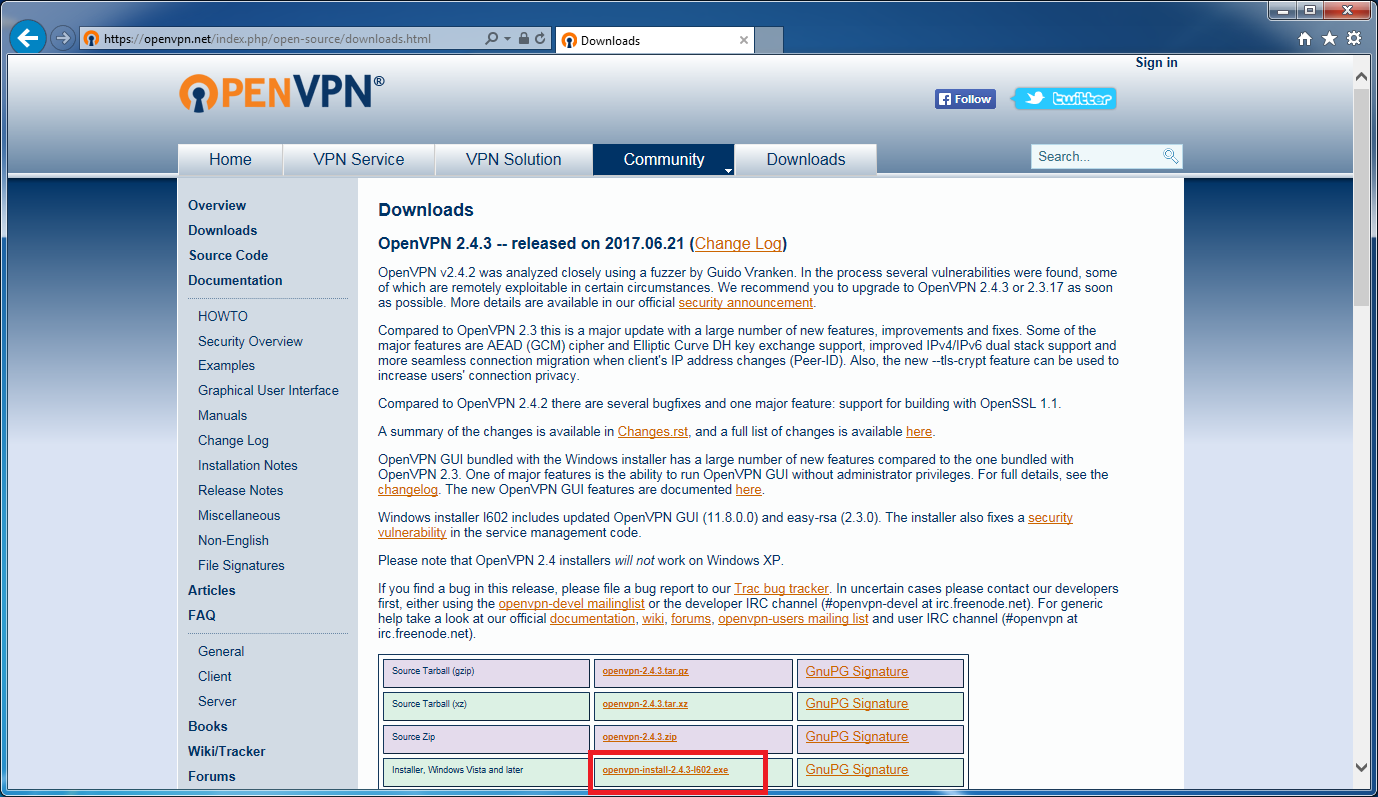
Click on the link for the “openvpn-install-2.4.3-i602.exe” installer and save the file (save it, rather than immediately run it, in case we need it later).
After you save the file, double-click on it to launch it.
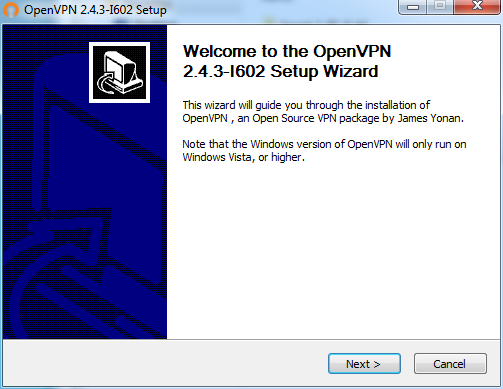
Click Next.
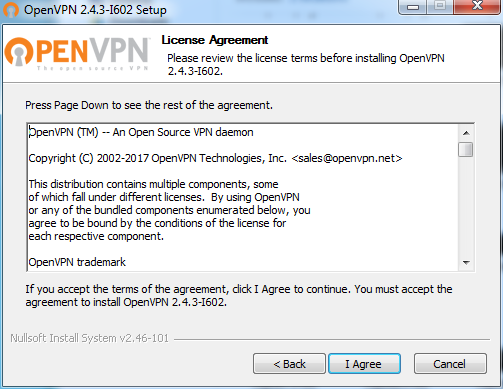
Click the “I agree” button.
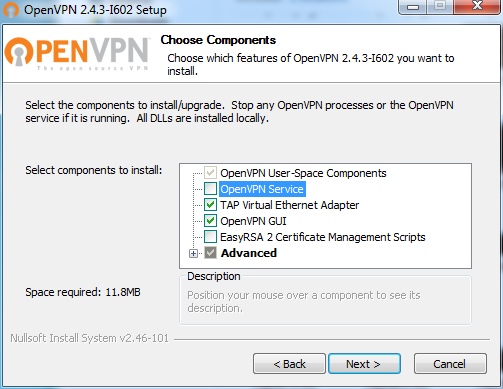
Uncheck the “OpenVPN Service” checkbox – we won’t be installing a VPN server on our Windows PC. We just need the client software. Click the Next button.
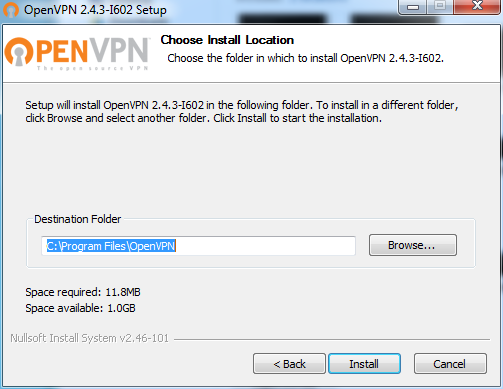
Keep the default destination folder, then click Install.
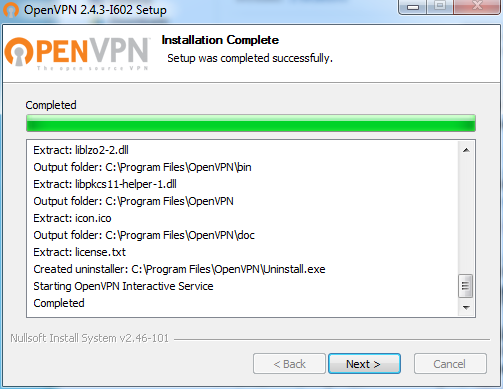
Click the Next button.
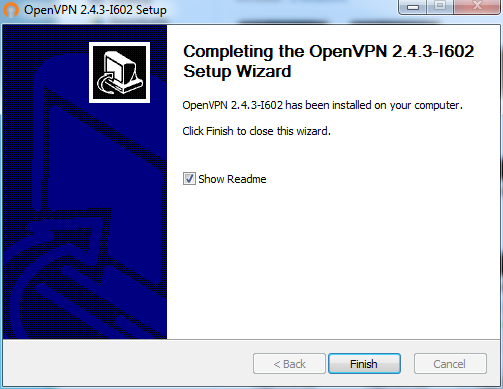
Leave the “Show Readme” checkbox checked, then click the Finish button.
After clicking Finish, the Readme file appears. Reading that file, we see that the following directory has been created:
C:\Program Files\OpenVPN\config
We need to copy all of our client-side key and configuration files into this directory. At this point, they are still on the server, so we’ll copy them down using pscp, which is the PuTTY secure copy utility.
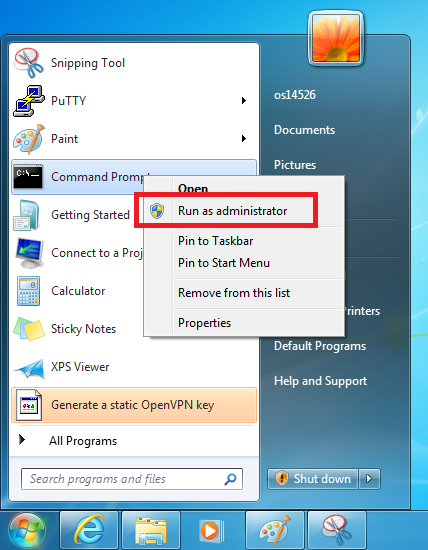
Start by opening a Windows command-line window so we can use pscp. Right-click on the command prompt shortcut and “Run as administrator”. We will be copying files into a program files directory, and we need admin privileges to do that.

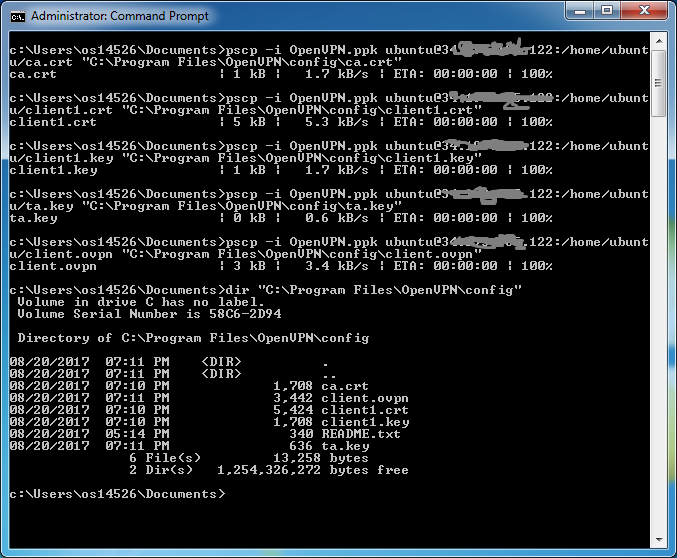
Note in the above screenshot that I changed my directory to my own documents directory, which is the directory where we stored the OpenVPN.ppk file. We’ll be using this file to identify ourselves when we perform the secure copy.
Let’s do that now. In the following commands, replace “your-IP-Address” with our AWS Elastic IP address. This is the same one that we used earlier to login to the ubuntu server.
pscp -i OpenVPN.ppk ubuntu@your-IP-Address:/home/ubuntu/ca.crt "C:\Program Files\OpenVPN\config\ca.crt"

pscp -i OpenVPN.ppk ubuntu@your-IP-Address:/home/ubuntu/client1.crt "C:\Program Files\OpenVPN\config\client1.crt"

pscp -i OpenVPN.ppk ubuntu@your-IP-Address:/home/ubuntu/client1.key "C:\Program Files\OpenVPN\config\client1.key"

pscp -i OpenVPN.ppk ubuntu@your-IP-Address:/home/ubuntu/ta.key "C:\Program Files\OpenVPN\config\ta.key"

pscp -i OpenVPN.ppk ubuntu@your-IP-Address:/home/ubuntu/client.ovpn "C:\Program Files\OpenVPN\config\client.ovpn"
Because we need to edit the client.ovpn file here on our Windows machine, we’ll need to convert the linux end-of-line characters into DOS end-of-line characters or this file will be very confusing to look at. We’ll run a quick powershell command to fix this. In our command-prompt window, change our directory to where the files are located.
cd c:\program files\openvpn\config
Now run powershell (you will get a new powershell prompt).
powershell
Run the following command (we are now in powershell)
(Get-Content "client.ovpn") | Set-Content "temp.ovpn"
Exit powershell
exit
Now delete the original file, and rename it “client.ovpn”
del client.ovpn

ren temp.ovpn client.ovpn
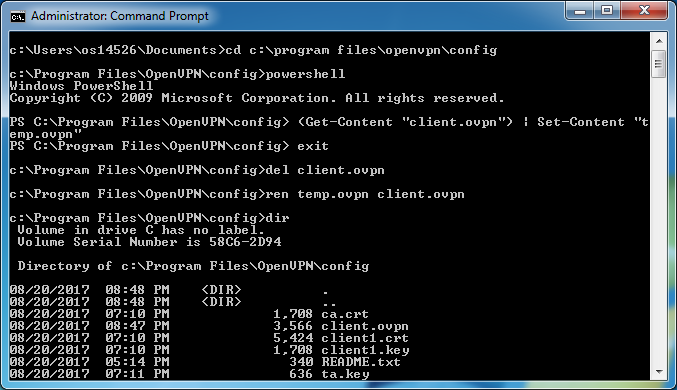
Type exit in the command prompt window to close it.
Now let’s start up the OpenVPN client. It won’t be able to connect to the VPN yet, because we haven’t edited the client.ovpn file yet. However, the OpenVPN client has an editor built in that we’ll use for that task.
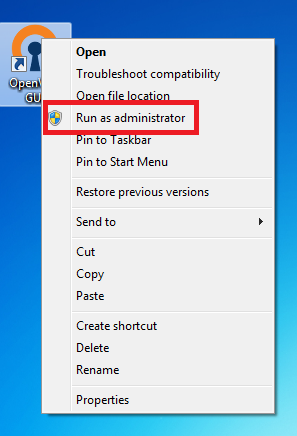
Run the OpenVPN GUI by right-clicking the desktop shortcut, then choosing “Run as administrator”.
When we run it, we notice that nothing seems to happen – no GUI window is left on the desktop. However, if we look in the system tray on the bottom right of the desktop, we see a new icon of a window with a padlock. This is how we interact with the OpenVPN client.

Right-click on the padlock icon to pop the contextual menu.
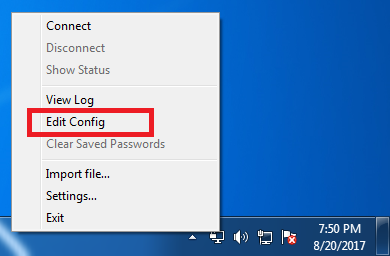
Choose “Edit Config”.
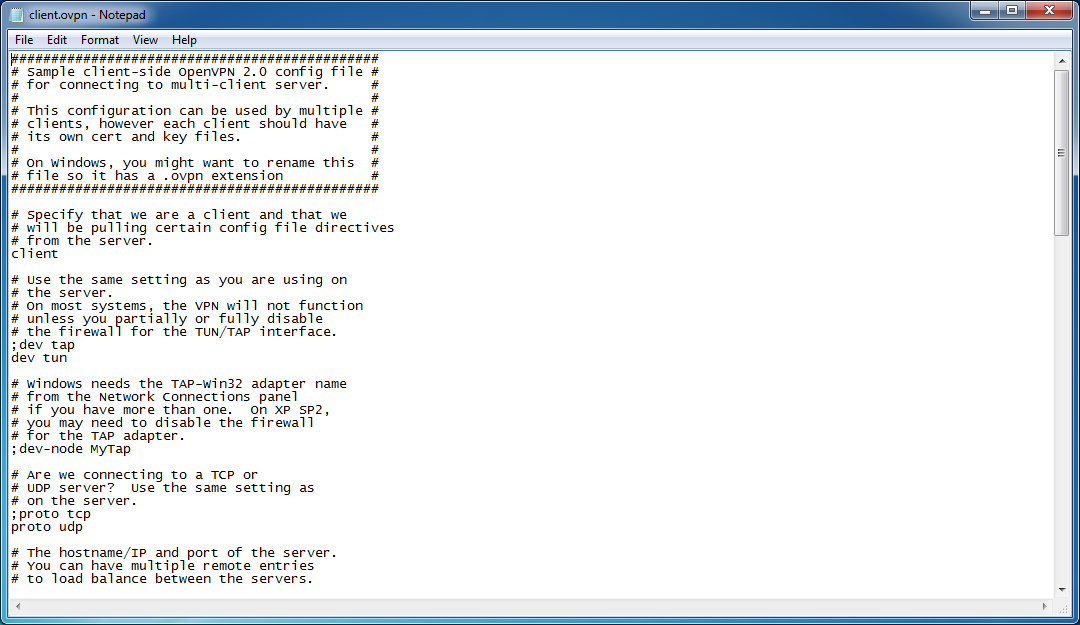
The OpenVPN GUI launches a notepad file with our config file in it. Let’s edit all of the required settings.
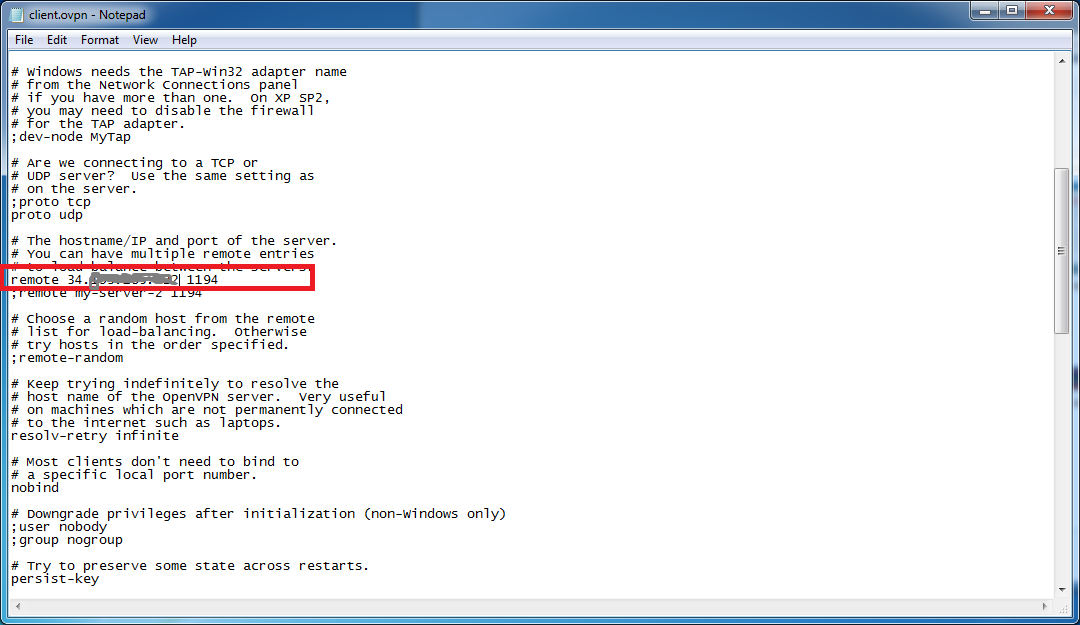
First update the “remote” directive to reflect the actual IP address that we are connecting to. Like before, this is your Elastic IP.
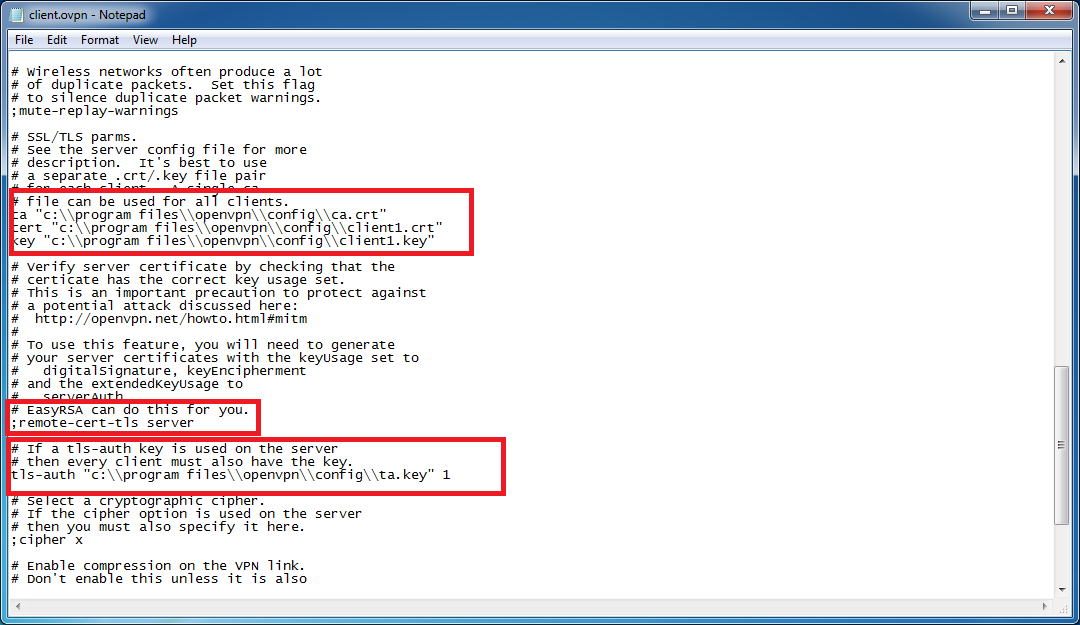
Add the directory paths to the ca, cert, key, and tls-auth files. For the backslashes in the file directory strings, use double-back-slashes “\”. Then enclose the full file path in double-quote characters. See the following screenshot as an illustration.
Also add a semicolon to the remote-cert-tls directive to disable it.
Add the following lines to the end of the file. These are required because we have specified them on the server-side.
cipher AES-256-CBC # AES

auth SHA512
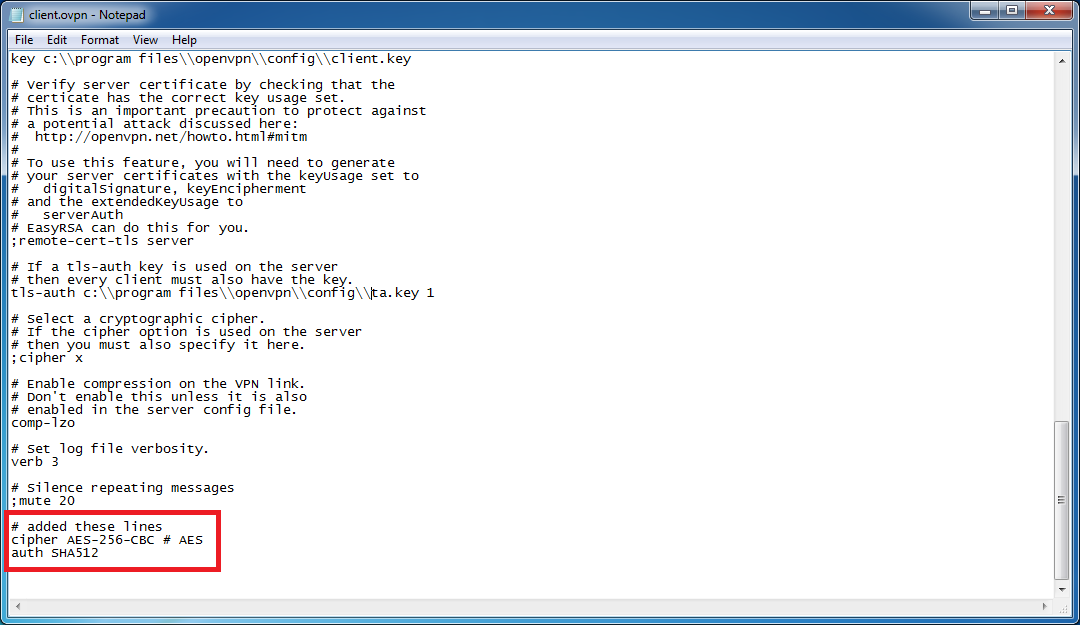
Save the file, then exit notepad.
Now go back to the OpenVPN icon in the system tray, right-click on the icon, then choose “connect”.
An OpenVPN window will appear briefly, revealing a running log of the connection process. Once the connection has completed, the lock icon in the system tray will turn green.
![]()
If you get an error message from OpenVPN (it will popup if the connection fails), then choose the “View log” menu selection from the OpenVPN system tray icon. Information contained in the log should provide additional clues on how to fix the problem.
Test the VPN
Now that we have a connection, we’ll use the www.dnsleaktest.com website to test two things:
- That our internet traffic is being routed up the VPN tunnel and out the VPN Server
- That our DNS requests are also being routed up the VPN tunnel
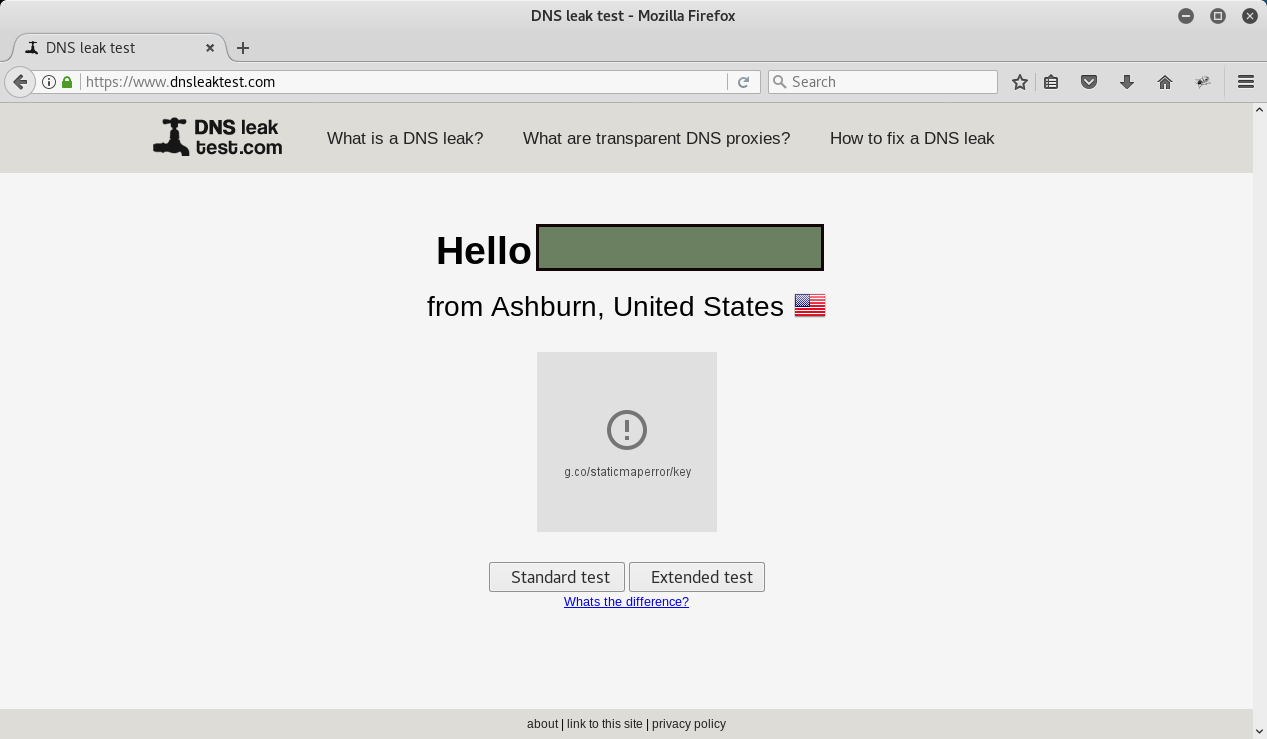
First, use our browser to visit www.dnsleaktest.com.
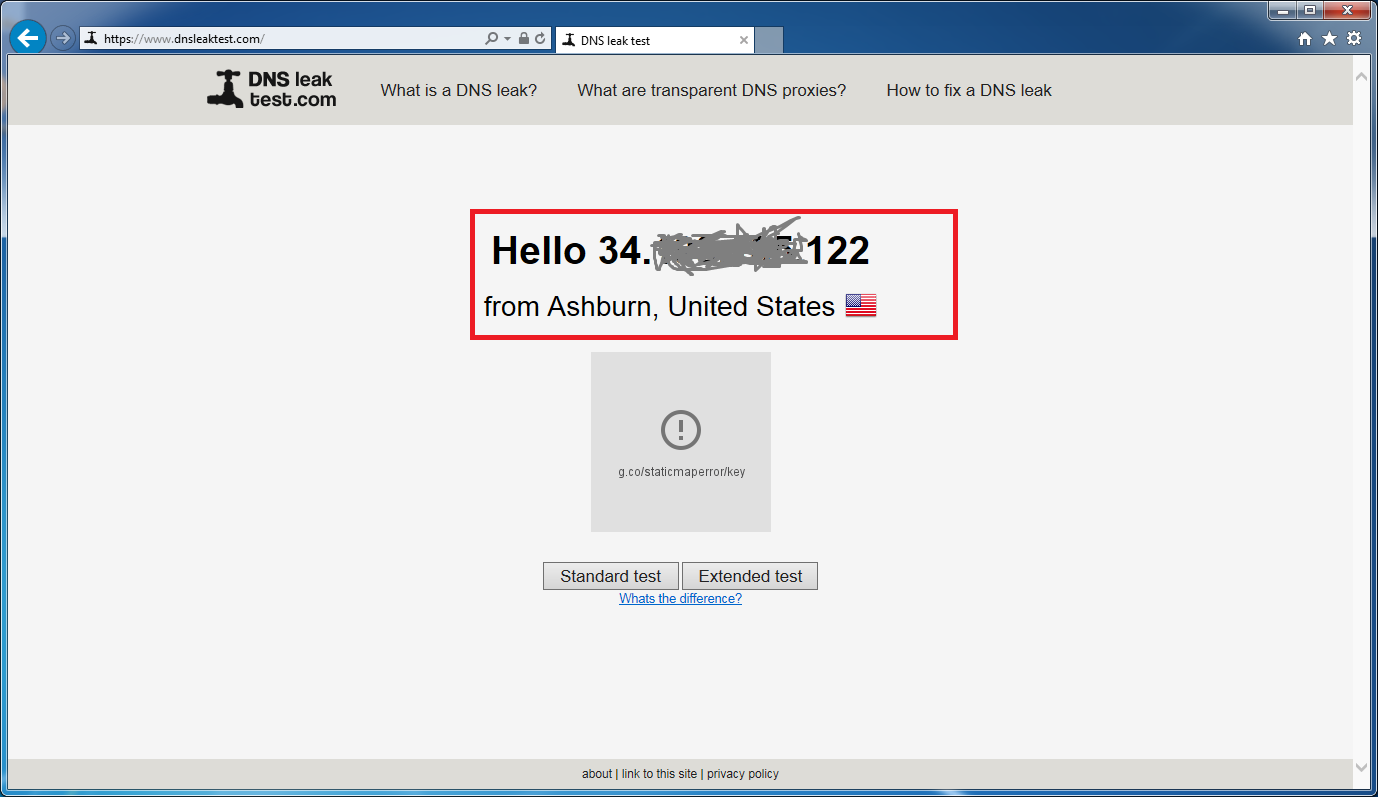
If our traffic is exiting the AWS VPN Server, we will see the public IP of our AWS server, which is the Elastic IP address that we’ve been using in our configuration. If the VPN isn’t running or our connection failed, then we’ll see our own public IP assigned by our Internet Service Provider.
The IP address seen in the screenshot above is, in fact, our AWS VPN Server. So far so good. Now let’s check the DNS. Click on the “Standard Test” button.
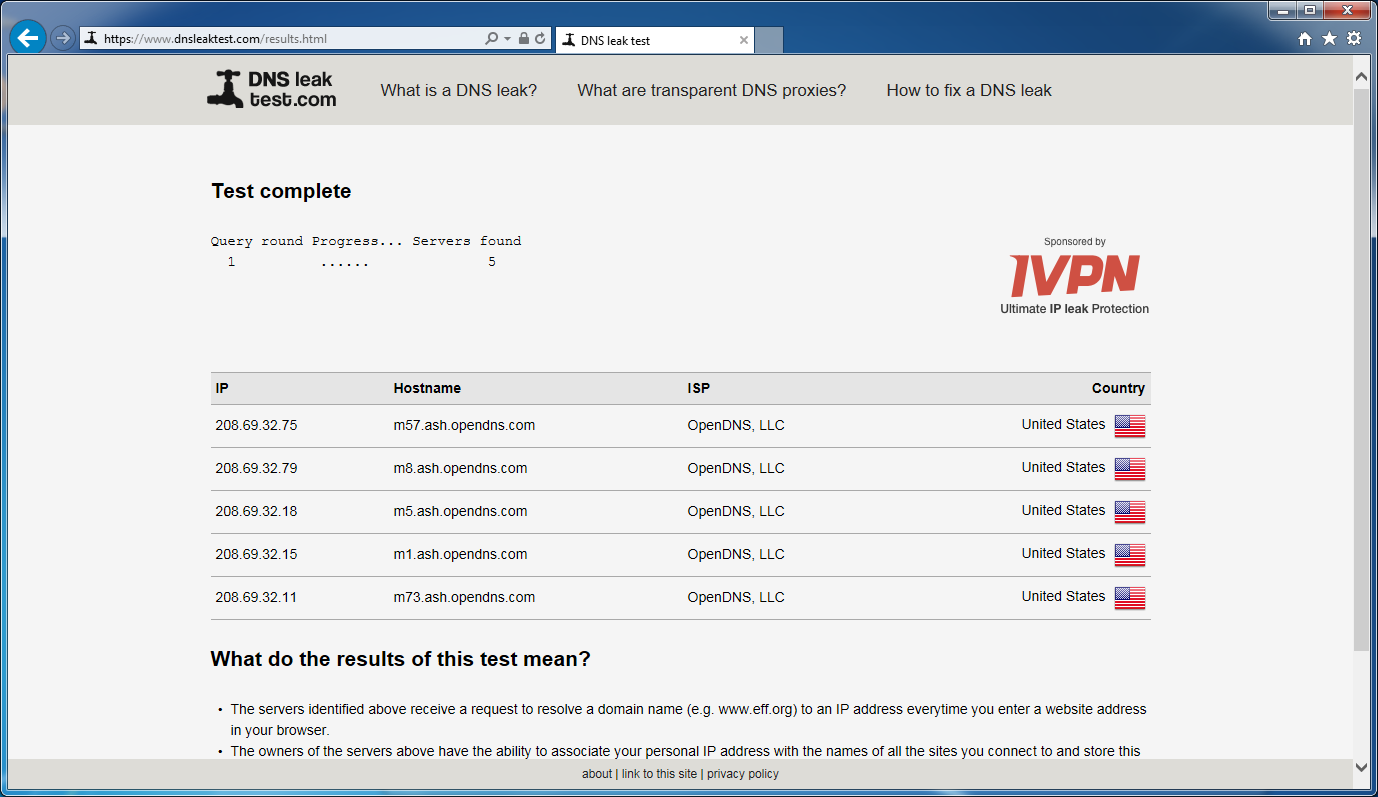
In our test results we’ll be closely looking at the list of hostnames. They should all be “OpenDNS” servers, and not hostnames from our own Internet Service Provider. In this case, we see that they all are OpenDNS servers, so no DNS leakage is occurring.
At this point all of our internet traffic is routing through the VPN, safe from prying eyes, and safe from our Internet Service Provider.
To disconnect from the VPN, simply go back to the lock icon in the system tray, right-click on the icon, then choose “disconnect”. At that point you could rerun the www.dnsleaktest.com test and observe that all reported IP addresses and hostnames match your Internet Service Provider.
Next Steps
We are now able to connect to our VPN. However, recall that we intentionally configured our AWS OpenVPN security group to only allow inbound traffic from our home IP. That means we can only connect to it from home. But now that we have it working, we might want to open it up so we can use our VPN from other locations. For instance, we might want to do the following:
- In our security group, add more inbound rules for other discrete IP addresses, such as our work IP address or another discrete location. To accomplish this, we’d “Add Rule”, specifying another Custom UDP rule for port 1194 at the address we specify.
- Simply open it up so we can connect from anywhere. In this case we’d edit our existing inbound rule, changing the source to “anywhere” (illustrated in the screenshot below).
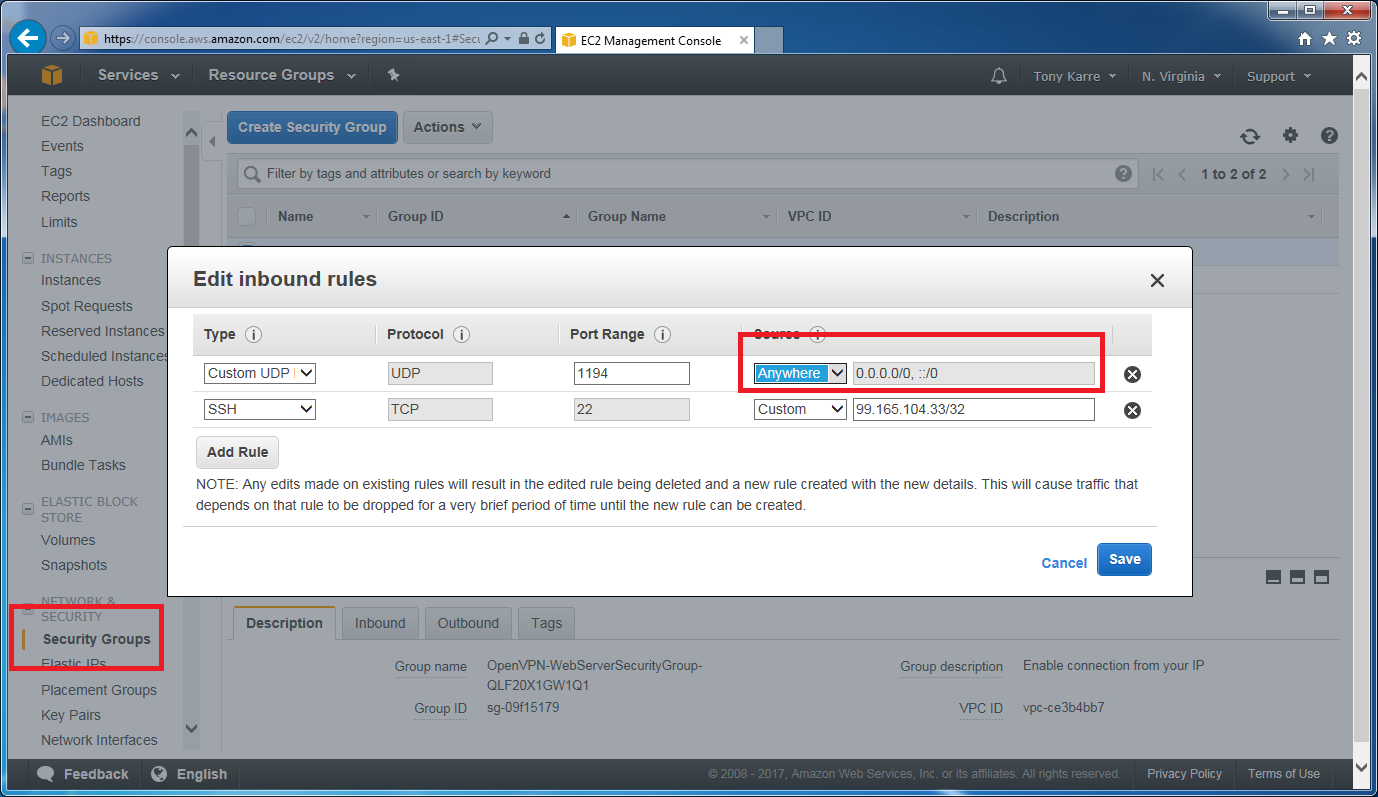
Remember, if you open up inbound access to “anywhere”, anyone with a valid key can connect. Don’t share your key files with others.
So at this point, if you are only interested in connecting from Windows, we are finished.
For those with a linux desktop, let’s keep going!
Install, configure, and test the VPN client software on our Linux PC
I’ll be configuring my Kali machine for this demonstration. Kali is a Linux-based security testing platform very similar to Ubuntu, and all the steps I’ll use should work just fine on Ubuntu. Other Linux releases will be similar, although specific commands may vary.
Kali already comes with openvpn software pre-installed. If you are running Ubuntu, however, you will likely need to start by installing openvpn using the exact same terminal window command that we used to configure our AWS server:
sudo apt-get install openvpn
We’ll also need to install openvpn support for the Gnome Network Manager (Kali and Ubuntu use the Gnome desktop). This will allow us to use the Network Manager GUI to create and use a VPN profile.
sudo apt-get install network-manager-openvpn-gnome
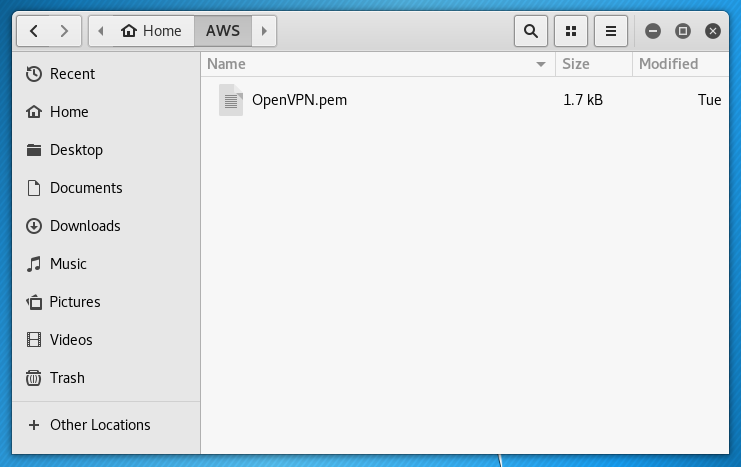
Let’s continue. Remember from earlier that we need the “OpenVPN.pem” identity key file to establish a secure SSH connection to my AWS server. Since I already have the file on my Windows PC, I’ll just manually copy it into a new file directory on my Kali machine (I’ve named it “AWS”) as seen in the following screenshot. Again, we’ll need it before we can login and securely copy down the other key and certificate files we need to support the VPN connection.
Now let’s use the OpenVPN.pem file to copy down our files. In a terminal window, use the following commands to perform the secure copy (substituting your own IP address within the command, of course):
cd /root/AWS

scp -i OpenVPN.pem ubuntu@your-IP-address:/home/ubuntu/ca.crt ./ca.crt

scp -i OpenVPN.pem ubuntu@your-IP-address:/home/ubuntu/client1.crt ./client1.crt

scp -i OpenVPN.pem ubuntu@your-IP-address:/home/ubuntu/client1.key ./client1.key

scp -i OpenVPN.pem ubuntu@your-IP-address:/home/ubuntu/ta.key ./ta.key
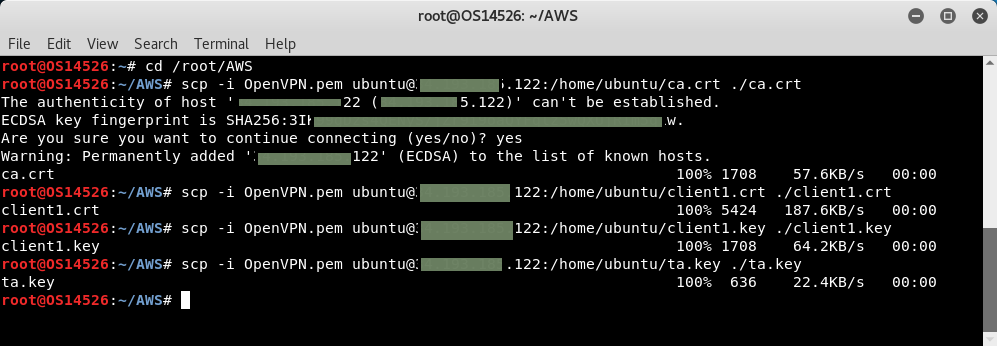
In the screenshot above you’ll notice that I received an “are you sure?” message the very first time I connected to our AWS server.
Now let’s use the Network Manager to setup a VPN profile. First, open the Settings window.

Click on the Network icon.

Now click on the “+” icon seen in the lower left of the window. This will add a connection type.
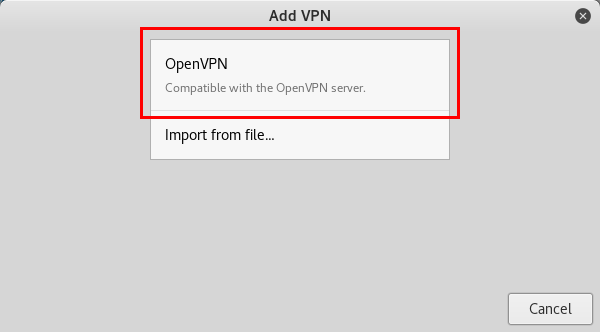
The only connection type we can add is the OpenVPN VPN type. Click on the OpenVPN rectangle.
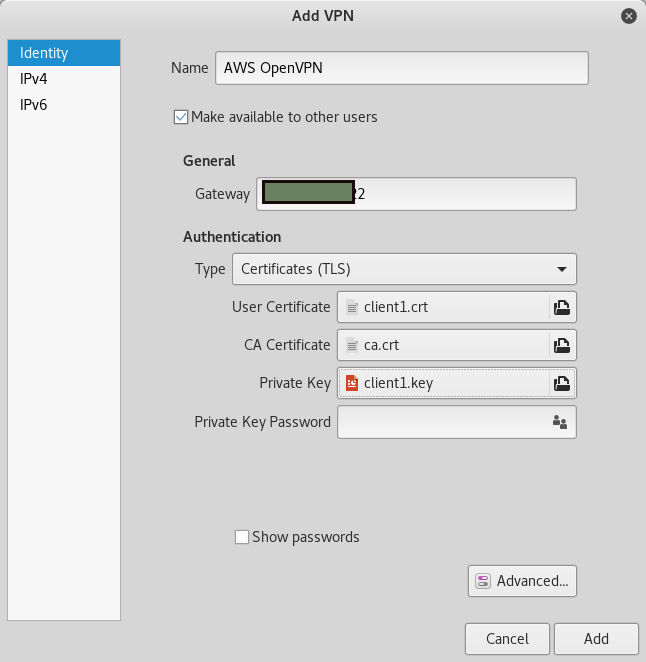
As seen in the screenshot above supply the following parameters:
- Supply a name. I’ve named it “AWS OpenVPN”.
- Check the “Make available to other users” checkbox.
- In the Gateway field, enter your AWS Elastic IP address (the same IP as in previous commands).
- Keep the defaulted Type of “Certificates (TLS)”.
- For the User Certificate, select the client1.crt file that we copied from the server.
- For the CA Certificate, select the ca.crt file that we copied from the server.
- For the Private Key, select the client1.key file that we copied from the server.
Now click on the “Advanced…” button.

In the General tab, check the “Use LZO data compression” checkbox (to match our server configuration).
Then click on the Security tab.
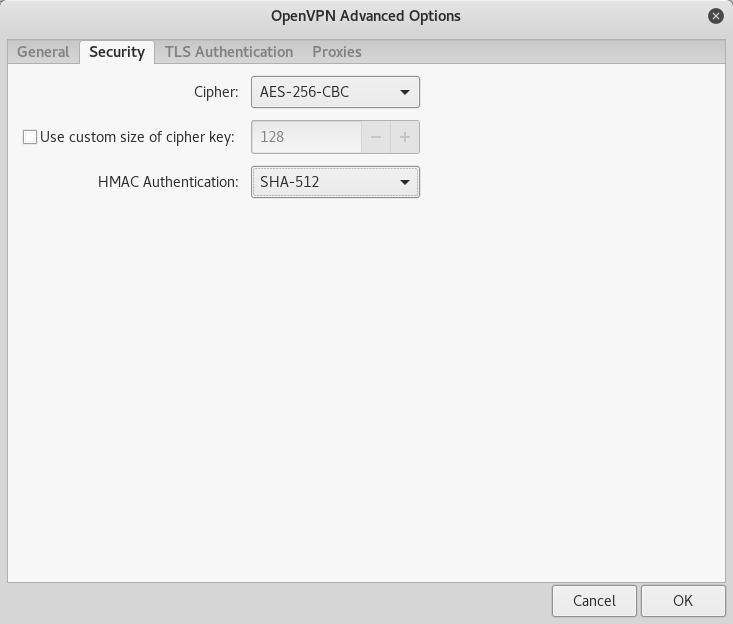
As seen in the screenshot above, choose the following parameters to match our server configuration:
- For Cipher, choose AES-256-CBC
- For HMAC Authentication, choose SHA-512
Now click the TLS Authentication tab.
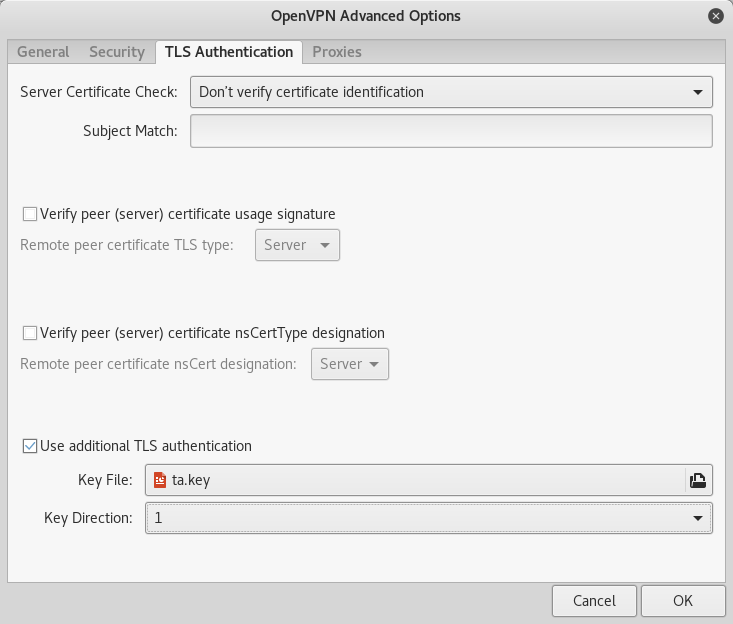
Check the “Use additional TLS authentication” checkbox, select our ta.key Key File, and choose a Key Direction setting of “1”.
Now click the OK button.
Now that we are back on the primary “Add VPN” window, click the “Add” button.
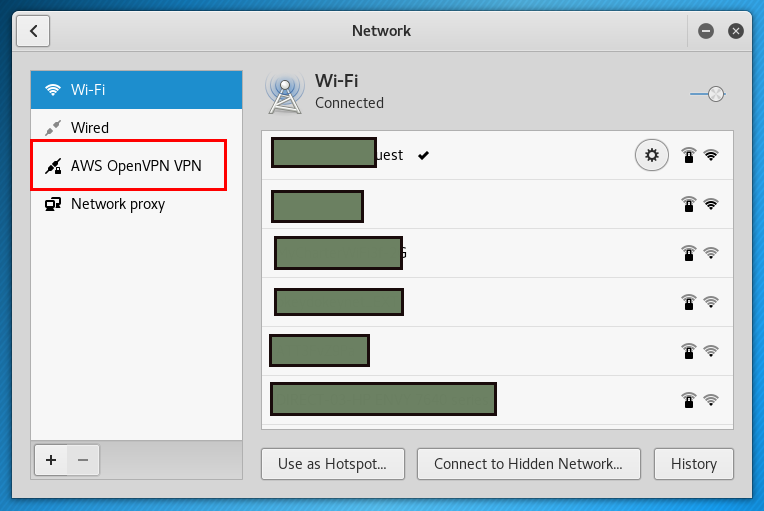
Now we can see our new AWS OpenVPN VPN profile entry. Let’s give it a try. Click on the “AWS OpenVPN VPN” item in the left-pane of the window.
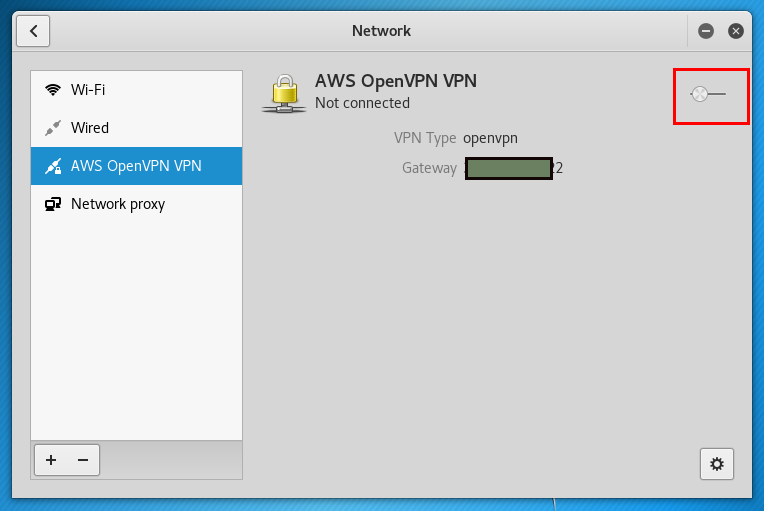
In the upper-right corner of the window, slide the switch to the right to enable the connection.

After a moment, the connection succeeds, as seen by the “Connected” status above. Now let’s close the Network window and open www.dnsleaktest.com in a browser.
Although I’ve obscured my IP address, it does correctly match our AWS server’s Elastic IP address as desired. This means that our traffic routes out the VPN. Now let’s click the “Standard Test” button to check for DNS leakage.

Since I see the OpenDNS servers, and not my Internet Service Provider’s DNS servers, I know that I don’t have any DNS leakage.
Now that we know our VPN connection works, let’s turn it off. In the upper right-hand corner of my Kali desktop, I see an icon that looks like a connection with a padlock. Clicking that icon reveals the AWS OpenVPN network manager profile. Click “Turn Off” to end our connection.

To turn the VPN connection back on, just click on the your network connection icon that is in that same general location (my icon is a wifi icon, as I’m connected to the wifi).
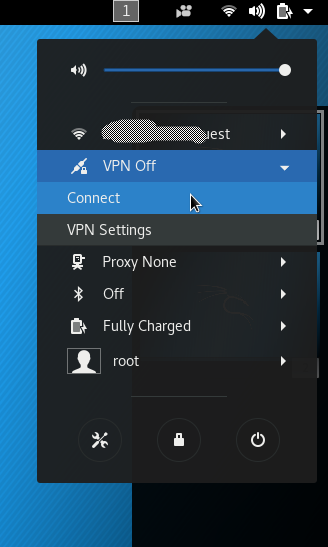
Under the “VPN Off” indicator, click on “Connect” to restart the connection.
Remember, depending on your flavor of Linux, the look and feel of your network management tools may vary from what I’ve shown you here. The basic concepts are the same, however. Just make sure you match your client settings with the server configuration.
Enjoy your secure browsing!
Addendum [7/21/2019] for Linux Clients
Linux GUI client support has changed somewhat since I first posted this article, and the GUI doesn’t always work well. On my Linux client PCs, I usually just start openvpn from the linux command line like this:
sudo openvpn myfile.ovpn
Furthermore, the steps required to fix DNS leakage are a little more complex, and require some additional software installs. This is what I have been using with Kali and Parrot, and it probably works on Ubuntu as well:
First, install openvpn-systemd-resolved
sudo apt-get install openvpn-systemd-resolved

sudo systemctl enable systemd-resolved.service

sudo systemctl start systemd-resolved.service
Now, confirm your linux hostname, because you’ll need it in the next step.
$hostname

parrot
As seen above, “hostname” was the linux command, and “parrot” was the output of the command (i.e., my hostname).
Now use nano or other text editor (and use sudo so you can write to the file) and edit this file: /etc/nsswitch.conf
Change this line in the file:
hosts: files mdns4_minimal [NOTFOUND=return] resolve [!UNAVAIL=return] dns
To this:
#hosts: files mdns4_minimal [NOTFOUND=return] resolve [!UNAVAIL=return] dns

hosts: files resolve dns parrot
You can see my hostname (“parrot”) in the new line.
Finally, add these lines to the end of the OVPN files that you’ll be using:
dhcp-option DNSSEC allow-downgrade

dhcp-option DOMAIN-ROUTE .

script-security 2

setenv PATH /usr/local/sbin:/usr/local/bin:/usr/sbin:/usr/bin:/sbin:/bin

up /etc/openvpn/update-systemd-resolved

down /etc/openvpn/update-systemd-resolved

down-pre
Note that after you use, then kill the VPN connection, it may take a minute for DNS to start resolving again.
Awesome! Awesomeeeeeeeee man! This the most complete tutorial ever that I’ve seen on the web! Thank you very very much!
This is by far the best tutorial I have found. Thank you so much for being so thorough!
One thing to note – I had to add the line:
block-outside-dns
to my OpenVPN config to stop DNS leakage.
[Tony Karre edit: thanks DW – I also had to do this for Windows 10. Good catch. Note that this is a Windows-only configuration item.]
Thanks for such awesome tutorial! Agreed with Ameer that it is still the most complete one
Thank you so much for your tutorial. It’s been really helpful. I agree with everyone this tutorial is the best. But can i ask you a question about how am i gonna make a client for my iphone.
Because you see when i make new client i can’t configurate the paths of the keys.
[edit from Tony Karre: for your iPhone, use OpenVPN Connect for iOS. If the app asks you to import a file, it probably needs an OVPN file. I explained how to create one for Android, and you should be able to use the same file for iOS. See this: https://blogs.perficient.com/2017/09/12/how-to-connect-your-android-phone-to-your-aws-based-vpn-server/
Thanks for the help sir. I guess i was’t gonna be able to do this without your tutorials. Now I got it work for my iphone too. You’re the best!
Has anyone done ant internet speed tests with and without the VPN? I am wondering if the CPU of the server is big enough to process higher internet speeds.
I just ran a speed test via speedtest.net. I was getting around 21 M down and 40+ M up when connected to the VPN. When not on the VPN (sitting on my sofa with my Macbook) I was getting 70 to 80 M, both up and down. Note that I chose a microinstance when setting up my VPN. My monthly AWS bill for this is about US $9.50. As a reality check I watched some Sling TV through the VPN and it worked just fine. I’ve never had a problem with bandwidth in real-life use.
Thanks. Those are pretty good numbers. Similar to what I am getting using ExpressVPN.
Hi Tony, everything went well with your very good instruction. I just came to the end with no problems, but when I loaded my client.ovpn file in the OpenVPN GUI it not continues because of an parse error in key. I didnt found any help for this issue, therefore the whole process seems to be useless. Do you have an idea how to solve the problem?
Hi Stephan, I tried to respond to you via email, but my email bounced back.
Hey Tony thank you so much for this wonderful guide. It worked perfectly. One issue i found was mutliple clients getting the same ip address.
So I had to add “duplicate-cn” in server.conf and restart the openvpn server.