Building a simple Flask App using Docker vs Code
This article was published as a part of the Data Science Blogathon.
Introduction
More often than not, developers run into issues of an application running on one machine versus not running on another. Dockers help prevent this by ensuring the application runs on any machine if it works on yours. Simply put, if your job as a data scientist requires developing applications, make it easy for you to create, deploy and run them by providing isolated environments encapsulating all the needed dependencies. One can think of Docker as a virtual machine without any operating system. It allows the applications to use the same kernel as the system (host) they are running on. This helps make the docker container lightweight along with enhanced performance.
Why should you use starting Dockers?
You could be sure of the reproducibility of your application, meaning that you wouldn’t have to deal with any “it doesn’t work on my machine” issues. Additionally, the containers you develop would be highly portable, allowing you to easily move from local development to a supercomputing cluster.
This article is a hands-on guide for building and running docker images of a generic flask app. To further simplify the process and avoid manually writing Docker commands, we use the Docker extension available in VS Code that creates an automatic template consisting of those commands.
Step 1. Cloning the Repo 📋
I have created a GitHub repo that has a simple flask app. This repo can be cloned to your local, which could be used to build the docker image.
Let us first understand the files present in this repo.
server.py
This python script is for creating a flask app that, when run, renders the template contained in ‘index.html’.
index.html
In the templates folder, the file ‘index.html’ contains a simple template comprising a single line of text as a heading.
requirements.txt
This file contains all the python packages one would need to install to run this app.
gunicorn.sh
Although Flask has a built-in web server, it is unsuitable for production and needs to be installed behind a real web server that can connect with Flask via the WSGI protocol. A common choice for this web server is Gunicorn.
This shell script file helps launch the Gunicorn server. The script contains the following:
gunicorn server:app -b 0.0.0.0:5005 -- timeout 900
The above line is a gunicorn command for launching the server where ‘server’ refers to the module we have built (server.py) while ‘app’ refers to the variable name given to our Flask object. The ‘-b’ in the command helps specify a socket to bind the server. Since some applications need more time to respond than others, we can explicitly set ‘timeout’ to a higher number (in seconds) to ensure that a longer time is given for the application to load.
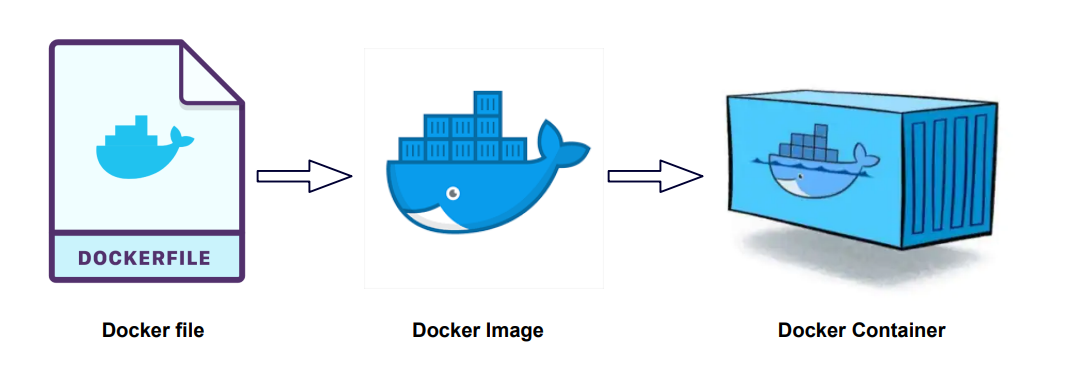
Step 2. Creating a DockerFile 📝
A Dockerfile is a file that one creates, which consequently helps build a Docker image. This file contains instructions that tell Docker how the docker image should be built.
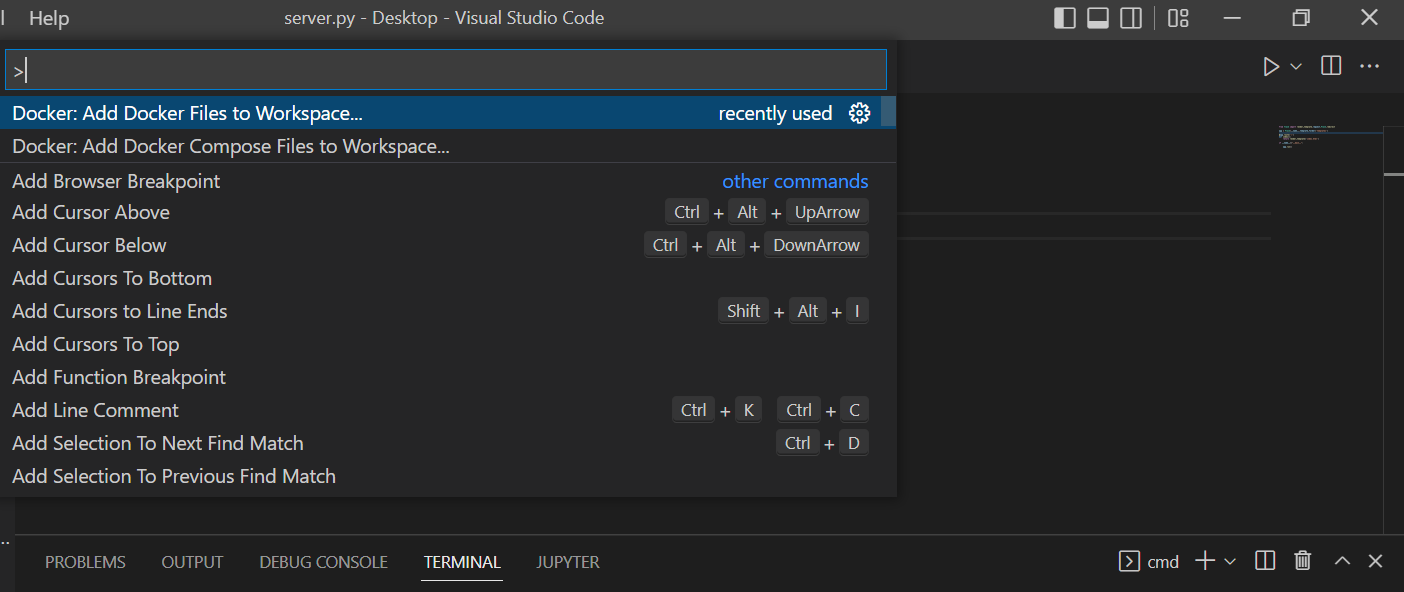
To build our Docker file, we open our ‘server.py’ file on VS code and open the command pallet with ctrl+shift+p on windows or cmd+shift+p on mac. We can type the following to be able to get a standard template for our docker file :
>docker: add
We can then select the ‘Docker: Add Docker Files to Workspace’ and choose ‘Python’ as the language.
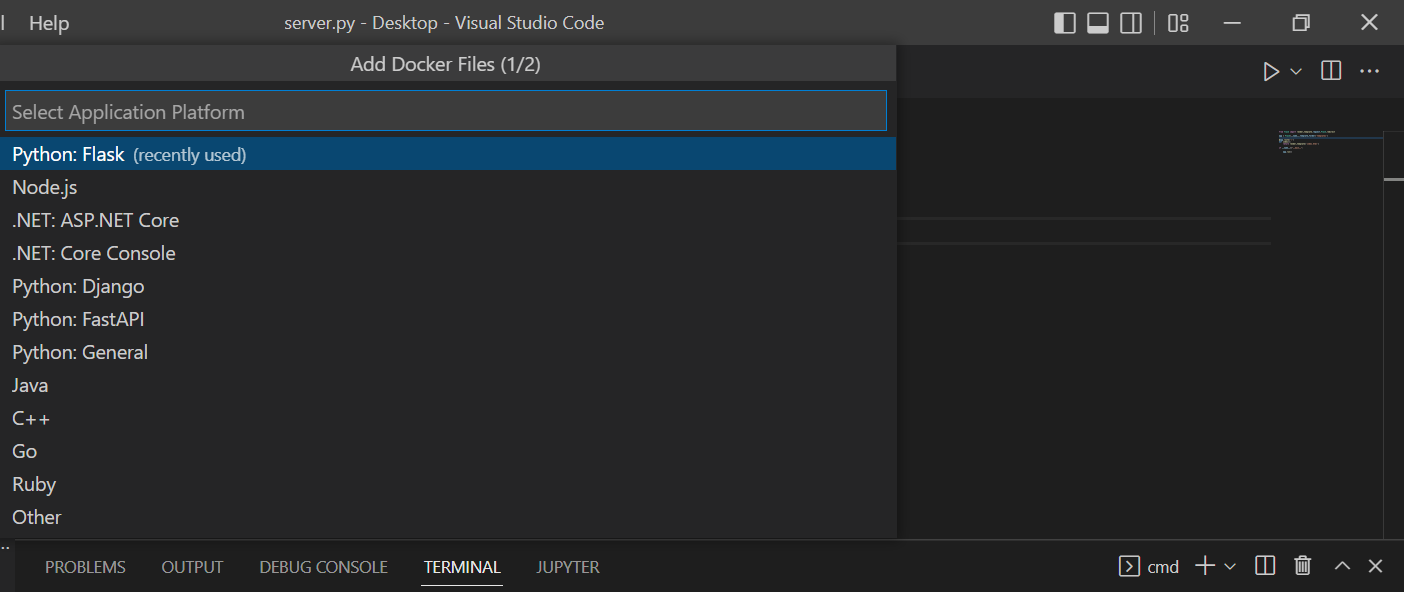
We will be prompted to choose our app’s entry point; then we can select the path of our server.py file from the dropdown. We will be further prompted to give the app a port (like 5005) to run.
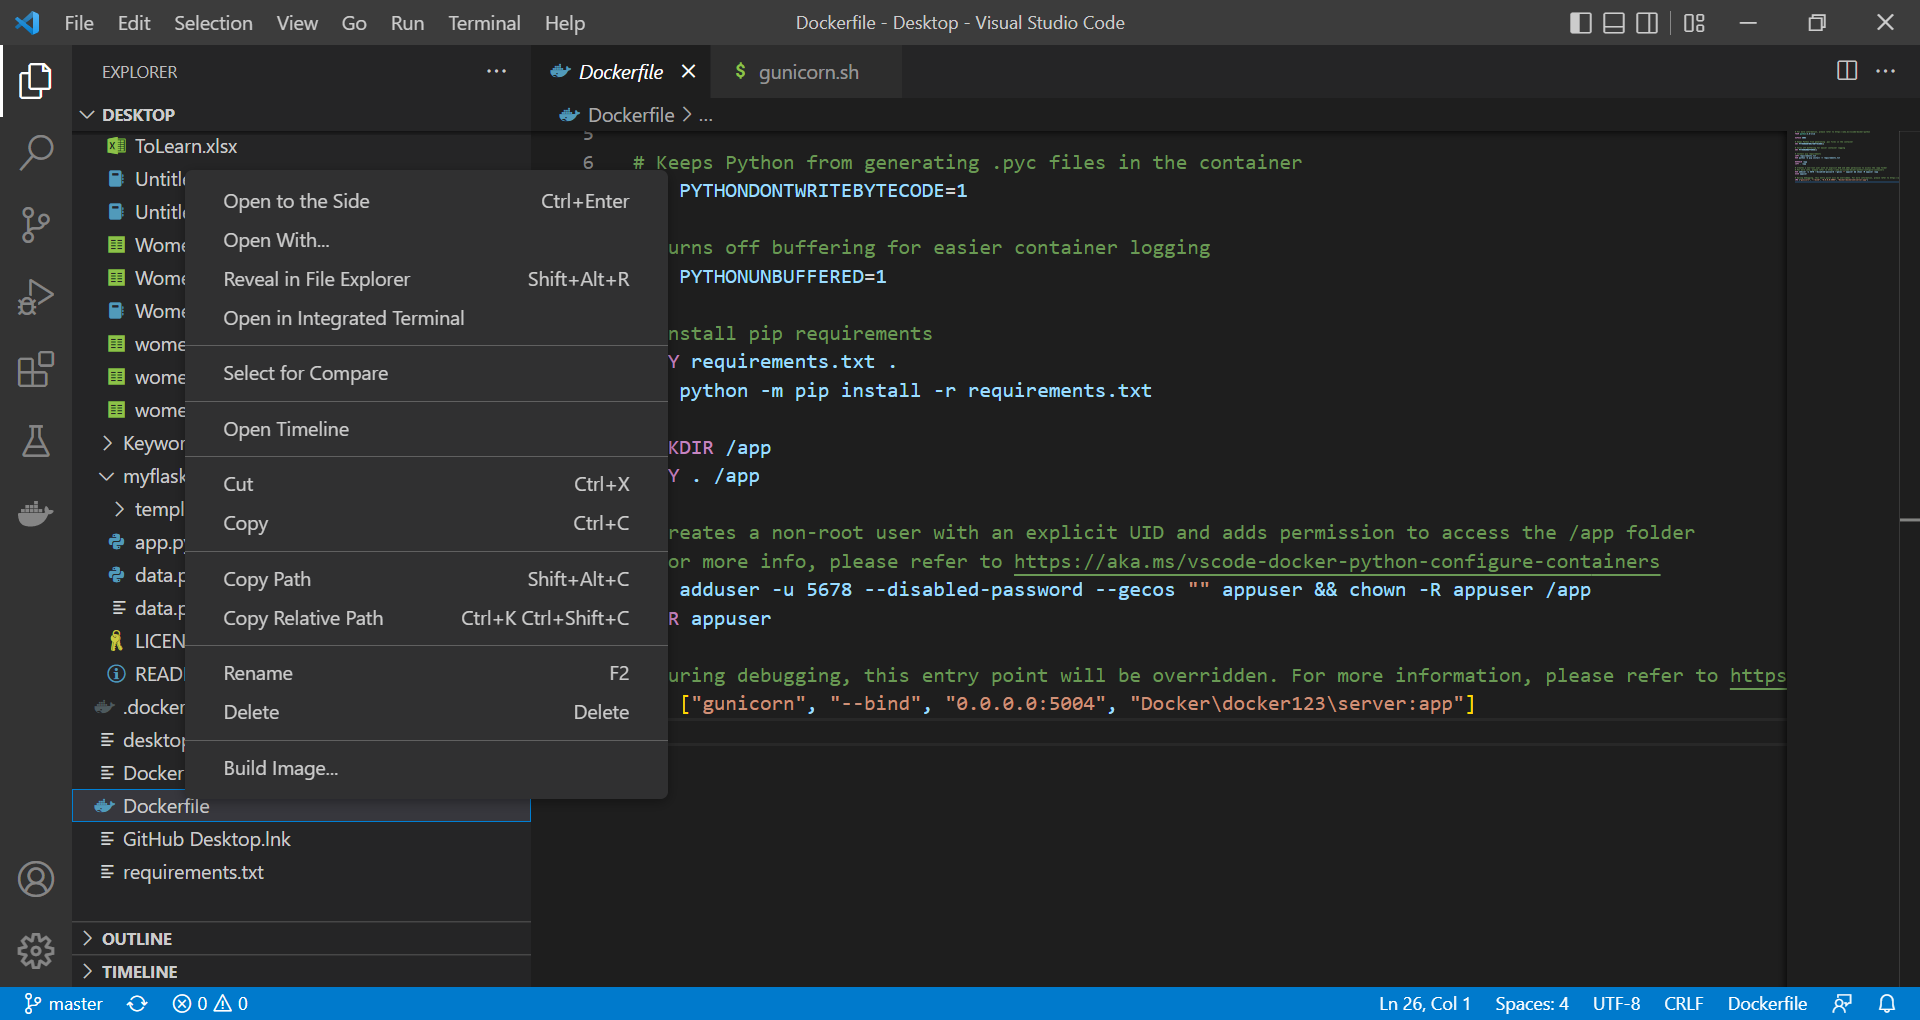
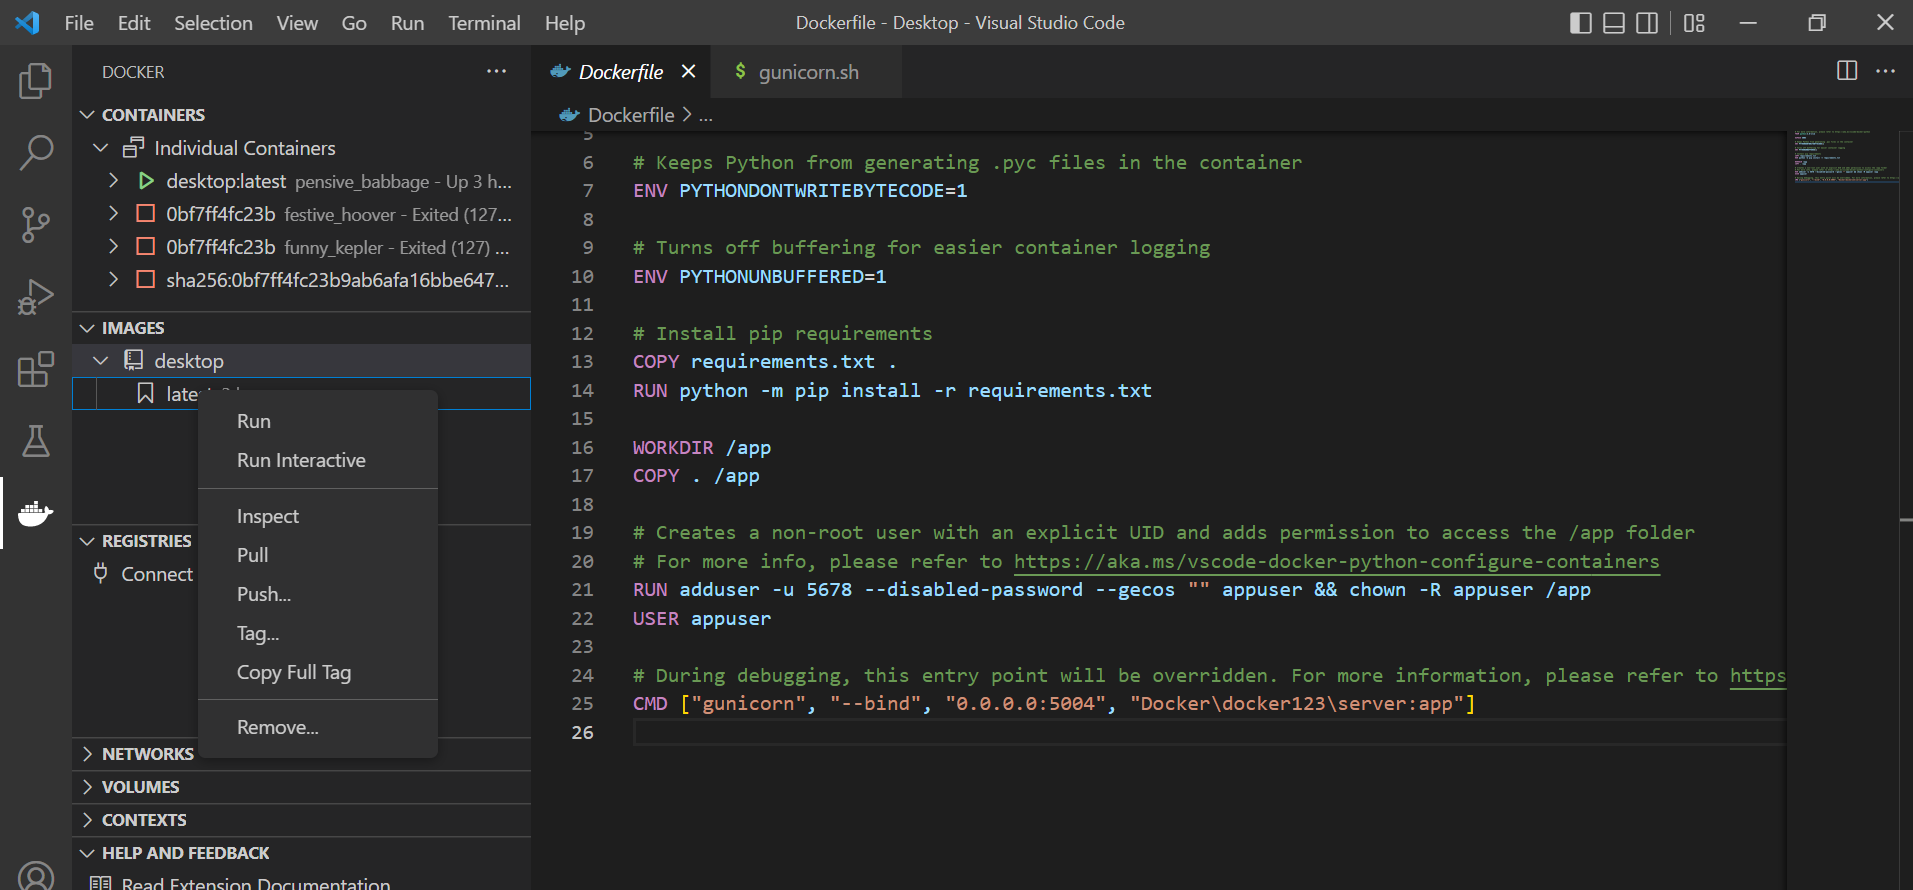
This creates the Dockerfile, which looks like this :
# For more information, please refer to https://aka.ms/vscode-docker-python
FROM python:3.8-slim
EXPOSE 5005
# Keeps Python from generating .pyc files in the container
ENV PYTHONDONTWRITEBYTECODE=1
# Turns off buffering for easier container logging
ENV PYTHONUNBUFFERED=1
# Install pip requirements
COPY requirements.txt .
RUN python -m pip install -r requirements.txt
WORKDIR /app
COPY . /app
# Creates a non-root user with an explicit UID and adds permission to access the /app folder
# For more info, please refer to https://aka.ms/vscode-docker-python-configure-containers
RUN adduser -u 5678 --disabled-password --gecos "" appuser && chown -R appuser /app
USER appuser
# During debugging, this entry point will be overridden. For more information, please refer to https://aka.ms/vscode-docker-python-debug
ENTRYPOINT ["./gunicorn.sh"]
We change the default CMD line to the following to ensure that the gunicorn server is loaded on running our docker container –
ENTRYPOINT ["./gunicorn.sh"]
Let’s go over some of the important commands included in this Dockerfile:
1) FROM python:3.8-slim
It allows us to inherit existing images, we install a Python image and install it in our Docker image.
2) EXPOSE 5005
The EXPOSE instruction informs Docker that the container listens on the specified network ports (5005) at runtime.
3) ENV PYTHONDONTWRITEBYTECODE=1
This environment variable prevents Python from generating .pyc files in the container.
4) COPY requirements.txt.
COPY is a docker file command that copies files from a local source location to a destination in the Docker container. In this case, the COPY command copies the requirements.txt file from the local directory to the Docker container.
5) RUN python -m pip install -r requirements.txt
This command is for running the copied requirements.txt file to install all the necessary dependencies for our application and consequently keep them in our container.
6) WORKDIR /app
The WORKDIR instruction sets the working directory for any RUN, CMD, ENTRYPOINT, COPY and ADD instructions that follow it in the Dockerfile.
7) ENTRYPOINT [“./gunicorn.sh”]
An ENTRYPOINT instruction in docker is used to set executables that will always run when the container is initiated. Thus, the file gunicorn.sh will be run when the docker container is started.
Step 3. Building the Docker Image 🛠️
A Docker image gets built by running a Docker command (which uses the Dockerfile we created).
We can then right-click the docker file on VS code’s Explorer tab and choose the ‘Build Image’ option. This helps create a docker image from the docker file we created.
Step 4. Running the Image 🏃
The container is a running instance of a Docker image.
We can run the Docker image we created by going to the VS code on the Docker tab. We can choose the image (under Images) we want to run and start running it.
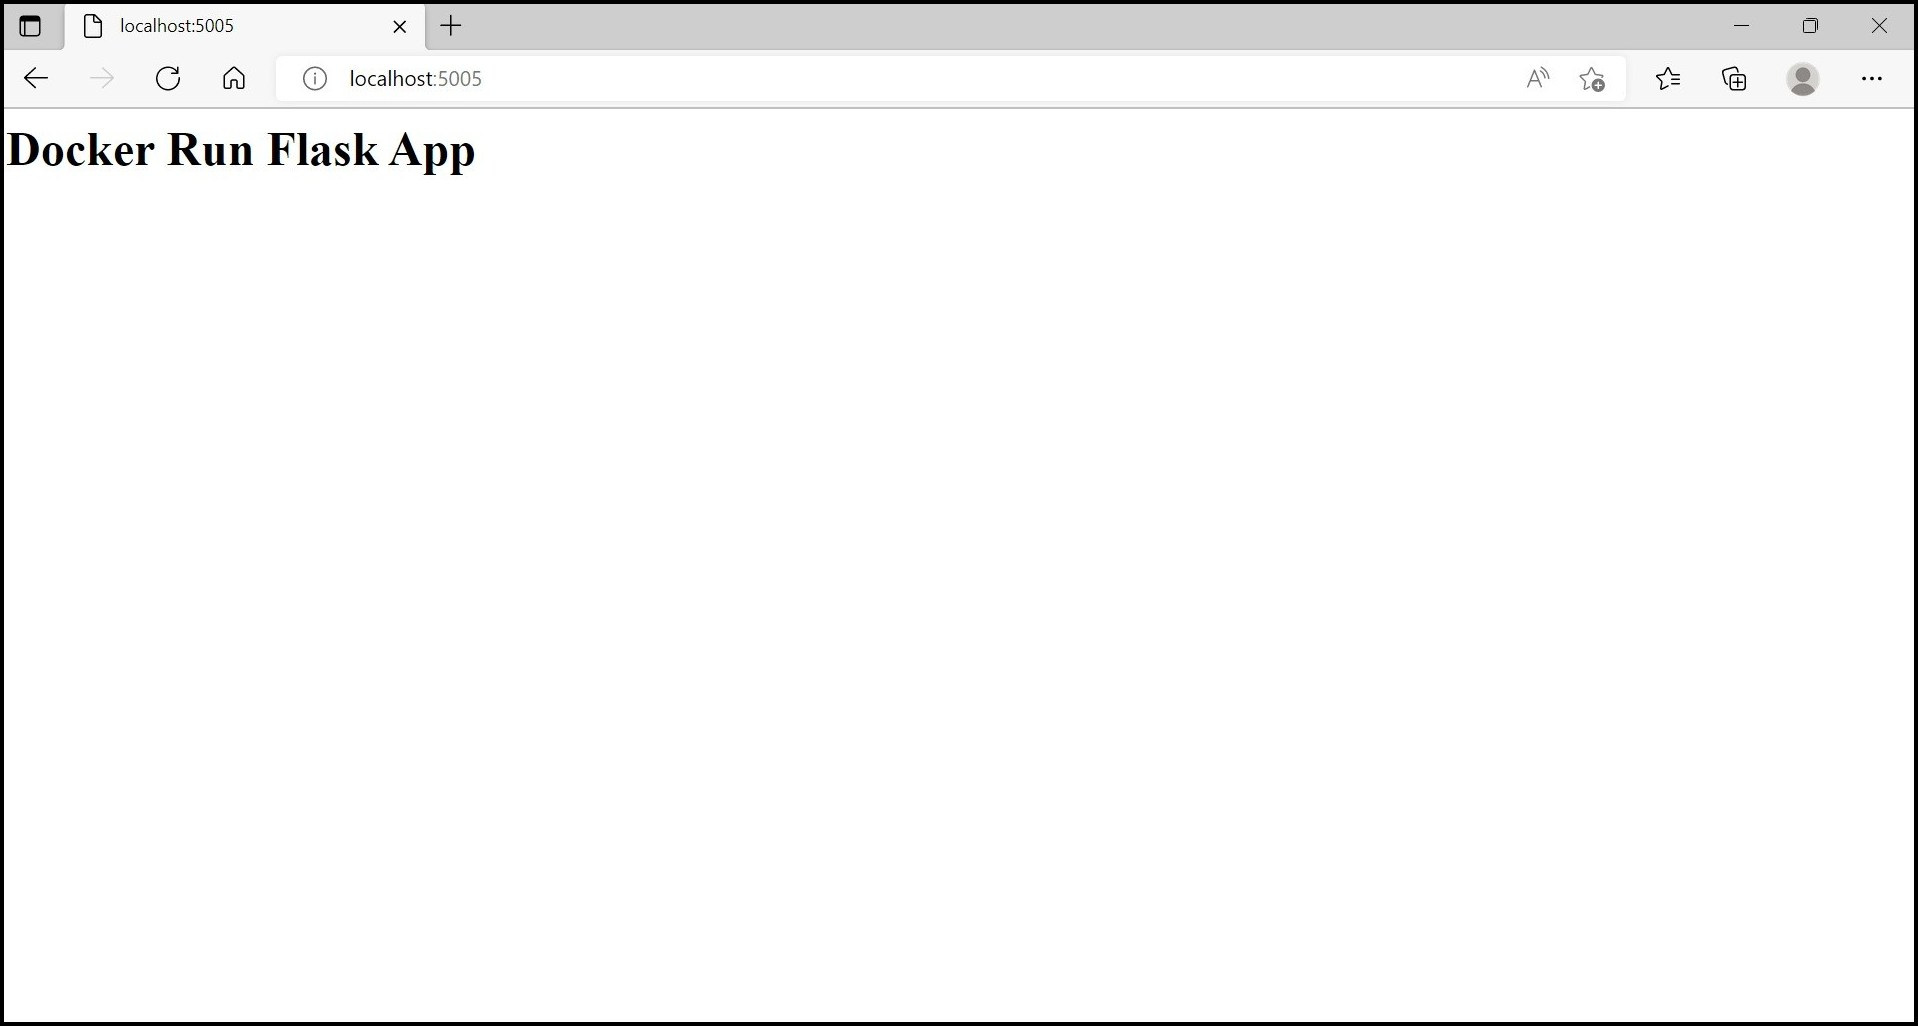
We can now open our app on the browser using the following URL:
The ‘port’ in the above link has to be changed to the port number we provided in the gunicorn.sh script (5005). This gives us the following (i.e. the text we had put in our index.html file) –
Conclusion to Docker
Data scientists have often been involved in producing the models they build, for which learning to containerize applications using dockers becomes imperative.
- It ensures that the application runs on any machine if it works on yours.
- Its containers are highly portable, allowing you to easily move from local development to a supercomputing cluster.
- It allows the applications to use the same kernel as the system (host) they are running on. This helps make the container lightweight along with enhanced performance.
This article aimed to provide a hands-on guide on dockerizing a simple flask app. A similar process can be extended to dockerizing any flask application a developer builds.
The media shown in this article is not owned by Analytics Vidhya and is used at the Author’s discretion.


Articles that are nice and very informative, I like to read the articles you make. Thanks for sharing!