Deploy a Machine Learning Web App with Heroku
In this article, you will learn to deploy a fully functional ML web application in under 3 minutes.
In a previous blog post, I demonstrated how you can build a machine learning web app in Python using the Streamlit library. The end product looked like this:
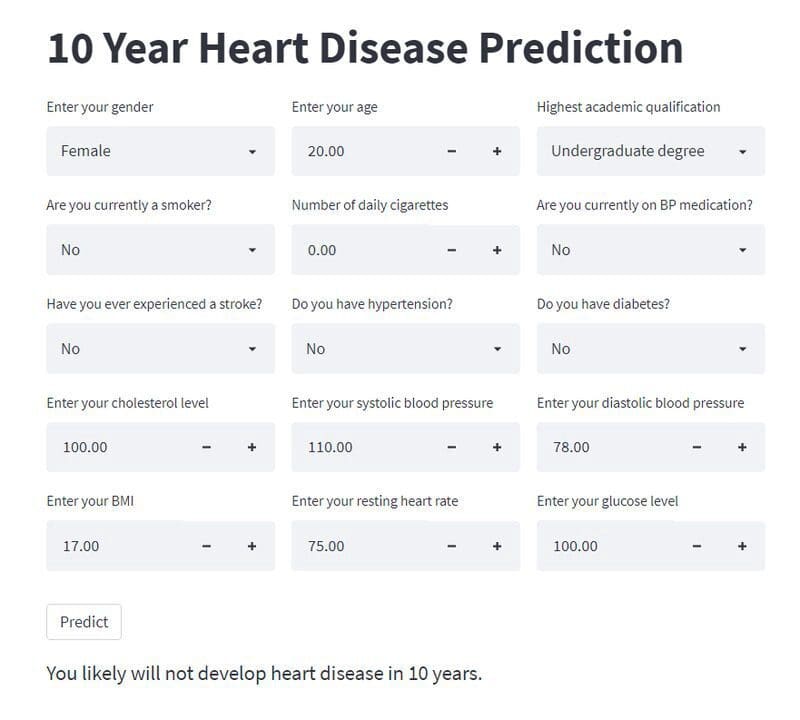
This is an app that allows users to enter information about their health and lifestyle, and returns an output prediction of how likely the person is to develop heart disease in 10 years.
If you’d like to learn more about the model and how the app was built, feel free to go through the tutorial.
Otherwise, you can simply navigate to this Github repository and clone it. It contains all the code files necessary to build and deploy the web application.
Step 0: Pre-requisites
To run the Streamlit web app and deploy it to Heroku, you need to have a non-GUI based Python code editor installed (a Jupyter Notebook won’t suffice). I’m currently using Visual Studio Code, but PyCharm and Atom are also good alternatives for you to try out.
Once that’s done, make sure to install these three libraries using the ‘pip’ command — Streamlit, Joblib, and Pandas.
Step 1: Run the app locally
Now that your environment is ready, try running the app locally to check if everything works.
Go to your terminal and type the following lines of code:
streamlit run streamlit_fhs.py
Then, open a browser and navigate to http://localhost:8501. You should see a web application that looks like this:

Step 2: Create the necessary files
Our folder currently has three files:

In order to successfully deploy the app to Heroku, we need to create three more files:
1. requirements.txt
First, create a text file and name it requirements.txt. Then, paste the following into it:
pandas==1.3.2
    gunicorn==19.9.0
    streamlit==1.5.1
    joblib==1.1.0
    sklearn==0.22
2. Procfile
Next, you need to create a Procfile. This tells Heroku where your app is located and how to start it.
To create a Procfile, just open your terminal and navigate to the folder you just cloned. Type the following command:
echo web: gunicorn app:app >Procfile
3. Setup.sh
Finally, create a file named setup.sh with the following contents:
mkdir -p ~/.streamlit/
    echo "\ [server]\n\
    headless = true\n\
    port = $PORT\n\
    enableCORS = false\n\
    \n\" > ~/.streamlit/config.toml
Step 3: Set up Heroku
Now, you need to create a free Heroku account.
Once that’s done, download the Heroku CLI and run the executable file.
To make sure you have successfully installed Heroku on your device, type the following command into your terminal:
heroku --version
If you get a “command not found” error, it means that something’s wrong and Heroku isn’t set up properly on your device. Otherwise, your installation was successful and you can move to the next step.
Step 4: Deploy the web app
Open your terminal again and navigate to the directory where your app resides.
Type the following command:
heroku create my_app
Note: You can replace “my_app” with any name of your choice.
Then, you need to initialize and push your code to Git. To do so, type the commands below into the terminal:
git init
    git add .
    git commit -m "first commit"
Finally, run these two commands to deploy your code to Heroku:
heroku git:remote -a my_app
    git push heroku master
Note: Again, remember to change my_app to your app name.
Once you’re done, you will see output like this show up on your terminal:

The link displayed above is where your app resides, and you can now access it online. Here’s the URL to my web app: https://fhs-pred-app.herokuapp.com/.
That’s it! If you followed all the steps correctly, you now have deployed a functional web application that you can share with others using a single link.
Natassha Selvaraj is a self-taught data scientist with a passion for writing. You can connect with her on LinkedIn.