App Building And Deployment of a Predictive Model Using Flask and AWS
This article was published as a part of the Data Science Blogathon
Objective
An app is to be developed to determine whether an applicant requesting a loan is eligible. This app will then be launched on the Amazon AWS infrastructure, allowing users to determine whether they are qualified for a loan from any location.
Introduction
A Finance company deals in all kinds of home loans and has a presence across all urban, semi-urban, and rural areas. A Customer-first applies for a home loan and after that company validates the customer eligibility for the loan. Details like Gender, Marital Status, Education, Number of Dependents, Income, Loan Amount, Credit History, and others are given in the form to fill up by the applicants.
Then a robust model is built taking those details as input to determine whether an applicant is eligible for a loan or not. The target variable here is Loan Status and the rest are predictors. After building the model an app is to be designed for a user interface that allows the user to see instantly if he/she is eligible to get a loan by entering the given details.
Exploratory Data Analysis
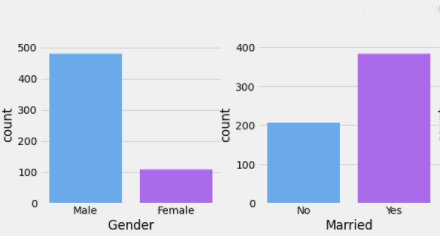
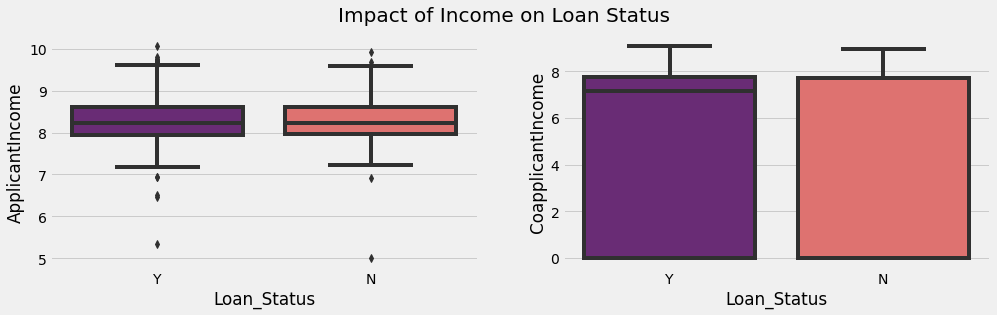
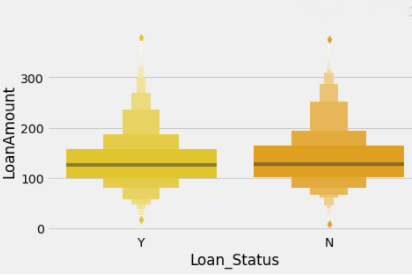
Univariate analysis has been done on “Gender” and “Married” columns using the Bar Graph. Bivariate Analysis has been done on Loan_Status and ApplicantIncome as well as Loan_Status and CoapplicantIncome using Box Plot. Also, Bivariate Analysis has been done on Loan_Status and LoanAmount using Boxen Plot.
.png)
The observations of the univariate and bivariate analysis have been written below.
1. The Number of Male Applicants is more in comparison to Female Applicants as shown in Fig. 1.
2. Married Applicants are more in comparison to Unmarried Applicants as shown in Fig. 1(a) and (b) respectively.
3. There is no clear pattern of impact of Applicant and Coapplicant’s Income on the Loan Status as shown in Fig. 2(a) and (b) respectively.
4. The Loan Amount has no clear pattern with the Loan Status as shown in Fig. 3.
5. Outliers were present in the “Applicant Income”, “Co-applicant Income”, “LoanAmount” columns. It has been depicted through Box Plot as shown in Fig. 4.
Data Preprocessing
1. Missing Values from the categorical columns “Gender”, “Married”, “Dependents”, and “Self Employed” were replaced by the Mode function. Missing values from the Numerical columns “Loan Amount”, “Loan Amount Term”, and “Credit History” were replaced by the Median function.
2. Outliers from the “Applicant Income”, “Co-applicant Income”, and “LoanAmount” were removed such as records with a value higher than 25000 were removed from the “Applicant Income” column, records with a value higher than 10000 were removed from the “Applicant Income” column, records with value higher 400 were removed from the “Loan Amount” column.
3. “Gender”, “Married”, “Educated”, “Self-employed”, and “Loan Status” columns were encoded with 1 for the first category and 0 with the second category. In the Property Area column the urban was encoded as 2, Semiurban was encoded as 1, and Rural was encoded as 0. In the “Dependents” column 1, 2, and 3+ Dependents were encoded as 1, 2, 3 respectively.
4. Target column “Loan_Staus” were split as Yes and No. Yes was encoded as 1, and No was encoded as 0.
5. Target Column was imbalanced which was removed using the oversampling method by importing Smote function.
Model Development
1. Data were split into 80:20 ratio.
2. Logistic Regression, Decision Tree, Gradient Boosting Classifiers were trained using the trained dataset and applying 5 fold cross-validation it was found that Gradient Boosting Classifier gives the best performance.
App Building
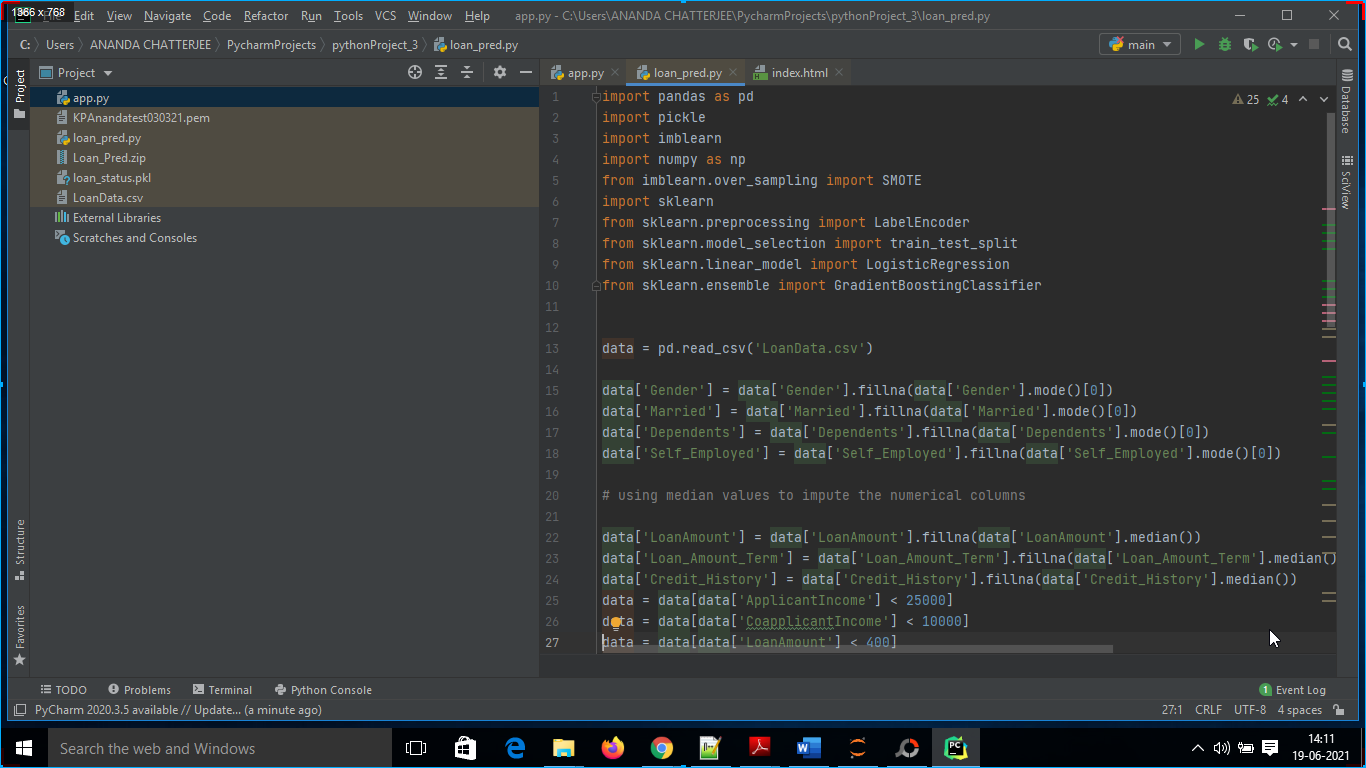
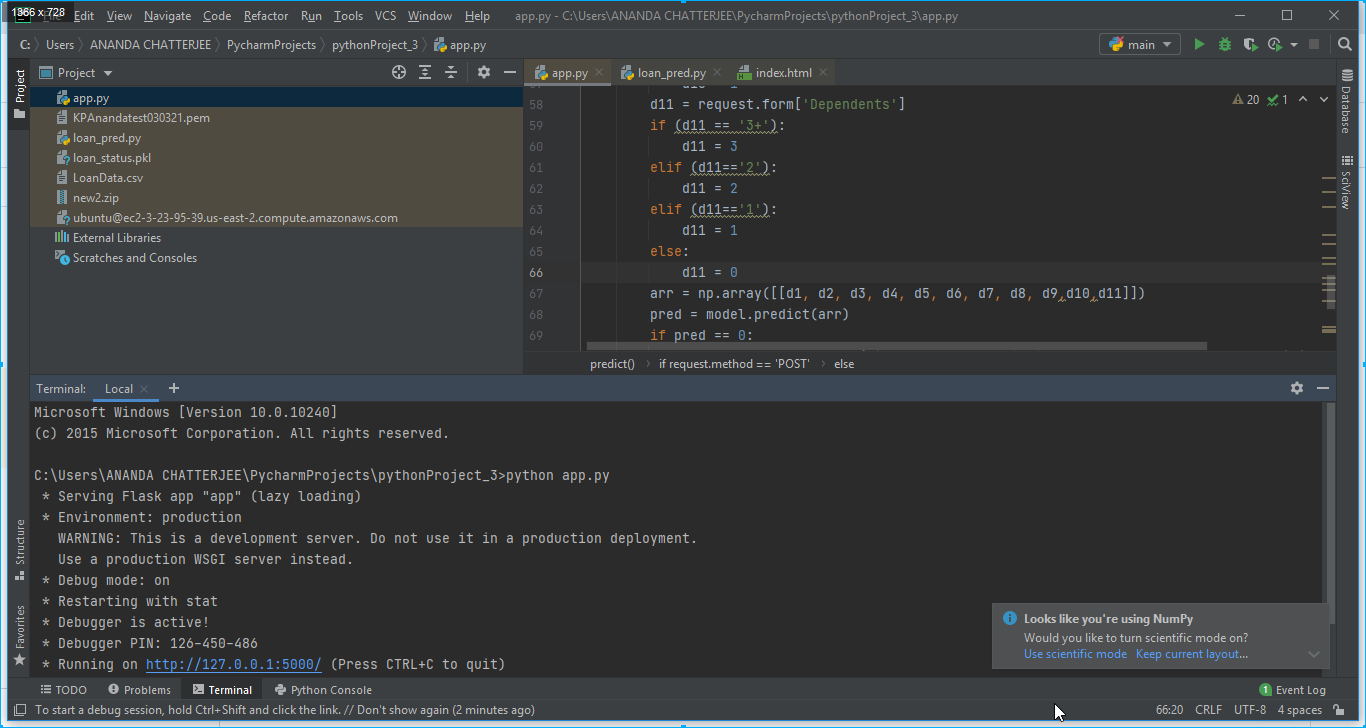
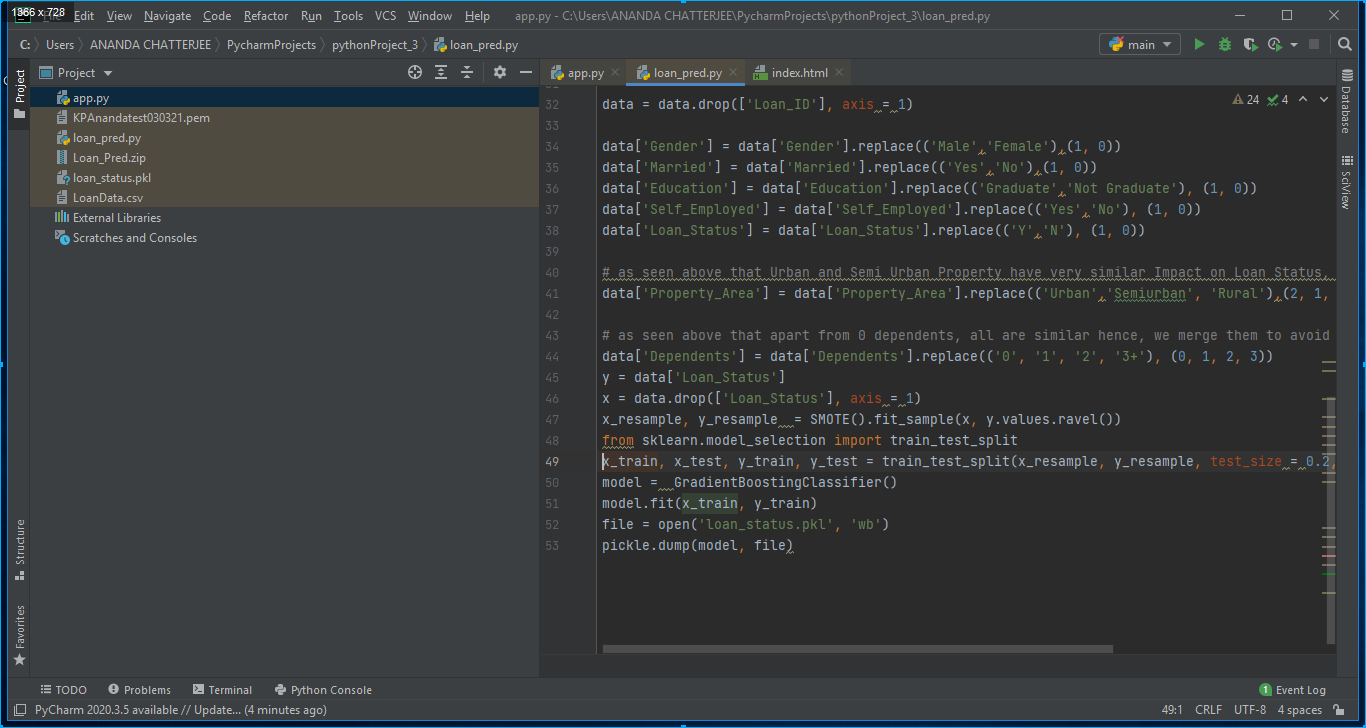
1. Python code was written on Pycharm Editor to run the model. In our case, its name was loan_pred.py as shown in Fig. 5 below.

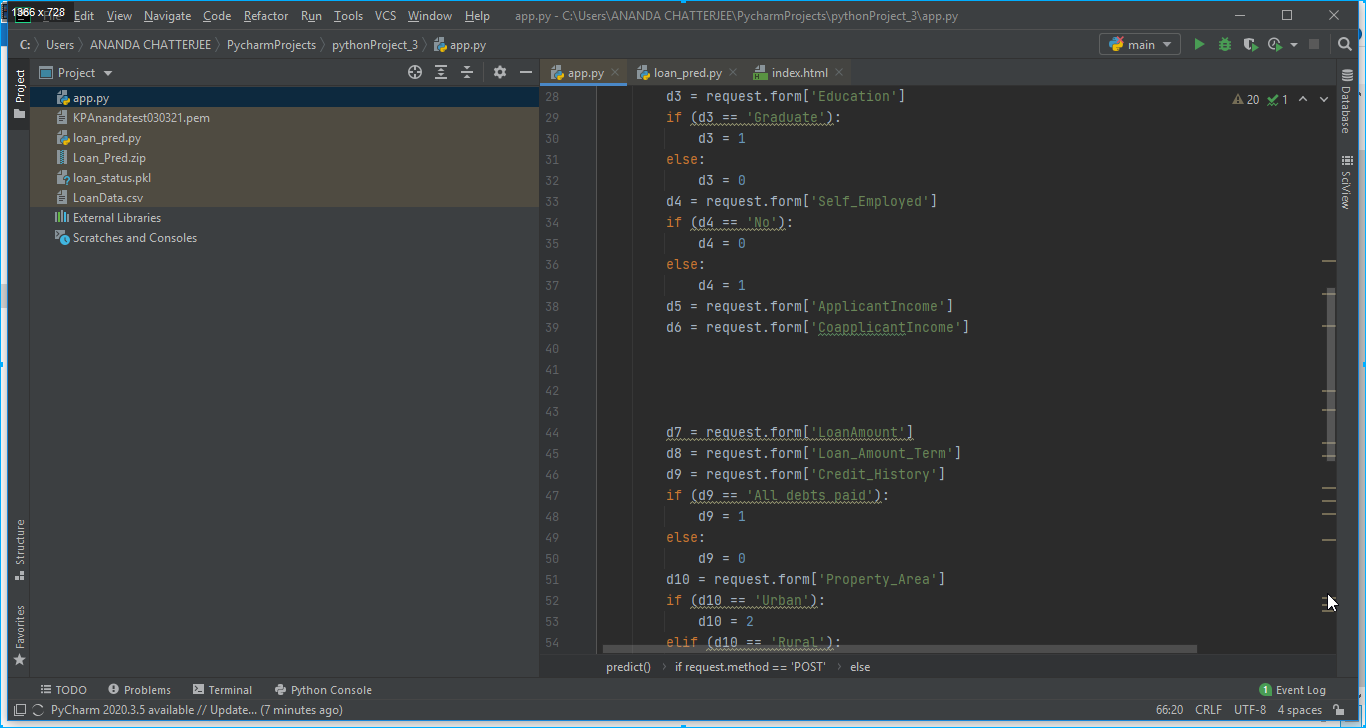
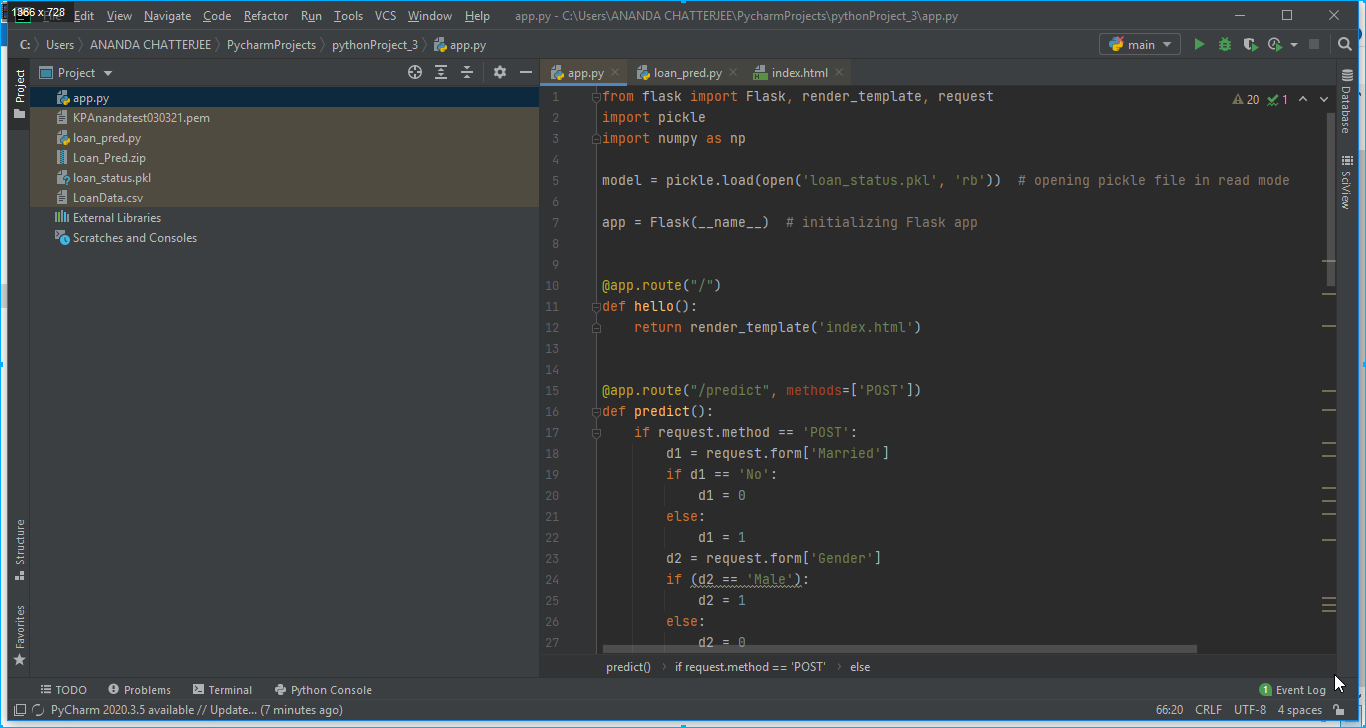
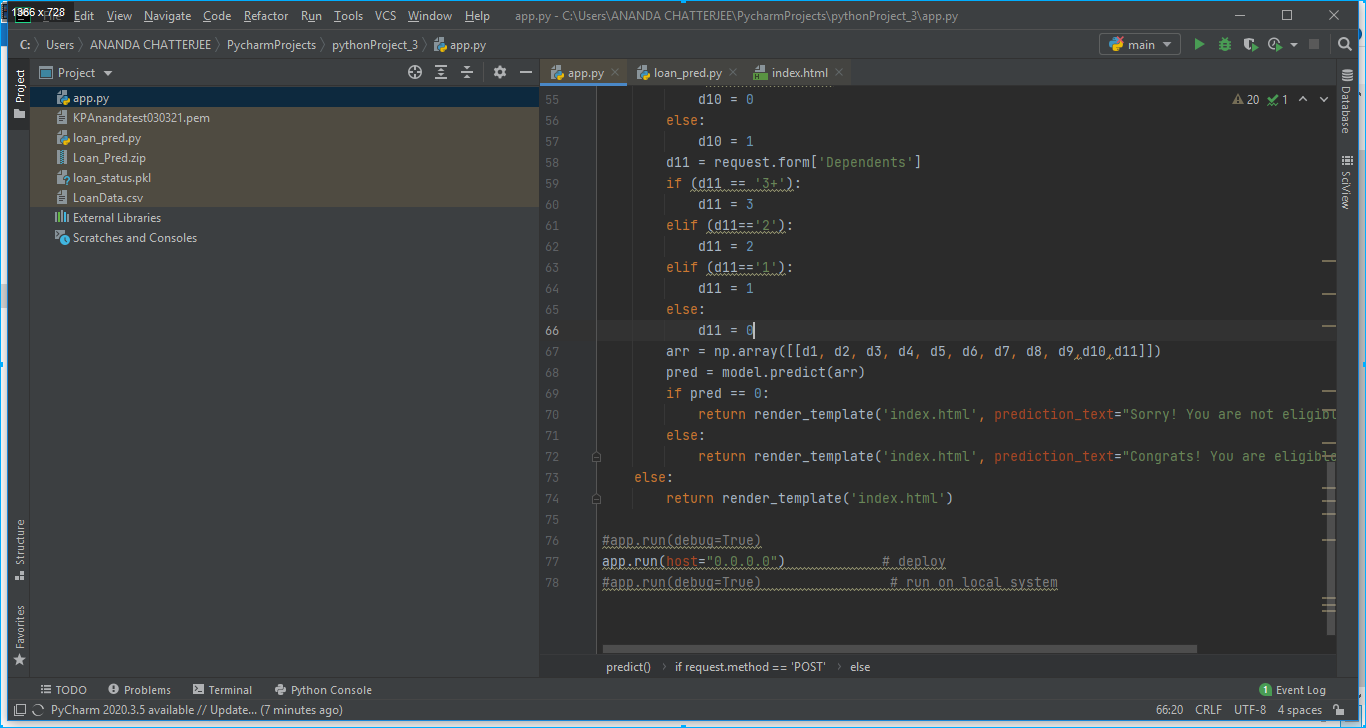
2. An app has been developed using Flask on Pycharm editor. In our case, it was app.py as shown in below Fig. 6.


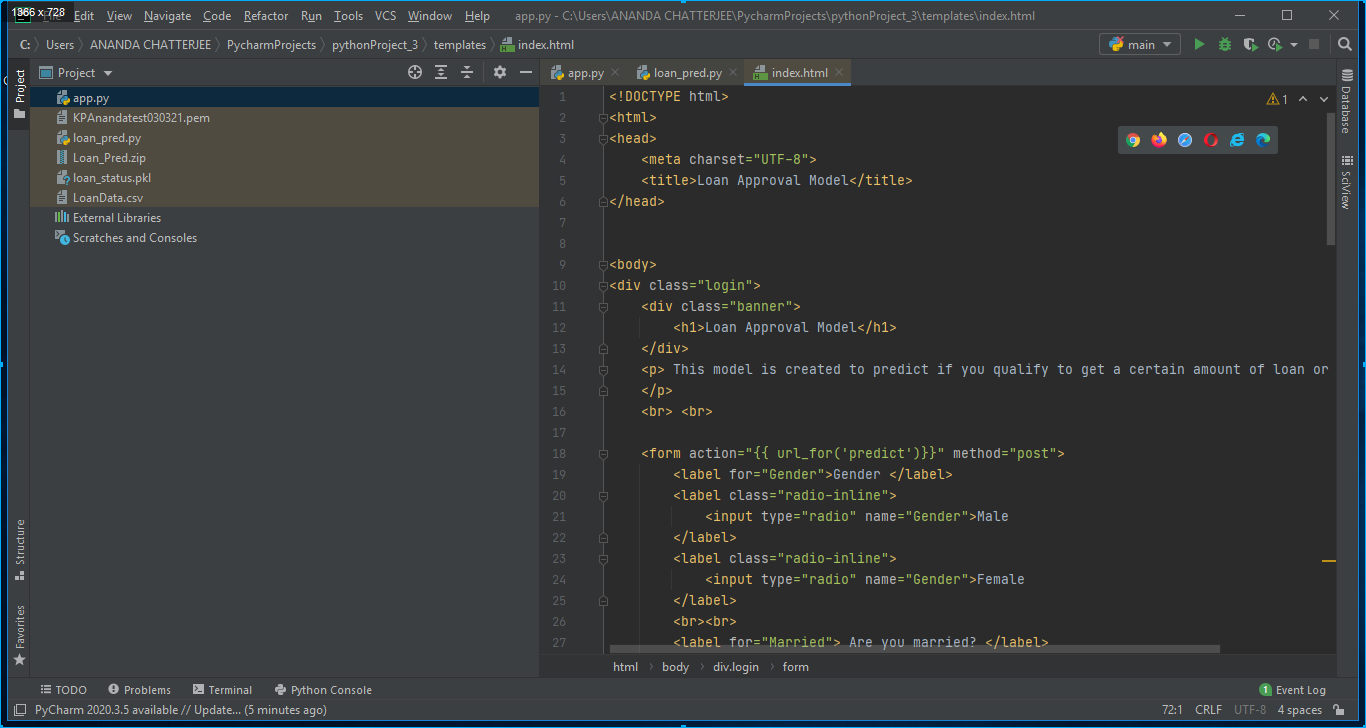
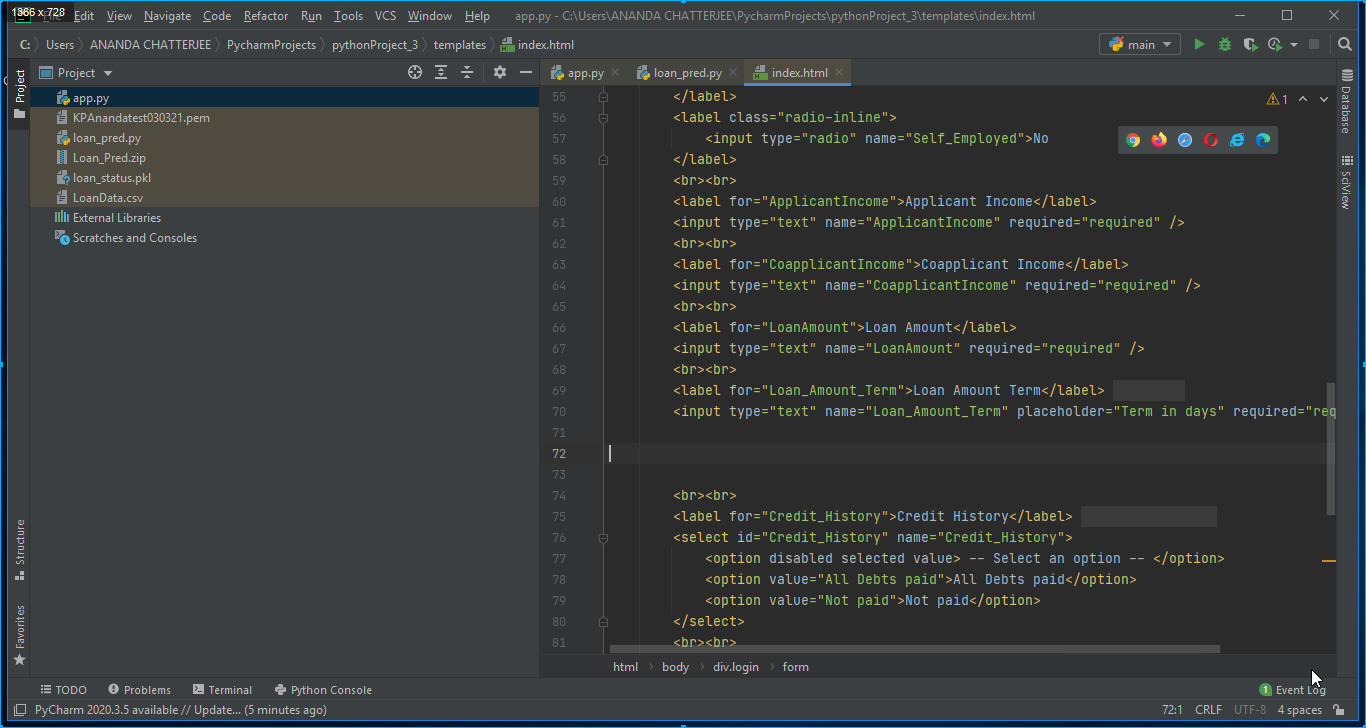
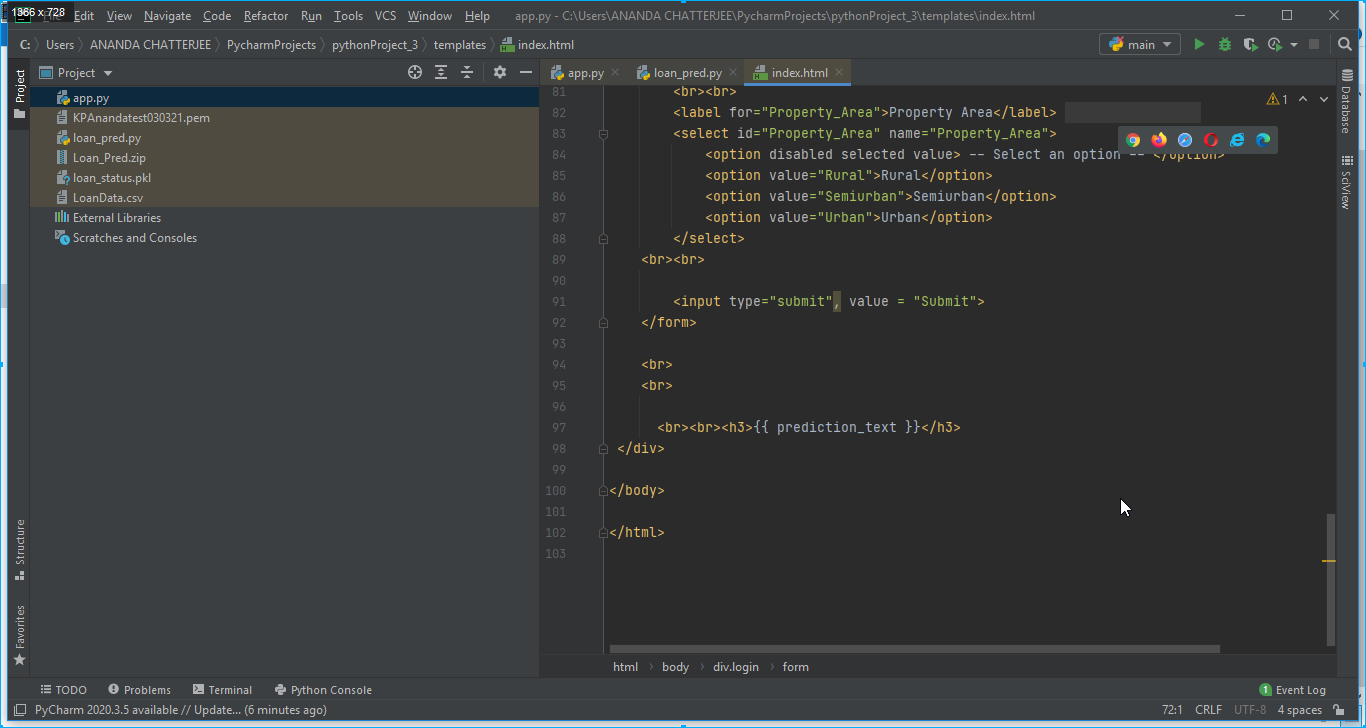
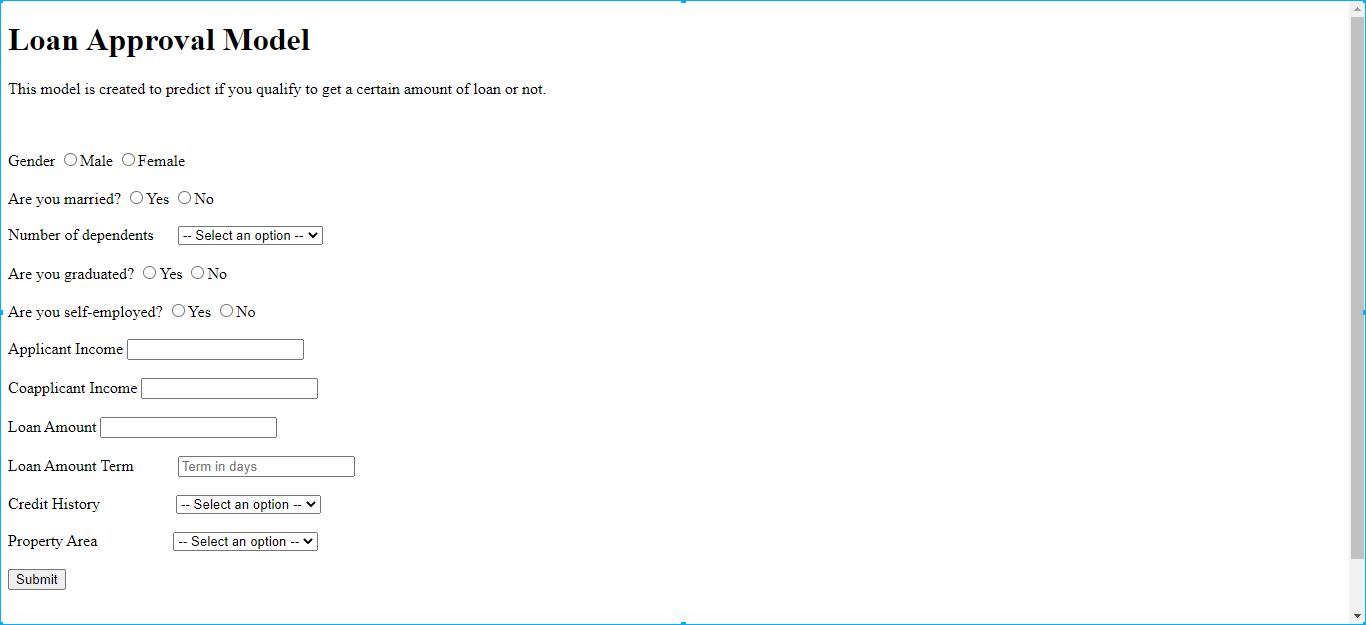
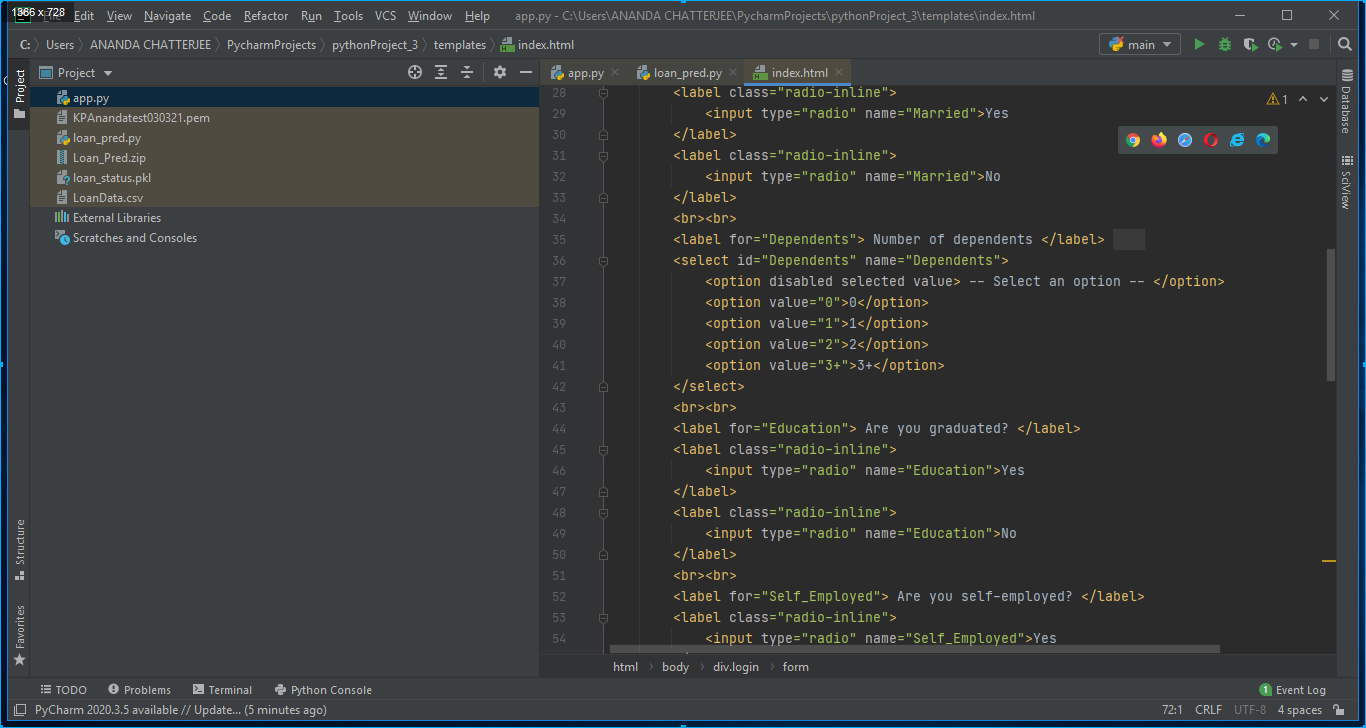
3. A HTML page has also been created writing HTML codes on Pycharm editor for designing an app. In our case it was index.html and it was stored in the templates folder as shown in below Fig. 7.

4. A pickle file was generated after executing the python file loan_pred.py. The pickle file which in our case was loan_status.pkl was read in app.py to make the flask application as shown in Fig. 5.
Model Deployment on the local server
1. python code, HTML code, and flask code were written on pycharm editor. These three codes are written below.
2. All were saved in a pythonProject_3 folder The path of the folder was as follows: “C:UsersANANDA CHATTERJEEPycharmProjectspythonProject_3”. This is shown in Fig. 8.
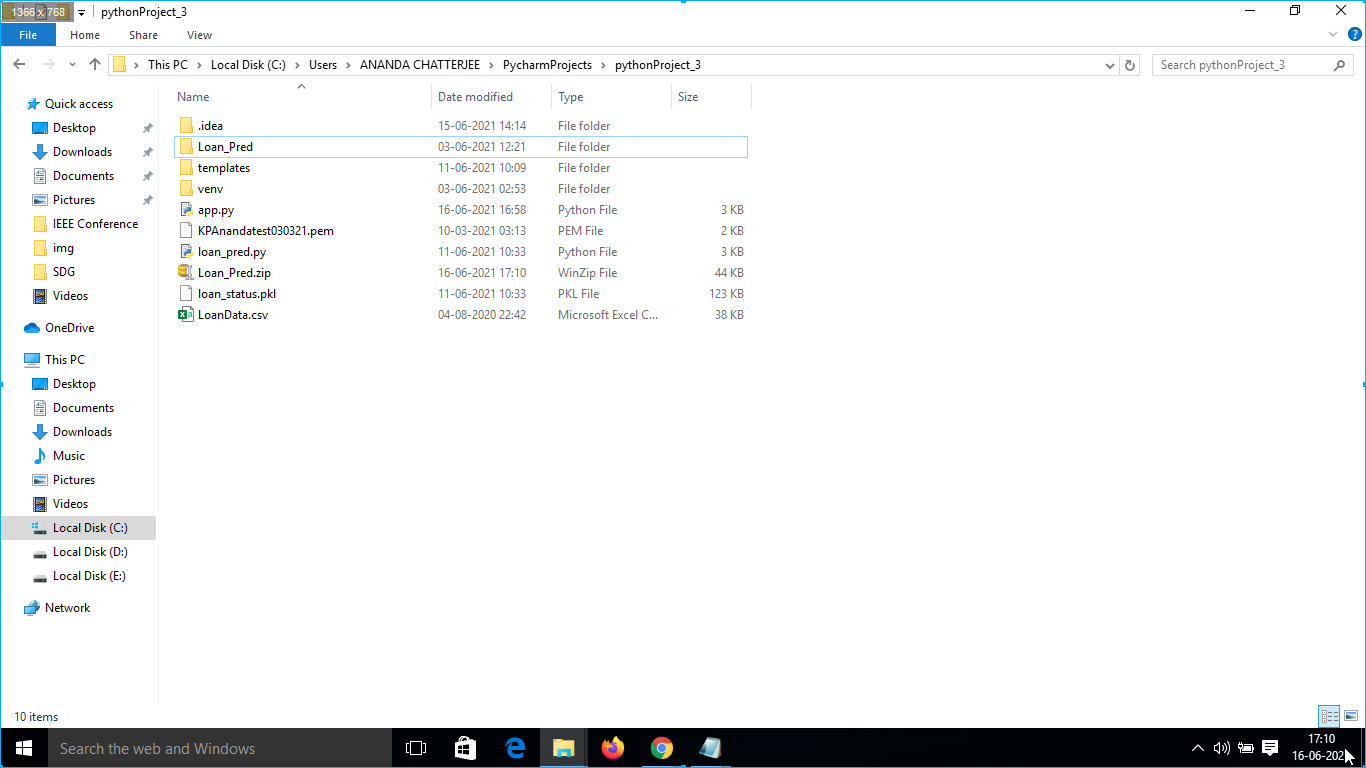
3. Pycharm editor was open and pythonProject_3 folder was selected and under the folder app.py file was run to run the app on the local server as shown in Fig. 6.
4. After clicking on local server-id: “http://127.0.0.1:5000/” the app opens on the local server. While running on the local server the code in-app was app. run(debug=True) and it will be changed to the app. run(host=”0.0.0.0”) while running on Web Host as shown in Fig. 9.
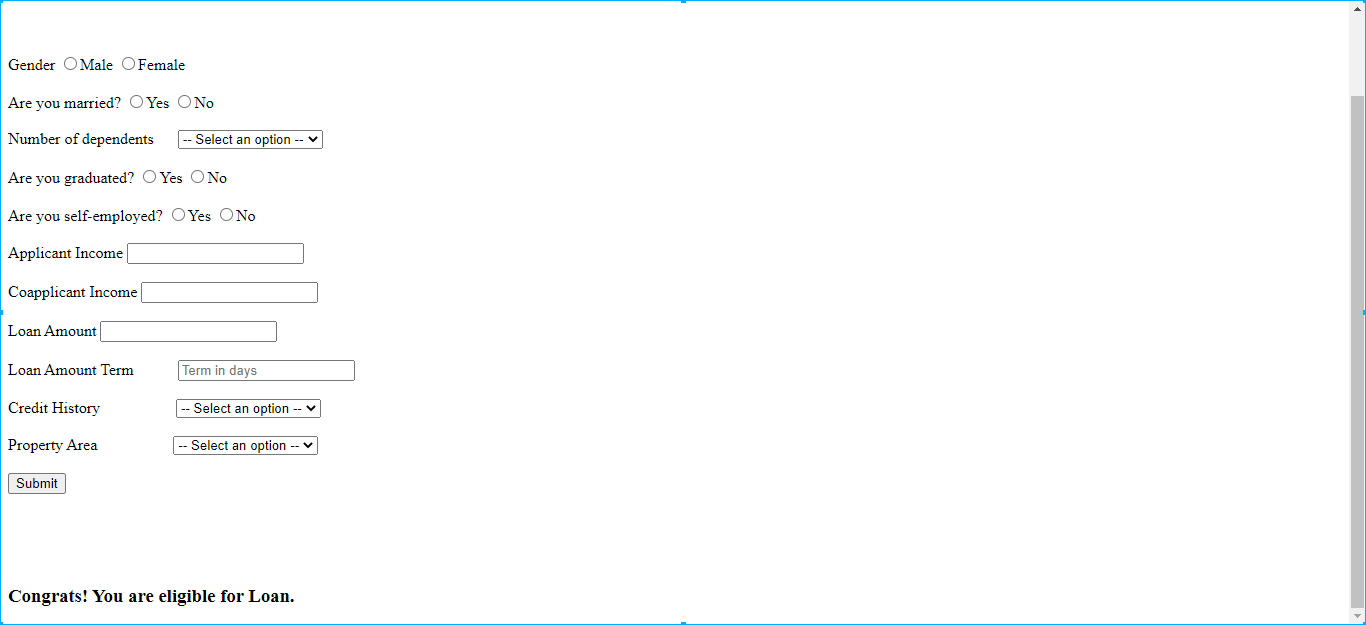
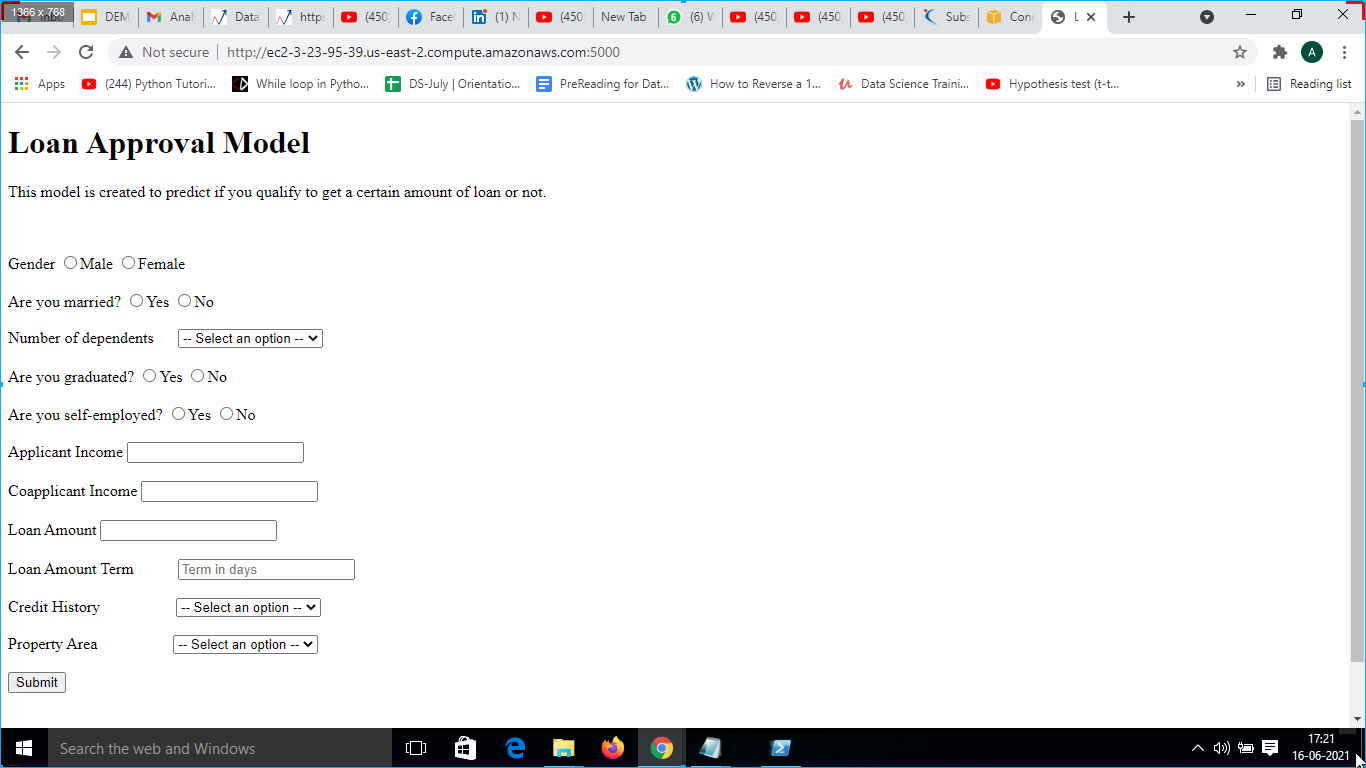
4. The app was opened on the local server as shown in Fig. 10 below.
5.Input values were plugged in the app and after pressing the submit button output was generated as shown in Fig. 11(a) and 11 (b).
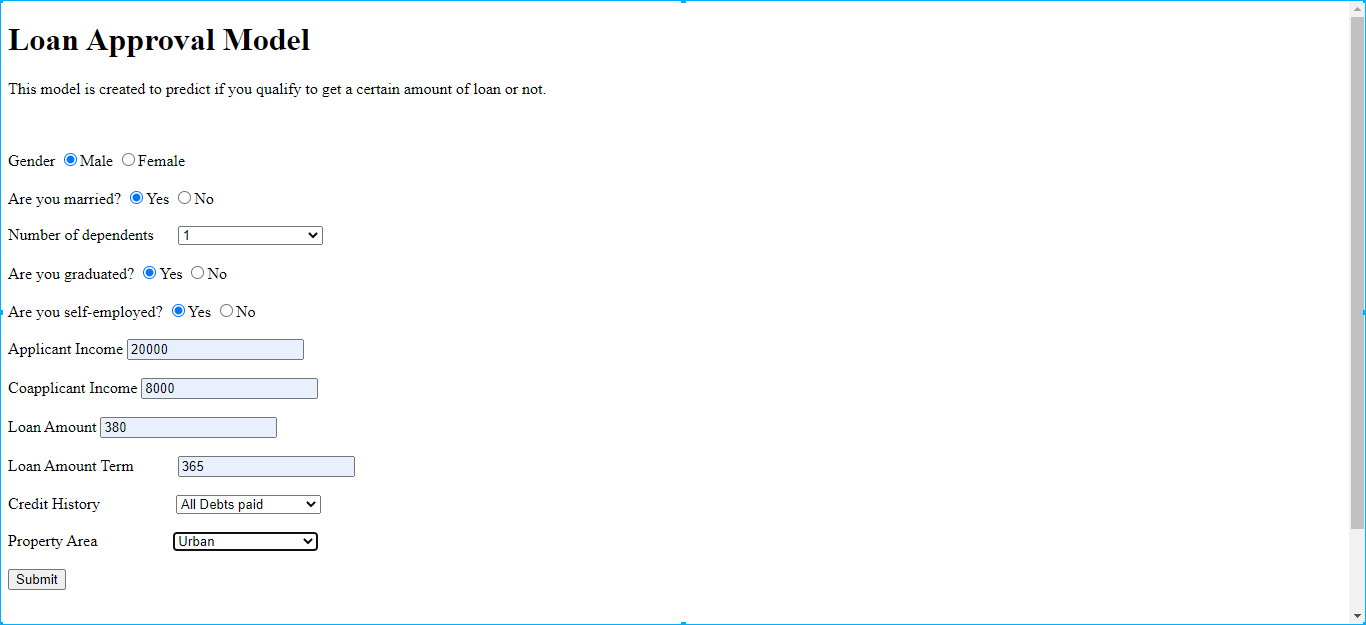
Fig. 11(a) Input values inserted in the app on the local server
=============================================================================

### python code
import pandas as pd
import pickle
import imblearn
import numpy as np
from imblearn.over_sampling import SMOTE
import sklearn
from sklearn.preprocessing import LabelEncoder
from sklearn.model_selection import train_test_split
from sklearn.linear_model import LogisticRegression
from sklearn.ensemble import GradientBoostingClassifier
data = pd.read_csv('LoanData.csv')
data['Gender'] = data['Gender'].fillna(data['Gender'].mode()[0])
data['Married'] = data['Married'].fillna(data['Married'].mode()[0])
data['Dependents'] = data['Dependents'].fillna(data['Dependents'].mode()[0])
data['Self_Employed'] = data['Self_Employed'].fillna(data['Self_Employed'].mode()[0])
# using median values to impute the numerical columns
data['LoanAmount'] = data['LoanAmount'].fillna(data['LoanAmount'].median())
data['Loan_Amount_Term'] = data['Loan_Amount_Term'].fillna(data['Loan_Amount_Term'].median())
data['Credit_History'] = data['Credit_History'].fillna(data['Credit_History'].median())
data = data[data['ApplicantIncome'] < 25000]
data = data[data['CoapplicantIncome'] < 10000]
data = data[data['LoanAmount'] < 400]
#data['ApplicantIncome'] = np.log(data['ApplicantIncome'])
#data['CoapplicantIncome'] = np.log1p(data['CoapplicantIncome'])
data = data.drop(['Loan_ID'], axis = 1)
data['Gender'] = data['Gender'].replace(('Male','Female'),(1, 0))
data['Married'] = data['Married'].replace(('Yes','No'),(1, 0))
data['Education'] = data['Education'].replace(('Graduate','Not Graduate'), (1, 0))
data['Self_Employed'] = data['Self_Employed'].replace(('Yes','No'), (1, 0))
data['Loan_Status'] = data['Loan_Status'].replace(('Y','N'), (1, 0))
# as seen above that Urban and Semi Urban Property have very similar Impact on Loan Status, so, we will merge them together
data['Property_Area'] = data['Property_Area'].replace(('Urban','Semiurban', 'Rural'),(2, 1, 0))
# as seen above that apart from 0 dependents, all are similar hence, we merge them to avoid any confusion
data['Dependents'] = data['Dependents'].replace(('0', '1', '2', '3+'), (0, 1, 2, 3))
y = data['Loan_Status']
x = data.drop(['Loan_Status'], axis = 1)
x_resample, y_resample  = SMOTE().fit_sample(x, y.values.ravel())
from sklearn.model_selection import train_test_split
x_train, x_test, y_train, y_test = train_test_split(x_resample, y_resample, test_size = 0.2, random_state = 0)
model =  GradientBoostingClassifier()
model.fit(x_train, y_train)
file = open('loan_status.pkl', 'wb')
pickle.dump(model, file)
====================================================================

## Flask code to build app
from flask import Flask, render_template, request
import pickle
import numpy as np
model = pickle.load(open('loan_status.pkl', 'rb'))  # opening pickle file in read mode
app = Flask(__name__)  # initializing Flask app
@app.route("/")
def hello():
    return render_template('index.html')
@app.route("/predict", methods=['POST'])
def predict():
    if request.method == 'POST':
        d1 = request.form['Married']
        if d1 == 'No':
            d1 = 0
        else:
            d1 = 1
        d2 = request.form['Gender']
        if (d2 == 'Male'):
            d2 = 1
        else:
            d2 = 0
        d3 = request.form['Education']
        if (d3 == 'Graduate'):
            d3 = 1
        else:
            d3 = 0
        d4 = request.form['Self_Employed']
        if (d4 == 'No'):
            d4 = 0
        else:
            d4 = 1
        d5 = request.form['ApplicantIncome']
        d6 = request.form['CoapplicantIncome']
        d7 = request.form['LoanAmount']
        d8 = request.form['Loan_Amount_Term']
        d9 = request.form['Credit_History']
        if (d9 == 'All debts paid'):
            d9 = 1
        else:
            d9 = 0
        d10 = request.form['Property_Area']
        if (d10 == 'Urban'):
            d10 = 2
        elif (d10 == 'Rural'):
            d10 = 0
        else:
            d10 = 1
        d11 = request.form['Dependents']
        if (d11 == '3+'):
            d11 = 3
        elif (d11=='2'):
            d11 = 2
        elif (d11=='1'):
            d11 = 1
        else:
            d11 = 0
        arr = np.array([[d1, d2, d3, d4, d5, d6, d7, d8, d9,d10,d11]])
        pred = model.predict(arr)
        if pred == 0:
            return render_template('index.html', prediction_text="Sorry! You are not eligible for Loan.")
        else:
            return render_template('index.html', prediction_text="Congrats! You are eligible for Loan.")
        return render_template('index.html')
app.run(host="0.0.0.0")            # deploy
#app.run(debug=True)                # run on local system
===============================================================


## HTML code
<!DOCTYPE html>

<html>

<head>

    <meta charset="UTF-8">

    <title>Loan Approval Model</title>

</head>

<body>

<div class="login">

    <div class="banner">

        <h1>Loan Approval Model</h1>

    </div>

    <p> This model is created to predict if you qualify to get a certain amount of loan or not. <br>

    </p>

    <br> <br>

    <form action="{{ url_for('predict')}}" method="post">

        <label for="Gender">Gender </label>

        <label class="radio-inline">

            <input type="radio" name="Gender">Male

        </label>

        <label class="radio-inline">

            <input type="radio" name="Gender">Female

        </label>

        <br><br>

        <label for="Married"> Are you married? </label>

        <label class="radio-inline">

            <input type="radio" name="Married">Yes

        </label>

        <label class="radio-inline">

            <input type="radio" name="Married">No

        </label>

        <br><br>

        <label for="Dependents"> Number of dependents </label>

        <select id="Dependents" name="Dependents">

            <option disabled selected value> -- Select an option -- </option>

            <option value="0">0</option>

            <option value="1">1</option>

            <option value="2">2</option>

            <option value="3+">3+</option>

        </select>

        <br><br>

        <label for="Education"> Are you graduated? </label>

        <label class="radio-inline">

            <input type="radio" name="Education">Yes

        </label>

        <label class="radio-inline">

            <input type="radio" name="Education">No

        </label>

        <br><br>

        <label for="Self_Employed"> Are you self-employed? </label>

        <label class="radio-inline">

            <input type="radio" name="Self_Employed">Yes

        </label>

        <label class="radio-inline">

            <input type="radio" name="Self_Employed">No

        </label>

        <br><br>

        <label for="ApplicantIncome">Applicant Income</label>

        <input type="text" name="ApplicantIncome" required="required" />

        <br><br>

        <label for="CoapplicantIncome">Coapplicant Income</label>

        <input type="text" name="CoapplicantIncome" required="required" />

        <br><br>

        <label for="LoanAmount">Loan Amount</label>

        <input type="text" name="LoanAmount" required="required" />

        <br><br>

        <label for="Loan_Amount_Term">Loan Amount Term</label>

        <input type="text" name="Loan_Amount_Term" placeholder="Term in days" required="required" />

        <br><br>

        <label for="Credit_History">Credit History</label>

        <select id="Credit_History" name="Credit_History">

            <option disabled selected value> -- Select an option -- </option>

            <option value="All Debts paid">All Debts paid</option>

            <option value="Not paid">Not paid</option>

        </select>

        <br><br>

        <label for="Property_Area">Property Area</label> ;

        <select id="Property_Area" name="Property_Area">

            <option disabled selected value> -- Select an option -- </option>

            <option value="Rural">Rural</option>

            <option value="Semiurban">Semiurban</option>

            <option value="Urban">Urban</option>

        </select>

    <br><br>

        <input type="submit", value = "Submit">

    </form>

    <br>

    <br>

      <br><br><h3>{{ prediction_text }}</h3>

 </div>

</body>

</html>
==========================================================================
Model Deployment on Amazon AWS
1. Open Amazon AWS and create instance anandatest from instance state as shown in 12.
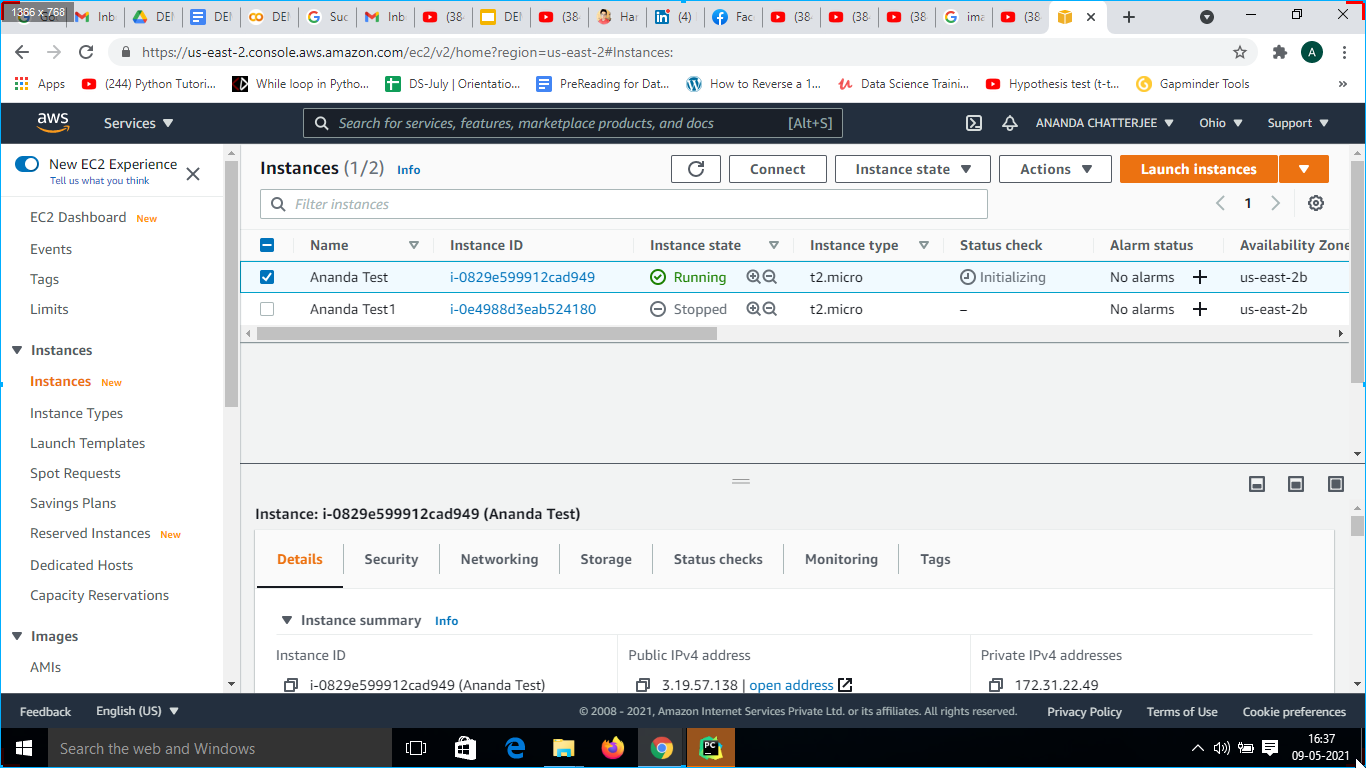
Fig. 12 New Instance on Amazon AWS EC2
2. Amazon Web Services gives you a PEM file containing a private key whenever you create a new instance, and it is to be downloaded and in our case, its name is “KPAnandatest030321.pem”, it is used to connect my instance with the SSH Client.
3. Move to the Security group under the present instance and set Port Range as 5000 and Port Type as TCP Custom as shown in 13.
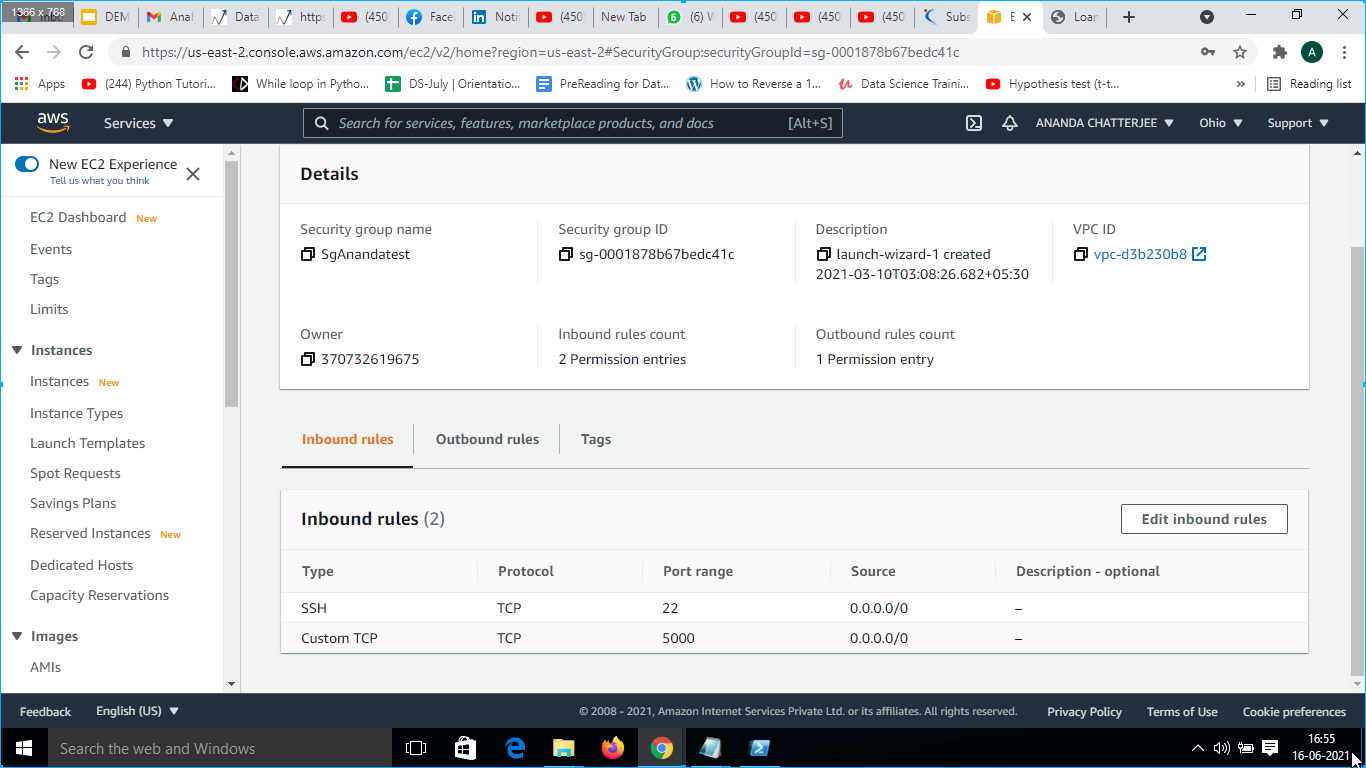
Fig. 13 Security settings in AWS EC24. Then instance was connected to SSH Client by clicking on the Action tab and then click on connect. The SSH client pic has shown below.

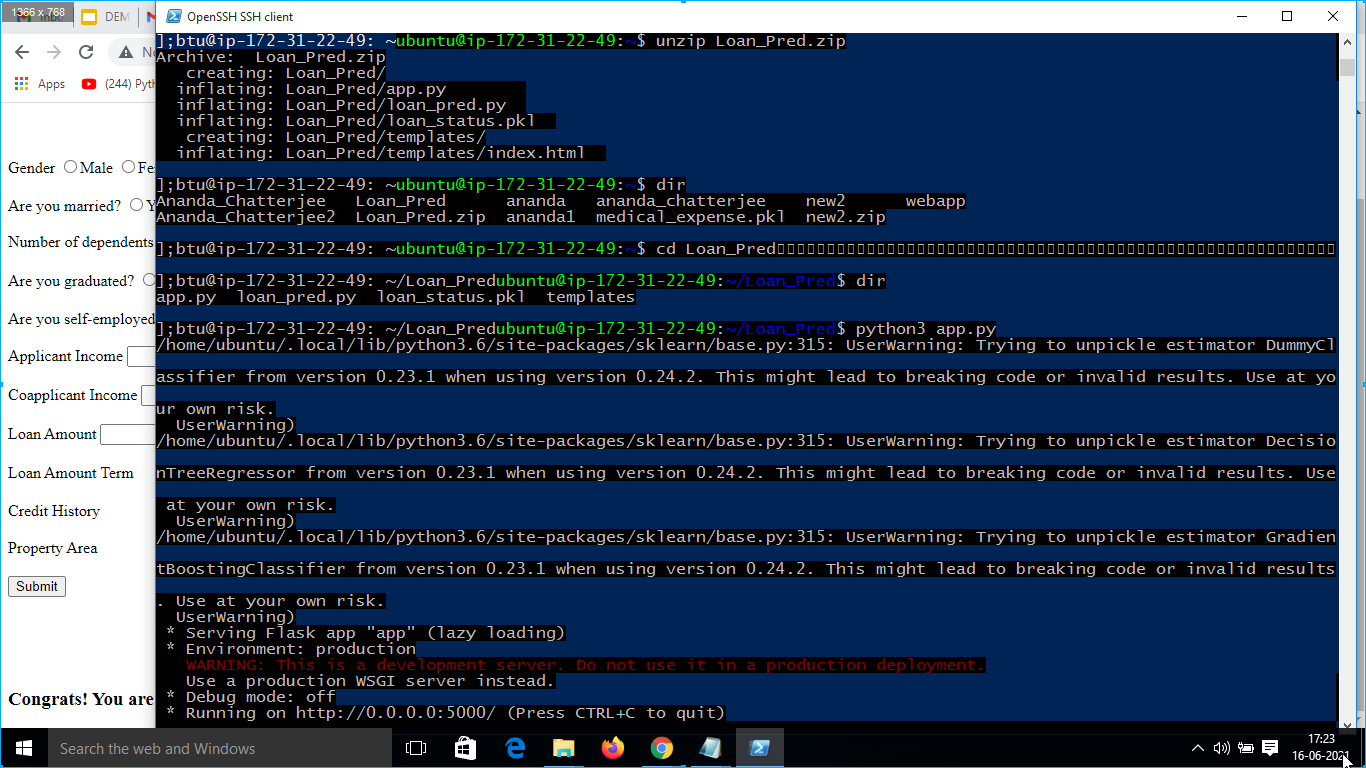
5. Open the PowerShell prompt and paste the command “scp -i KPAnandatest030321.pem Loan_Pred.zip [email protected]:” to copy the Loan_Pred.zip file to access the app.py and then paste command ssh -i “KPAnandatest030321.pem” [email protected]” to connect the local machine to the AWS server as shown in Fig. 15.
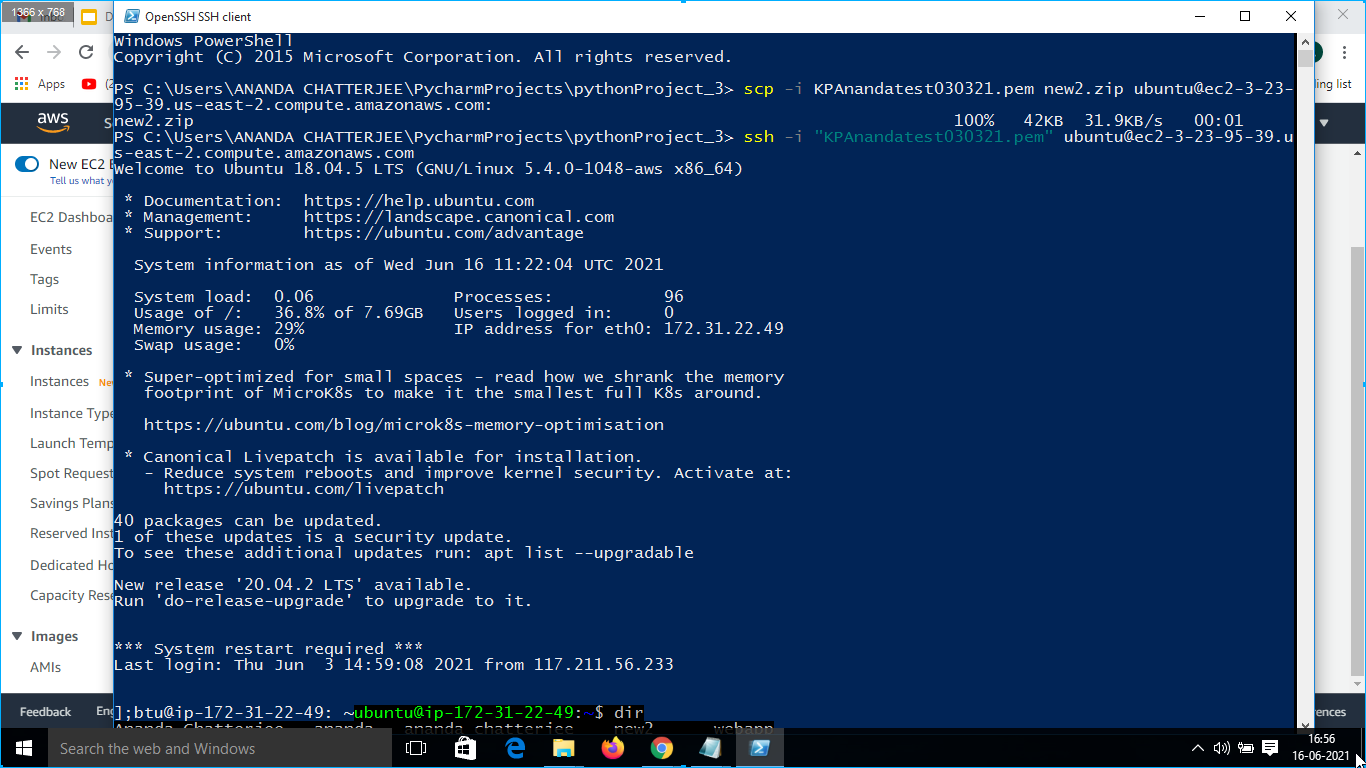
6. Paste command ssh -i “KPAnandatest030321.pem” [email protected]” to connect the local machine to the AWS server as shown in 6(d).
7. Thereafter the command ” cd Local_Pred” was run to locate app.py as shown in 6(e).
8. Thereafter python3 app.py command was run to run the app on the web host as shown in Fig. 16.
9. Afterwards Amazon Aws SSH Client was visited, and connect the instance to Public DNS to run my app on the web URL as shown in Fig. 14.
10. Then the present instance was connected using the Public DNS “ec2-3-23-95-39.us-east-2.compute.amazonaws.com” as shown in Fig. 14.
11. The app was opened on a web server as shown in 17 and input values such as ” Gender”, “Are you married?”, “Number of dependents”, “Are you graduated?”, “Are you self-employed?”, “Applicant Income”, “Co-applicant Income”, “Loan Amount”, “Loan Amount Term”, “Credit History”, “Property Area” as shown in Fig. 18.
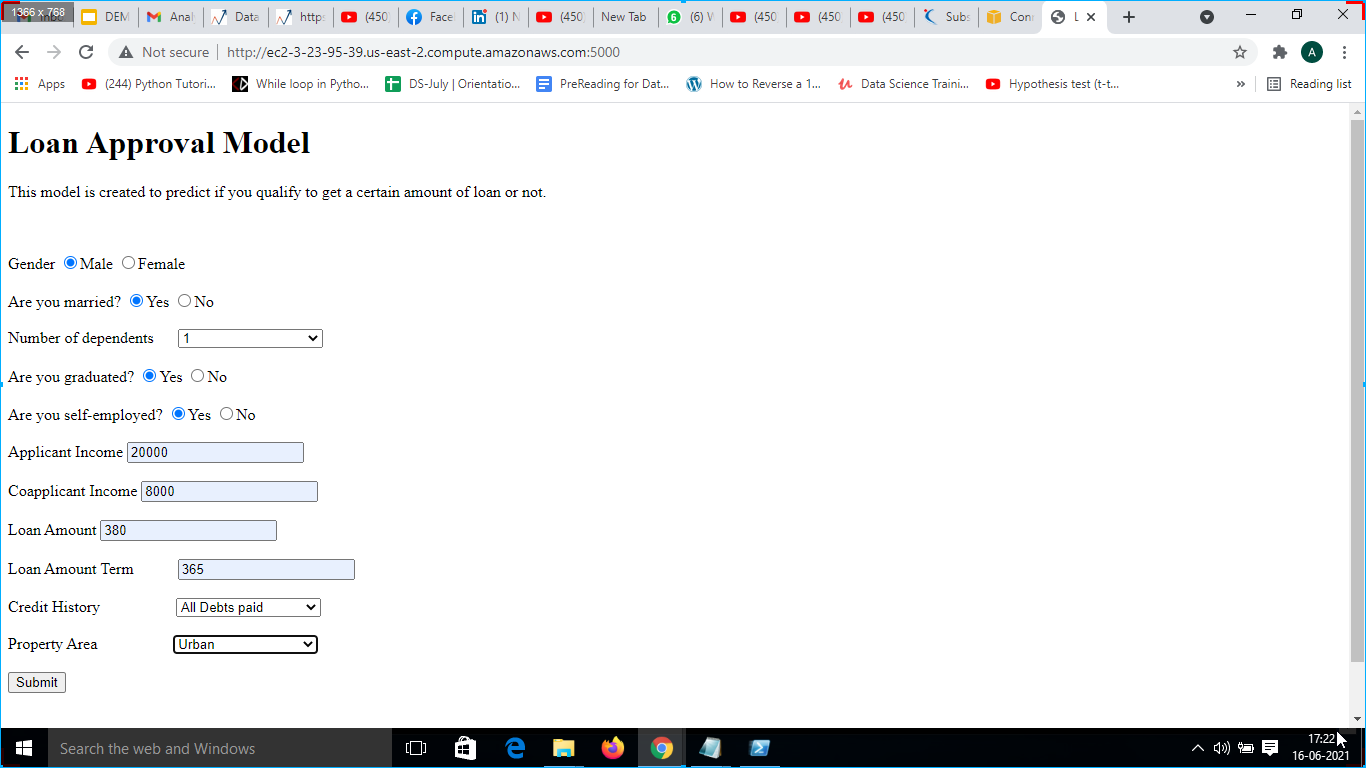
12. Output was obtained after pressing submit button and the following output was generated
“Congrats! You are eligible for Loan” as shown in 6(h).

Dataset Download Link: https://drive.google.com/uc?id=1H2YW6gN2nUAjvPEK_hZKH8CR4ckeXwI5
My Linkedin id is: Linkedin
The media shown in this article are not owned by Analytics Vidhya and are used at the Author’s discretion.
I am a Data Scientist working with ICICI. I am an M.Tech degree holder in Instrumentation & Control. I did post graduation in Data Science also. I love coding which drove me towards learning ML,DL, and NLP. I have participated in few hackathons and also done many projects on ML,DL,and NLP using Python & R


