Simplifying MLOps: A Complete Guide On ZenML For Beginners
Introduction
Are you new to Data Science, Machine Learning, or MLOps and feeling overwhelmed with tool choices? Consider ZenML—an orchestration tool for streamlined production pipelines. In this article, we’ll explore ZenML’s capabilities and features to simplify your MLOps journey.
Learning Objectives
- Learn the fundamental concepts of ZenML, such as pipelines, steps, and materializers.
- Explore the ZenML commands for initializing a repository, running the local dashboard, and managing pipelines.
- Understand how to define and connect steps within a pipeline, including using decorators like @step and @pipeline.
- Dive into advanced ZenML features like scheduling pipeline runs, adjusting execution order of steps, and leveraging step context for logging and debugging.
- Understand how ZenML integrates with different cloud platforms and provides a standardized MLOps infrastructure.
This article was published as a part of the Data Science Blogathon.
Table of contents
- What is ZenML?
- Why Should we use ZenML?
- ZenML Installation Guide
- Important ZenML Terminologies
- Creating your First Pipeline
- Parameters and Renaming a Pipeline
- ZenML Stack Components CLI
- Suggestions and Good Practices
- ZenML Server and it’s Deployment
- Execution Order of Steps
- Enable/ Disable Logs
- Types of Settings
- Time Scheduling the Models
- Step Context
- Frequently Asked Questions
First, let’s grasp what ZenML is, why it stands out from other tools, and how to utilize it.
What is ZenML?
ZenML is an open-source MLOps (Machine Learning Operations) framework for Data Scientists, ML Engineers, and MLOps Developers. It facilitates collaboration in the development of production-ready ML pipelines. ZenML is known for its simplicity, flexibility, and tool-agnostic nature. It provides interfaces and abstractions specifically designed for ML workflows, allowing users to integrate their preferred tools seamlessly and customize workflows to meet their unique requirements.
Why Should we use ZenML?
ZenML benefits data scientists, ML engineers, and MLOps engineers in several key ways:
- Simplified Pipeline Creation: Easily build ML pipelines with ZenML using the @step and @pipeline decorators.
- Effortless Metadata Tracking and Versioning: ZenML provides a user-friendly dashboard for tracking pipelines, runs, components, and artifacts.
- Automated Deployment: ZenML streamlines model deployment by automatically deploying it when defined as a pipeline, eliminating the need for custom docker images.
- Cloud Flexibility: Deploy your model on any cloud-based platform effortlessly using simple commands with ZenML.
- Standardized MLOps Infrastructure: ZenML allows all team members to run pipelines by configuring ZenML as the staging and production environment, ensuring a standardized MLOps setup.
- Seamless Integrations: Easily integrate ZenML with experiment tracking tools such as Weights and Biases, MLflow, and more.
ZenML Installation Guide
To install ZenML in your terminal, use the following commands:
Install ZenML:
pip install zenmlFor local dashboard access, install with the server option:
pip install "zenml[server]To verify if ZenML is correctly installed and to check its version, run:
zenml version
Important ZenML Terminologies
- Pipeline: A series of steps in the machine learning workflow.
- Artifacts: Inputs and outputs from each step in the pipeline.
- Artifact Store: A versioned repository for storing artifacts, enhancing pipeline execution speed. ZenML provides a local store by default, stored on your local system.
- Components: Configurations for functions used in the ML pipeline.
- Stack: A collection of components and infrastructure. ZenML’s default stack includes:
- Artifact Store
- Orchestrator

The left part of this image is the coding part we have done it as a pipeline, and the right side is the infrastructure. There is a clear separation between these two, so that it is easy to change the environment, in which the pipeline runs.
- Flavors: Solutions created by integrating other MLOps tools with ZenML, extending from the base abstraction class of components.
- Materializers: Define how inputs and outputs are passed between steps via the artifact store. All materializers fall under the Base Materializer class. You can also create custom materializers to integrate tools not present in ZenML.
- ZenML Server: Used for deploying ML models and making predictions.
Important ZenML Commands
Command to initiate a new repository:
zenml initCommand to run the dashboard locally:
zenml upOutput:
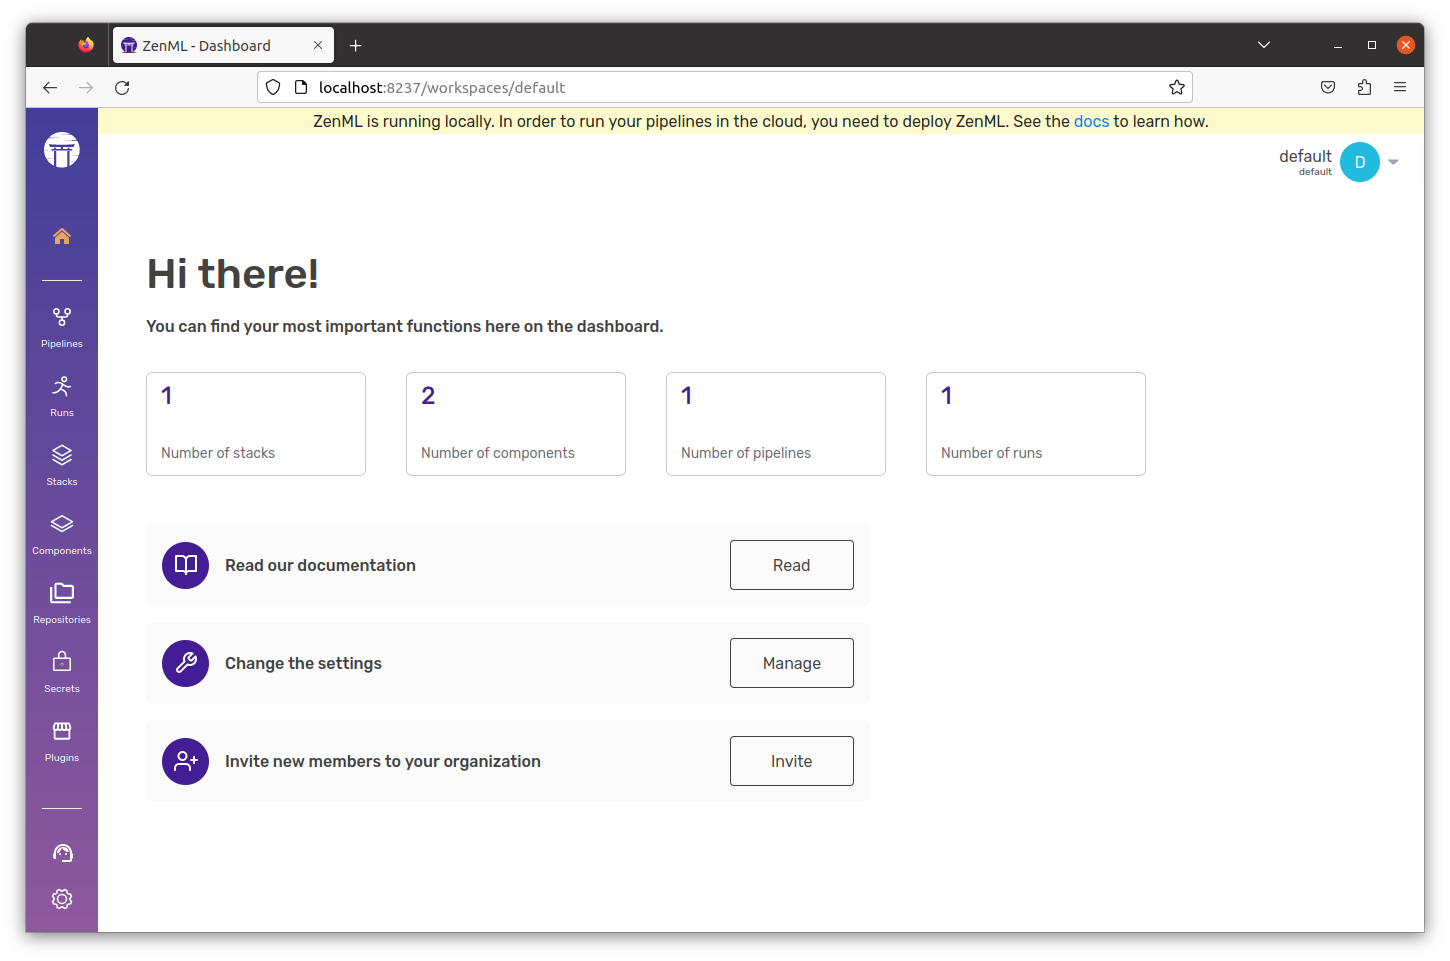
Command to know the status of our Zenml Pipelines:
zenml showCommand to see the active stack configuration:
zenml stack describeCLI:

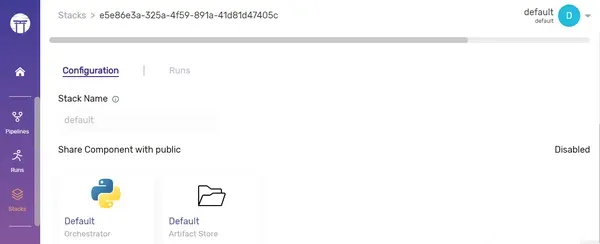
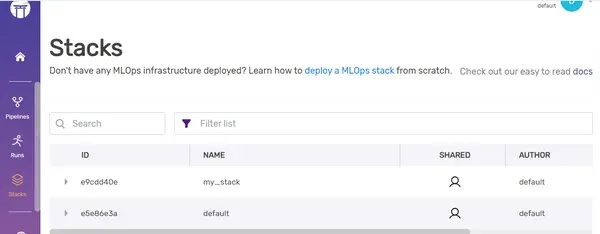
Command to see the list of all stacks registered:
zenml stack listOutput:

Dashboard:
Creating your First Pipeline
First, we need to import pipeline, step from ZenML to create our pipeline:
#import necessary modules to create step and pipeline
from zenml import pipeline, step
#Define the step and returns a string.
@step
def sample_step_1()->str:
return "Welcome to"
#Take 2 inputs and print the output
@step
def sample_step_2(input_1:str,input_2:str)->None:
print(input_1+" "+input_2)
#define a pipeline
@pipeline
def my_first_pipeline():
input_1=sample_step_1()
sample_step_2(input_1,"Analytics Vidhya")
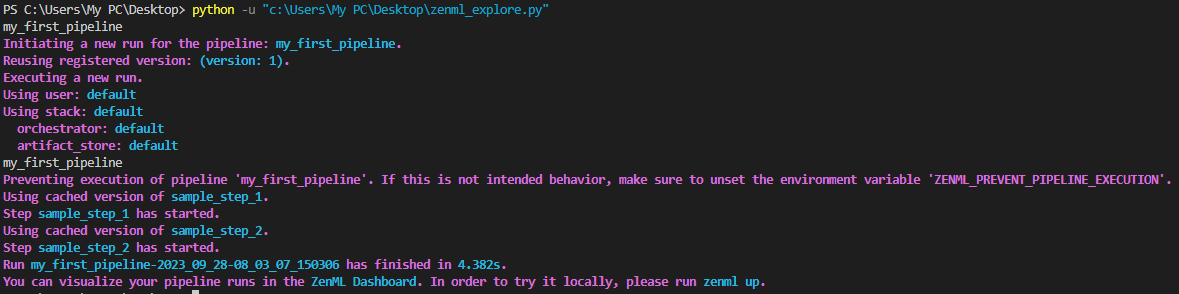
#execute the pipeline
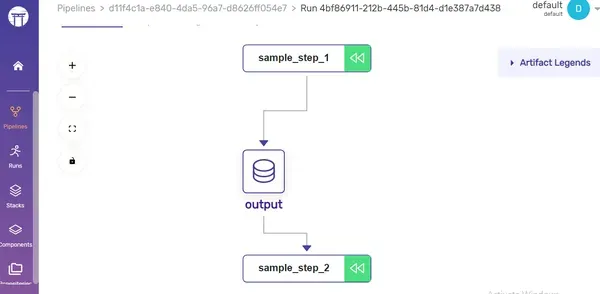
my_first_pipeline()In this sample pipeline, we’ve constructed two individual steps, which we then integrated into the overall pipeline. We accomplished this using the @step and @pipeline decorators.
Dashboard: Enjoy your pipeline visualisation
Parameters and Renaming a Pipeline
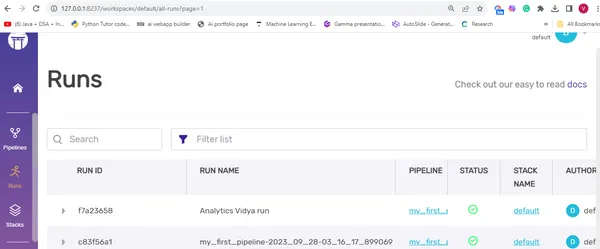
You can enhance this pipeline by introducing parameters. For instance, I’ll demonstrate how to modify the pipeline run name to ‘Analytics Vidya run’ using the with_options() method, specifying the run_name parameter.
#Here, we are using with_options() method to modify the pipeline's run name
my_first_pipeline = my_first_pipeline.with_options(
    run_name="Analytics Vidya run"
)
You can see the new name here in the dashboard:
If a step has multiple outputs its better to have tuple annotations to it. For example:
#Here, there are 4 outputs, so we are using Tuple. Here, we are using Annotations to tell what
# these outputs refers.
def train_data()->Tuple[
    Annotated[pd.DataFrame,"X_train"],
    Annotated[pd.DataFrame,"X_test"],
    Annotated[pd.Series,"Y_train"],
    Annotated[pd.Series,"Y_test"],
]:
We can also add date and time to it.
#here we are using date and time inside placeholders, which
#will automatically get replaced with current date and time.
my_first_pipeline = my_first_pipeline.with_options(
    run_name="new_run_name_{{date}}_{{time}}"
)
my_first_pipeline()
Dashboard:
Caching
Caching accelerates the pipeline execution process by leveraging previous run outputs when no code changes occur, saving time and resources. To enable caching, simply include a parameter alongside the @pipeline decorator.
#here, caching is enabled as a parameter to the function.
@pipeline(enable_cache=True)
def my_first_pipeline():
There are occasions when we need to dynamically adjust our code or inputs. In such cases, you can disable caching by setting enable_cache to False.
In dashboard, the hierarchy levels will be like:

You can utilize model properties to retrieve pipeline information. For instance, in the following example, we access the pipeline’s name using model.name.
model=my_first_pipeline.model
print(model.name)
You can see the last run of the pipeline by:
model = my_first_pipeline.model
print(model.name)

# Now we can access the last run of the pipeline
run = model.last_run
print("last run is:", run)
Output:

Access the pipeline using CLI
You can retrieve the pipeline without relying on pipeline definitions by utilizing the Client().get_pipeline() method.
Command:
from zenml.client import Client
pipeline_model = Client().get_pipeline("my_first_pipeline")
Output:
While you can conveniently view all your pipelines and runs in the ZenML dashboard, it’s worth noting that you can also access this information through the ZenML Client and CLI.
By using Client():
#here we have created an instance of the ZenML Client() to use the list_pipelines() method
pipelines=Client().list_pipelines()
Output:

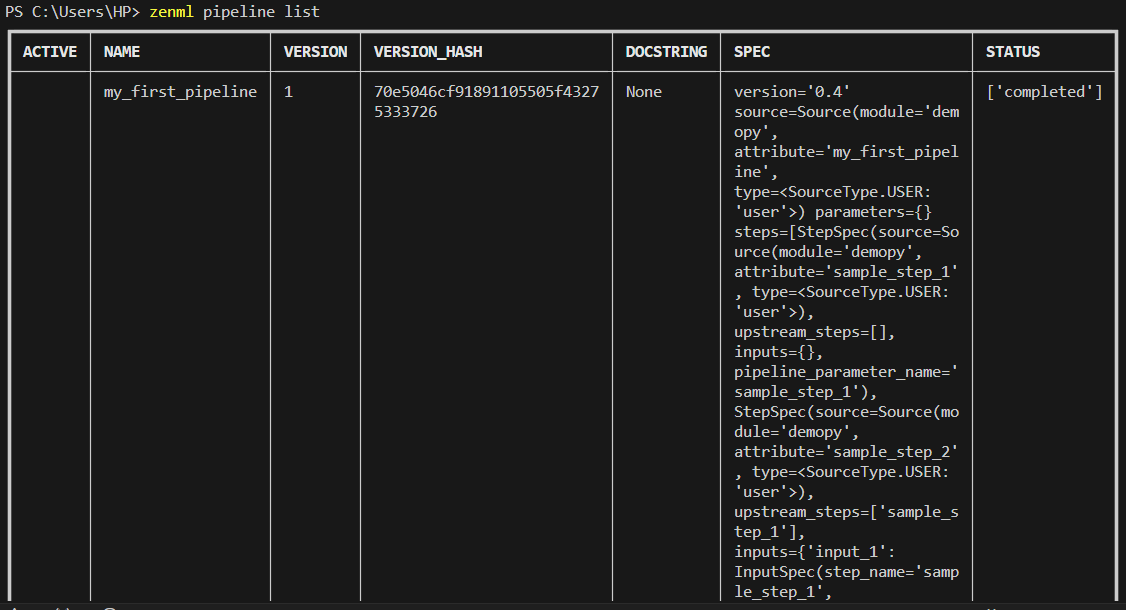
By using CLI:
zenml pipeline listOutput:
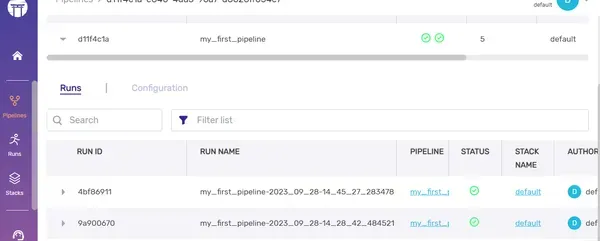
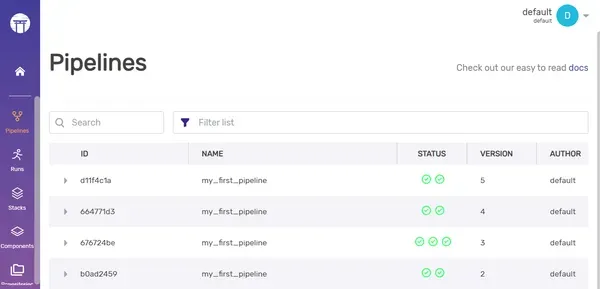
Dashboard:
ZenML Stack Components CLI
To view all the existing artifacts, you can simply execute the following command:
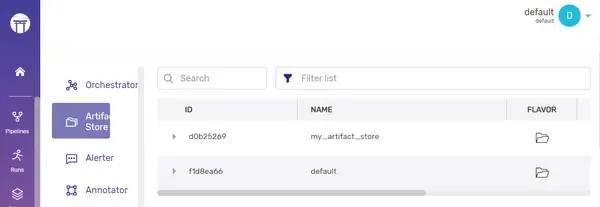
zenml artifact-store listOutput:

Dashboard:
To see the orchestrator list,
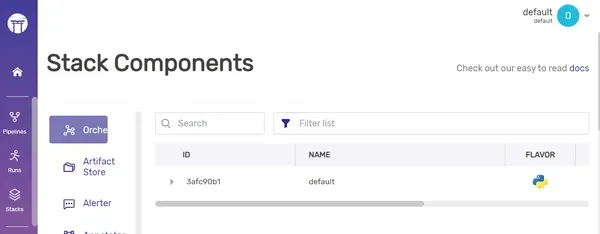
zenml orchestrator listOutput:

Dashboard:
To register new artifact store, follow the command:
zenml artifact-store register my_artifact_store --flavor=localYou can also make updates or deletions to the current artifact store by replacing the “register” keyword with “update” or “delete.” To access additional details about the registered stack, you can execute the command:
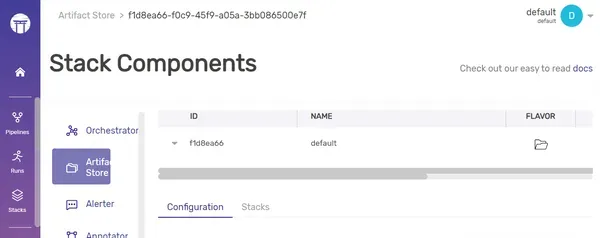
zenml artifact-store describe my_artifact_storeOutput:

Dashboard:
As we demonstrated earlier for the artifact store, you can also switch to a different active stack.
zenml stack register my_stack -o default -a my_artifact_store

As we demonstrated earlier for the artifact store, you can also switch to a different active stack.
zenml stack set my_stackYou can now observe that the active stack has been successfully switched from “default” to “my_stack.”
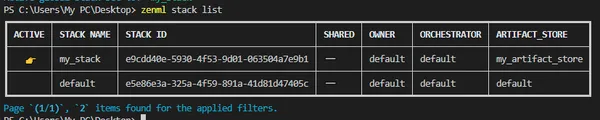
Dashboard: You can see the new Stack here in the dashboard.
Suggestions and Good Practices
1. Incorporate robust logging practices into your project by:
#import necessary modules
from zenml import pipeline, step
from zenml.client import Client
from zenml.logger import get_logger
logger=get_logger(__name__)

#Here, we are creating a pipeline with 2 steps.
@step
def sample_step_1()->str:
    return "Welcome to"

@step
def sample_step_2(input_1:str,input_2:str)->None:
    print(input_1+" "+input_2)

@pipeline
def my_first_pipeline():
#Here, 'logger' is used to log an information message
    logger.info("Its an demo project")
    input_1=sample_step_1()
    sample_step_2(input_1,"Analytics Vidya")
my_first_pipeline()
Output:

2. Ensure your project has a well-structured template. A clean template enhances code readability and facilitates easier understanding for others who review your project.
My_Project/                             # Project repo
├── data/                               # Data set folder
├── notebook/ .ipynb                    # Jupyter notebook files
├── pipelines/                          # ZenML pipelines folder
│   ├── deployment_pipeline.py          # Deployment pipeline
│   ├── training_pipeline.py            # Training pipeline
│   └── *any other files
├──assets
├── src/                                # Source code folder
├── steps/                              # ZenML steps folder
├── app.py                              # Web application
├── Dockerfile(* Optional)
├── requirements.txt                    # List of project required packages
├── README.md                           # Project documentation
└── .zen/
For creating a comprehensive end-to-end MLOps project, it’s advisable to adhere to this project template. Always ensure that your step files and pipeline files are organized in a separate folder. Include thorough documentation to enhance code comprehension. The .zen folder is automatically generated when you initiate ZenML using the “zenml init” command. You can also use notebooks to store your Colab or Jupyter notebook files.
3. When dealing with multiple outputs in a step, it’s advisable to use Tuple annotations.
4. Remember to set enable_cache to False, especially when scheduling pipeline runs for regular updates, such as dynamically importing new data (we’ll delve into time scheduling later in this blog).
ZenML Server and it’s Deployment
ZenML Server serves as a centralized hub for storing, managing, and executing pipelines. You can gain a comprehensive view of its functionality through the picture below:

In this setup, the SQLite database stores all stacks, components, and pipelines. “Deploying” refers to making your trained model generate predictions on real-time data in a production environment. ZenML offers two deployment options: ZenML Cloud and self-hosted deployment.
Execution Order of Steps
By default, ZenML executes steps in the order they are defined. However, it’s possible to change this order. Let’s explore how:
from zenml import pipeline

@pipeline
def my_first_pipeline():
#here,we are mentioning step 1 to execute only after step 2.
    sample_step_1 = step_1(after="step_2")
    sample_step_2 = step_2()
#Then, we will execute step 3 after both step 1 and step 2 got executed.
    step_3(sample_step_1, sample_step_2)
In this scenario, we’ve modified the default execution order of steps. Specifically, we’ve arranged for step 1 to run only after step 2, and step 3 to run after both step 1 and step 2 have been executed.
Enable/ Disable Logs
You can enable or disable the saving of logs in the artifact store by adjusting the “enable_step_logs” parameter. Let’s take a look at how to do this:
#Here, we are disabling the logs in the step, mentioned as a parameter.
@step(enable_step_logs=False)
def sample_step_2(input_1: str, input_2: str) -> None:
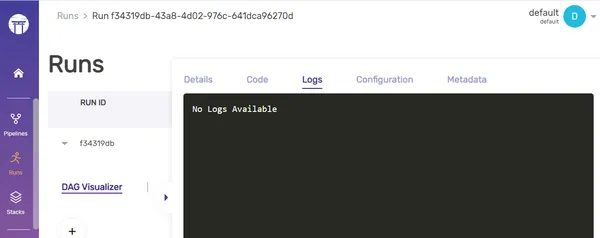
print(input_1 + " " + input_2)Output:
Before Logging:

After logging:
Types of Settings
There are two types of settings in ZenML:
- General Settings: These settings can be used across all pipelines (e.g) Docker settings.
- Stack Component Specific Settings: These are run-time specific configuration settings, and these differ from the stack component register settings which are static in nature, whereas these are dynamic in nature .For example., MLFlowTrackingURL is an register setting, whereas experiment name and it’s related run-time configurations are stack compnent specific settings. Stack component specific settings can be overridden during run-time, but register settings cannot be done.
Time Scheduling the Models
We can automate the deployment of the ML model by scheduling it to run at specific times using cron jobs. This not only saves time but also ensures that the process runs at the designated times without any delays. Let’s explore how to set this up:
from zenml.config.schedule import Schedule
from zenml import step,pipeline

#Define the step and return a string.
@step
def sample_step_1()->str:
    return "Welcome to"

#Take 2 inputs and print the output
@step
def sample_step_2(input_1:str,input_2:str)->None:
    print(input_1+" "+input_2)

@pipeline
def my_first_pipeline():
  logger.info("Its an demo project")
  input_1=sample_step_1()
  sample_step_2(input_1,"Analytics Vidya")

#Here we are using the cron job to schedule our pipelines.
schedule = Schedule(cron_expression="0 7 * * 1")
my_first_pipeline = my_first_pipeline.with_options(schedule=schedule)
my_first_pipeline()
In this context, the CRON job expression follows the format (minute, hour, day of the month, month, day of the week). Here, I’ve scheduled the pipeline to run every Monday at 7 A.M.
Alternatively, we can also use time intervals:
from zenml.config.schedule import Schedule
from zenml import pipeline

@pipeline
def my_first_pipeline():
  input_1 = sample_step_1()
  sample_step_2(input_1, "Analytics Vidya")

#here, we are using datetime.now() to mention our current time and
#interval_second parameter used to mention the regular time intervals it needs to get executed.
schedule = Schedule(start_time=datetime.now(), interval_second=3000)
my_first_pipeline = my_first_pipeline.with_options(schedule=schedule)
my_first_pipeline()
I’ve written code to initiate our pipeline, starting from the present moment, and repeating every 5-minute interval.
Step Context
The step context is employed to access information about the currently executing step, such as its name, the run name, and the pipeline name. This information can be valuable for logging and debugging purposes.
#import necessary modules
from zenml import pipeline, step
from zenml.client import Client
from zenml.logger import get_logger
from zenml.config.schedule import Schedule
from zenml import get_step_context
#Get a logger for the current module
logger = get_logger(__name__)
@step
def sample_step_1() -> str:
# access the step context within the step function
step_context = get_step_context()
pipeline_name = step_context.pipeline.name
run_name = step_context.pipeline_run.name
step_name = step_context.step_run.name
logger.info("Pipeline Name: %s", pipeline_name)
logger.info("Run Name: %s", run_name)
logger.info("Step Name: %s", step_name)
logger.info("It's a demo project")
return "Welcome to"
@step()
def sample_step_2(input_1: str, input_2: str) -> None:
# accessing the step context in this 2nd step function
step_context = get_step_context()
pipeline_name = step_context.pipeline.name
run_name = step_context.pipeline_run.name
step_name = step_context.step_run.name
logger.info("Pipeline Name: %s", pipeline_name)
logger.info("Run Name: %s", run_name)
logger.info("Step Name: %s", step_name)
print(input_1 + " " + input_2)
@pipeline
def my_first_pipeline():
input_1 = sample_step_1()
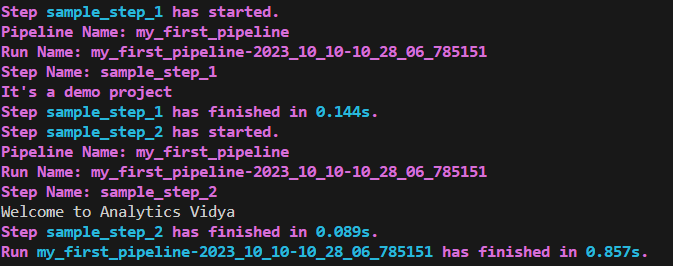
sample_step_2(input_1, "Analytics Vidya")
my_first_pipeline()Output:
Conclusion
In this comprehensive guide, we’ve covered everything you need to know about ZenML, from its installation to advanced features like customizing execution order, creating time schedules, and utilizing step contexts. We hope that these concepts surrounding ZenML will empower you to create ML pipelines more efficiently, making your MLOps journey simpler, easier, and smoother.
Key Takeaways
- ZenML simplifies ML pipeline creation through the use of decorators like @step and @pipeline, making it accessible for beginners.
- The ZenML dashboard offers effortless tracking of pipelines, stack components, artifacts, and runs, streamlining project management.
- ZenML seamlessly integrates with other MLOps tools such as Weights & Biases and MLflow, enhancing your toolkit.
- Step contexts provide valuable information about the current step, facilitating effective logging and debugging.
Frequently Asked Questions
Ans. ZenML allows pipeline automation through Scheduling, utilizing CRON expressions or specific time intervals.
Ans. Yes, ZenML is compatible with various cloud platforms, facilitating deployment through straightforward CLI commands.
Ans. ZenML streamlines the MLOps journey by offering seamless pipeline orchestration, metadata tracking, and automated deployments, among other features.
Ans. To accelerate pipeline execution, consider employing Caching, which optimizes time and resource utilization.
Ans. Absolutely, you can craft custom materializers tailored to your specific needs and integrations, enabling precise handling of input and output artifacts.


